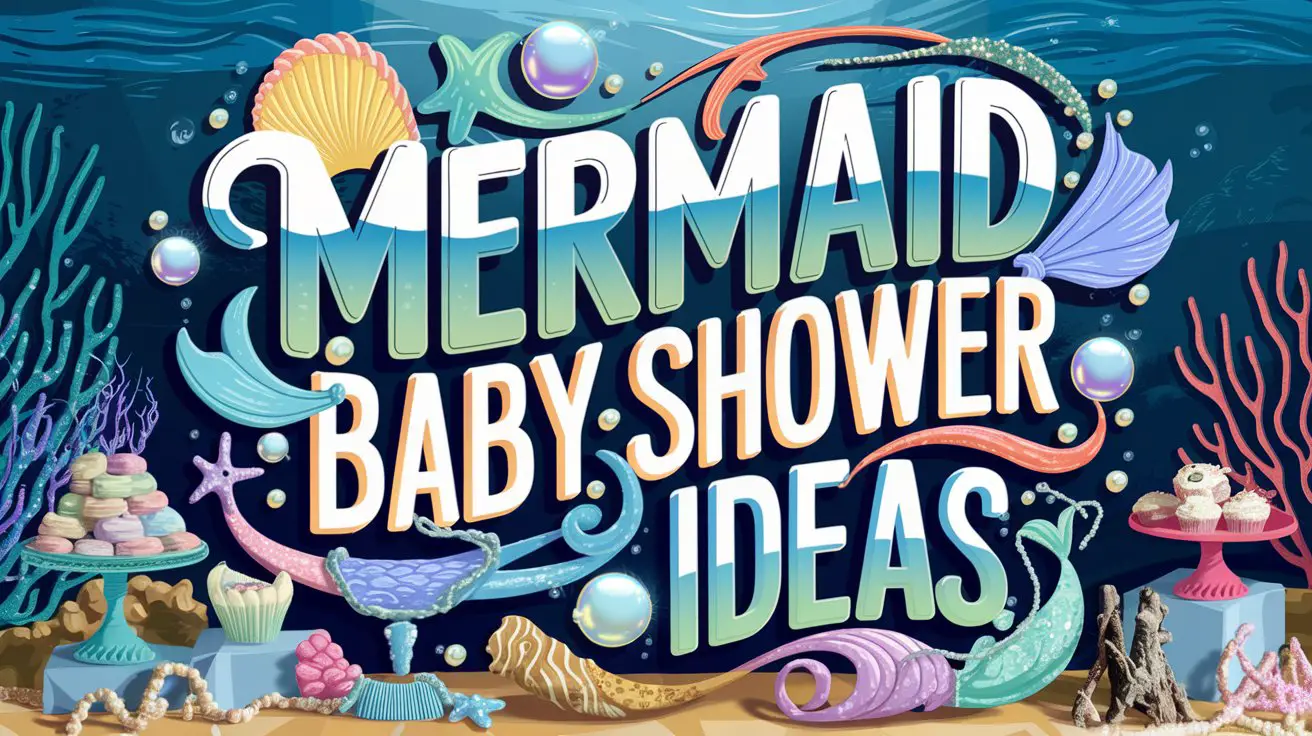
You know that magical moment when you find out your friend is having a baby and you immediately start daydreaming about the perfect shower? Well, if you’re thinking about throwing a mermaid-themed celebration, you’re in for such a treat.
I absolutely love this theme because it’s whimsical, gorgeous, and works beautifully whether you’re celebrating a little girl, boy, or keeping it a surprise!
I’ve been to a few mermaid baby showers, and honestly, they’re some of the most Instagram-worthy celebrations I’ve seen. But more importantly, they create this enchanting underwater atmosphere that just makes everyone smile.
Plus, there’s something so fitting about the ocean theme—after all, babies spend their first nine months floating in their own little sea, right? 🙂
Here’s the thing about mermaid showers: you can go full-on fancy with shimmering scales and elaborate decorations, or keep it sweet and simple with ocean colors and a few key touches.
I’m going to share 15 ideas that’ll help you create an unforgettable celebration, whether you’re working with a champagne budget or more of a sparkling-water situation. Let’s get started!
Under the Sea Color Palette and Decorations
Image Prompt: A stunning mermaid baby shower entrance featuring an ombre balloon arch transitioning from deep teal at the bottom through turquoise, seafoam green, and ending in soft purple and rose gold at the top. Include iridescent streamers that catch the light like water, scattered starfish decorations, and a “Welcome to [Baby’s Name]’s Ocean” sign with glittery mermaid tail graphics. Show string lights creating a magical underwater glow, with pearl balloon clusters and hanging jellyfish decorations made from paper lanterns with ribbon tentacles.
How to Do It
- Start with your color foundation: Combine teal, turquoise, seafoam green, lavender, and coral as your main palette
- Add metallic accents: Rose gold, silver, and iridescent finishes bring that magical shimmer
- Create an ombre balloon arch: You’ll need about 80-100 balloons in gradual color transitions (budget around $30-40 for quality balloons)
- Hang DIY jellyfish: Grab paper lanterns ($2-3 each), attach curled ribbon or tulle strips for tentacles
- Layer different textures: Mix matte and metallic, smooth and sparkly to create depth
- Scatter pearl accents everywhere: Use pearl balloons, pearl candy, even pearl-finish ornaments
- Time needed: About 2-3 hours for setup, or 4-5 hours if you’re doing the balloon arch yourself
- Pro tip: Hit up the dollar store for fishnet, shells, and starfish—you can find amazing decorations for a fraction of party store prices!
Honestly, the color palette is what really sells this theme. I’ve noticed that when you nail those ocean-inspired colors with just the right amount of sparkle, you don’t even need a ton of decorations. The atmosphere basically creates itself!
Looking for more creative inspiration for group celebrations? Check out these creative team name ideas that could spark some fun baby shower game team names!
Mermaid Tail Cake and Dessert Table
Image Prompt: An elaborate mermaid-themed dessert table with a two-tier cake decorated in turquoise ombre buttercream with edible gold scales and topped with a fondant mermaid tail. Surround the cake with cupcakes decorated as pearls, shells, and starfish. Include a candy buffet with blue rock candy “crystals,” Swedish fish, gummy sharks, and chocolate “sand dollars.” Show glass apothecary jars filled with colorful candies, seashell cake pops, and mermaid tail cookies. Add gold charger plates, coral branches, and scattered edible pearls. Soft romantic lighting highlighting the sparkly, magical spread.
How to Do It
- Order or bake a showstopper cake: Budget $60-150 for a professional two-tier mermaid cake, or $25-40 for supplies if you’re DIY-ing
- Create gradient frosting: Start with deep teal at the bottom, gradually lighten to seafoam at the top
- Add fondant scales: Cut teardrop shapes and layer them fish-scale style, or use a scale impression mat
- Make mermaid tail cupcake toppers: You can buy these on Etsy for about $15-20 per dozen
- Set up a candy bar: Fill glass jars with blue and green candies—rock candy looks like ocean crystals
- Include themed cookies: Shell-shaped, mermaid tails, and starfish sugar cookies with royal icing
- Display on varying heights: Use cake stands, boxes covered in fabric, or acrylic risers
- Time required: If ordering from a bakery, just pickup time; DIY baking takes 4-6 hours plus decorating
- Budget hack: Make simple cupcakes and invest in really nice toppers—guests remember the overall look more than elaborate flavors
I once attended a shower where the mom-to-be actually cried when she saw the dessert table (happy tears, obviously). The baker had created this incredible mermaid tail that looked like it was actually swimming through the cake. It doesn’t have to be that elaborate, but a beautiful centerpiece cake really sets the tone.
Message in a Bottle Guest Book
Image Prompt: A charming guest book station featuring a large clear glass bottle or jar decorated with rope, starfish, and a tag reading “Wishes for Baby.” Show small scrolls of parchment paper tied with twine, each waiting to be filled with messages. Include vintage-style pens, a decorative tray with shells and sand, and a small sign with instructions: “Write your wishes and advice for baby, then place your message in the bottle.” Display completed scrolls peeking out of the bottle top, with soft candlelight creating a warm, intimate atmosphere.
How to Do It
- Find a large decorative bottle or jar: Check HomeGoods, craft stores, or even recycle a large wine jug (budget $8-20)
- Cut parchment or cream cardstock into strips: About 3 inches by 8 inches works perfectly
- Pre-roll and tie each scroll with twine or ribbon: Prepare about 40-50 scrolls for a medium-sized shower
- Create instruction signage: Make it clear and cute—”Cast your wishes into the sea”
- Provide nice pens: Metallic or ocean-colored pens add a special touch
- Decorate the bottle with rope and shells: Hot glue works great for attaching decorations
- Set up a writing surface: A small table or cart dedicated to this activity
- Prep time: About 30-45 minutes to cut and prep scrolls
- Why this rocks: The mom-to-be gets to “open” this treasure later and read heartfelt messages whenever she needs encouragement
BTW, this is way more meaningful than a traditional guest book that often gets forgotten on a shelf. I love that expectant parents can actually revisit these messages during those challenging 3 AM feeding sessions!
For more unique celebration ideas, browse these party names for inspiration on making your event memorable.
Ocean-Inspired Photo Booth
Image Prompt: A fun mermaid photo booth corner with a shimmery teal sequin backdrop curtain and ocean-themed props hanging on a coral branch display. Show props including mermaid tail cutouts, oversized sunglasses shaped like starfish, “Mommy’s Little Mermaid” speech bubbles, King Triton’s crown, seahorse masks, and baby bottle props decorated with pearls. Include a vintage-style frame suspended with fishing line, creating a floating photo frame effect. Add a cozy seating area with a plush ottoman covered in mermaid scale fabric, surrounded by balloon clusters and soft lighting.
How to Do It
- Hang a sequin or shimmer backdrop: Budget around $15-30 for a quality backdrop from Amazon
- Create or buy themed props: Etsy has printable prop sets for $5-10, or buy pre-made for $20-30
- Include variety in your props: Mix silly (oversized glasses) with sweet (baby-themed signs)
- Set up a props display: Use a decorative branch, basket, or vintage suitcase to organize items
- Add a suspended frame: Hang a large ornate frame from clear fishing line—guests hold it for photos
- Provide a selfie station: Set up a phone tripod or tablet stand with a photo app
- Light it properly: String lights or a ring light make photos look amazing
- Time to set up: About 45 minutes to an hour
- Pro tip: Create a custom hashtag for the shower so all guest photos get collected in one place!
I cannot tell you how many baby shower photos I’ve seen where everyone’s just standing around awkwardly. A photo booth gives guests something fun to do, especially during that arrival period when not everyone knows each other yet.
Mermaid Lagoon Punch and Drink Station
Image Prompt: A beautiful beverage station with a large glass drink dispenser filled with blue punch garnished with floating lemon slices and edible flowers. Show the punch displaying beautiful layers of blue and purple, creating an ombre ocean effect. Include smaller dispensers with “Mermaid Water” (sparkling lemonade) and “Sea Foam Spritz” labels. Display mason jars with teal and white striped straws, decorative drink umbrellas, and tags for each beverage. Add fresh flowers, scattered pearls, and shells around the base. Show one glass filled with the layered blue punch, topped with whipped cream and edible glitter, with a mermaid tail cocktail stirrer.
How to Do It
- Create the signature punch: Mix blue Hawaiian Punch, lemon-lime soda, and pineapple juice (for about 20 guests, budget $15-20)
- Add the ombre effect: Layer different shades by carefully pouring denser liquids first
- Include a “mocktail” menu: Create 2-3 different drink options with cute ocean names
- Make an ice ring: Freeze water with edible flowers or berries in a bundt pan—keeps punch cold without diluting
- Set up multiple dispensers: Reduces crowding and looks more abundant
- Label everything clearly: Create small tent cards or chalkboard signs for each drink
- Provide fun straws and stirrers: Mermaid tail stirrers are available on Amazon for about $10-15
- Prep time: About 30 minutes to make punch and set everything up
- Budget-friendly swap: Use blue sports drinks or colored lemonade instead of fancy mixers
The drinks station can absolutely be a conversation piece! I saw one where they froze gummy fish into ice cubes—such a simple touch but guests were obsessed with getting a “fish” in their cup.
Explore beach party names for more coastal celebration themes that pair beautifully with mermaid showers.
Seashell Diaper Raffle and Games
Image Prompt: A cute game station table featuring the diaper raffle display with a large glass vase being filled with colorful raffle tickets next to stacks of diapers decorated with mermaid-themed gift wrap. Show game printouts including “What’s in Your Phone?” with mermaid graphics, “Baby Predictions” cards with ocean borders, and “Don’t Say Baby” shell necklaces laid out. Include a decorated box for collecting completed game cards, small prize bags with starfish tags, and a sign explaining each game. Display small succulent favors in shell-shaped pots as game prizes. Ocean-colored pens and decorated clipboards complete the setup.
How to Do It
- Create diaper raffle tickets: Print or buy pre-made tickets, about $8-12 for 50 tickets
- Explain the concept clearly on invitations: “Bring a pack of diapers, get a raffle ticket for prizes”
- Set up a decorated diaper collection area: Make it look intentional, not like a storage pile
- Choose 3-4 games maximum: Don’t overwhelm guests with constant activities
- Print game sheets: “Baby Predictions,” “What’s in Your Phone,” and “Baby Word Scramble” are mermaid-themed favorites
- Make “Don’t Say Baby” necklaces: Use shell charms or pearl beads (about $15-20 for supplies)
- Prepare small prizes: Budget $5-8 per prize—candles, bath bombs, or small succulents work great
- Prep time: 1-2 hours to print, cut, and organize everything
- FYI: Keep games short and sweet—15 minutes max per game keeps energy up
Wondering about games? I’ve noticed the “What’s in Your Phone” game gets everyone laughing because it’s quick, everyone can participate at once, and you don’t need to explain complicated rules. Plus, you’ll find out which guest has the most photos of their pet (it’s always someone!).
Mermaid Scale Table Settings
Image Prompt: An elegant place setting showing each guest’s spot at the table with an iridescent charger plate that reflects rainbow colors like mermaid scales. Display teal napkins folded into creative shapes, tied with gold rope and a shell napkin ring. Show a place card with the guest’s name written in calligraphy on a starfish-shaped card. Include scattered confetti in ocean colors across the table, small votive candles in mercury glass holders, and a miniature succulent favor at each setting. Capture the full table decorated with a table runner in sequined teal fabric, low floral centerpieces with white roses and eucalyptus, and overhead hanging decorations creating an underwater canopy effect.
How to Do It
- Invest in iridescent chargers: These run about $3-5 each and completely transform the table
- Choose napkins in ocean hues: Teal, turquoise, or even coral work beautifully
- Create napkin rings: Use rope, ribbon, or purchase shell-decorated rings for $10-15 per set
- Make personalized place cards: Print on cardstock or hand-write with metallic pens
- Layer your table settings: Charger, dinner plate, napkin, place card creates depth
- Add a small favor at each seat: Guests love finding a little gift waiting for them
- Create a statement table runner: Sequined fabric (about $15-20 per yard) adds major wow factor
- Budget for settings: Plan $8-12 per place setting including charger, napkin, and decorations
- Pro tip: Mix real and paper plates if you need to—just make sure the chargers stay consistent for that cohesive look
The table settings are where you can really show attention to detail. I remember one shower where each place setting had a different colored napkin representing different shades of the ocean—simple but so thoughtful!
Check out beautiful group names if you’re organizing teams for shower games or activities.
Underwater Ceiling Decorations
Image Prompt: A magical overhead view showing ceiling decorations creating an underwater effect. Display hanging paper jellyfish in various sizes made from tissue paper pom-poms with flowing ribbon tentacles in whites, purples, and pinks. Show suspended fish cutouts at different heights on clear fishing line, creating a swimming effect. Include hanging paper lanterns in teal and turquoise, tissue paper fans in ocean colors creating depth, and strands of iridescent streamers catching light. Add floating balloon clusters in corners and a stunning centerpiece installation of layered tulle fabric in blues and greens creating a wave effect. Capture how everything moves gently with air circulation, creating that underwater movement.
How to Do It
- Start with paper lanterns as jellyfish bodies: Large ones work best, about $2-4 each
- Attach ribbon or tulle tentacles: Cut varying lengths and curl them for movement
- Hang at different heights: Creates dimensional depth—some low, some high
- Add tissue paper fans: These fill large wall or ceiling spaces beautifully for about $1-2 each
- Suspend fish cutouts: Print and cut sea creature shapes, hang on fishing line
- Create a tulle canopy: Drape sheer fabric across the ceiling in waves (you’ll need 5-10 yards for a standard room)
- Secure everything safely: Use removable adhesive hooks—test your ceiling surface first!
- Time investment: Plan 2-3 hours for hanging all ceiling decorations
- Important: Enlist help for this—you’ll need someone to hand you items and tell you if things are straight
IMO, ceiling decorations are an often-missed opportunity! Most people focus on tables and walls, but when guests look up and see jellyfish “floating” overhead, it really completes the underwater illusion.
Mermaid-Themed Food Ideas
Image Prompt: A gorgeous buffet spread of mermaid-themed foods artfully displayed. Show a large platter of “Ocean Dip” (blue-tinted ranch or spinach dip) in a shell-shaped bowl surrounded by vegetables and crackers. Display “Goldfish Pond” (orange salad with mandarin oranges and carrot curls in a clear glass bowl), “Seaweed Salad” (green salad with cucumber ribbons), and “Crab Croissants” (croissant sandwiches with flags featuring crab designs). Include “Pearl Caprese Skewers” (mozzarella balls, tomatoes, and basil on picks), fruit kabobs arranged to look like tridents, and “Starfish Sandwiches” cut with star-shaped cookie cutters. Show beautiful serving platters in white and gold, decorative labels for each dish, and ocean-themed serving utensils.
How to Do It
- Plan a menu with creative names: Regular foods become magical with ocean-inspired titles
- Keep it simple but themed: You don’t need complicated recipes—just creative presentation
- Make “Ocean Dip”: Add blue food coloring to ranch or cream cheese dip (serves 15-20 for about $8)
- Create fruit tridents: Thread fruit on skewers and arrange standing up
- Use cookie cutters: Star and shell shapes transform regular sandwiches
- Serve caprese as “pearls”: Cherry tomatoes and mozzarella balls on toothpicks
- Include seafood options: Shrimp cocktail, crab dip, or tuna salad fit the theme naturally
- Budget for food: Plan $12-15 per person for a full spread
- Pro tip: Use clear glass serving dishes when possible—they look like water and show off the food beautifully
I love when the food itself becomes part of the decor! One shower I attended served blue Jell-O cups with gummy fish suspended inside—so simple but kids and adults both got a kick out of it.
Looking for more party inspiration? Browse spring team names for fresh, seasonal celebration ideas.
DIY Mermaid Tail Blankets as Favors
Image Prompt: A cozy display of handmade mermaid tail blankets in baby sizes, showing the knitted or crocheted texture in soft ocean colors—mint green, lavender, and coral. Display one blanket draped over a small chair with a newborn baby doll nestled inside, showing how adorable it looks in use. Show the tail fin detail at the bottom with its scale pattern or fan shape. Include a few folded blankets stacked beautifully with ribbon tied around them and thank-you tags attached. Add a basket of these blankets as guests’ take-home gifts, with a sign reading “A cozy tail for Baby [Name].” Capture the soft, handmade quality and the love that went into creating each one.
How to Do It
- Choose your crafting method: Knitting, crocheting, or sewing fleece all work
- Budget for materials: Yarn or fleece runs about $8-12 per baby-sized blanket
- Select soft, baby-safe materials: Make sure everything is washable and non-irritating
- Follow a simple pattern: Pinterest has tons of free mermaid tail blanket patterns
- Make them in advance: Each blanket takes 3-5 hours depending on your skill level
- Keep them small for babies: About 24-30 inches long is perfect for newborns
- Personalize with tags: Add a “Made with Love” tag to each blanket
- Alternative: If you’re not crafty, you can order these on Etsy for $15-25 each
- Real talk: This works best for smaller showers—making 40+ blankets is ambitious!
I’ve seen these as favors and honestly, they’re the kind of gift that actually gets used (and photographed constantly for social media). New parents absolutely treasure handmade items.
Mermaid Crown and Props for Mom-to-Be
Image Prompt: A beautiful display of special items just for the guest of honor. Show an ornate mermaid crown or flower crown with shells, pearls, and starfish integrated into the design, sitting on a decorative pillow. Display a matching mermaid tail blanket in her size for her to wrap up in during the party, a special “Mommy Mermaid” sash in iridescent fabric with gold lettering, and a floral corsage featuring ocean-colored flowers and shell accents. Include a decorated chair with “Queen of the Sea” or “Mommy-to-Be” signage, positioned prominently for opening gifts. Show soft, comfortable seating with coordinating throw pillows and a small side table for her drinks and snacks within easy reach.
How to Do It
- Create or buy a statement crown: Budget $15-30 for a really nice one from Etsy
- Make her throne special: Decorate her chair with fabric, a sash, or a special sign
- Provide a full-size mermaid blanket: She’ll appreciate having something cozy during a long party
- Design a custom sash: Use ribbon or fabric with iron-on letters (DIY for about $10-12)
- Give her a corsage: Wrist or shoulder corsages make her feel extra special
- Set up her space thoughtfully: Side table for drinks, ottoman for feet, easy chair access
- Include comfort items: Keep snacks and water nearby—pregnancy is exhausting!
- Time to prep: About 30 minutes to set up her special area
- Why it matters: She’ll remember feeling celebrated and pampered, not just like party decoration
This is SO important. I’ve been to showers where the mom-to-be was uncomfortable the whole time because nobody thought about her actual needs. Make sure she can sit comfortably, has everything within reach, and feels like the queen she is!
Explore women team names for celebrating female-focused events and gatherings.
Pearl and Shell Party Favors
Image Prompt: An elegant favor table displaying various take-home gifts for guests. Show small clear boxes filled with pearl candies (white chocolate malt balls), tied with teal ribbon and personalized tags reading “Thank You for Celebrating with Us.” Display mini jars of “Mermaid Bath Salts” in ocean colors with shell-shaped soap on top. Include small succulent plants in shell-shaped ceramic pots with little flags saying “Watch Me Grow.” Show organza favor bags filled with seashell-shaped soaps, and small bottles of nail polish in ocean colors with custom labels. Arrange everything on a tiered display with scattered pearls, shells, and a “Take a Treasure Home” sign. Capture the thoughtfulness and coordination of each favor option.
How to Do It
- Choose 1-2 favor types: You don’t need multiple options—pick what fits your budget
- Pearl candies are budget-friendly: About $15-20 for enough to fill 30 small boxes
- Make DIY bath salts: Epsom salt with food coloring and essential oil costs about $10 for 30 small jars
- Succulents are popular: Buy in bulk for $2-3 each, pot them in decorative containers
- Create custom tags: Print on cardstock or order personalized stickers
- Package beautifully: Presentation matters—ribbon, clear boxes, or organza bags elevate everything
- Set up a favor display: Make it easy for guests to grab on their way out
- Budget range: Plan $3-8 per favor depending on what you choose
- Honest opinion: Simple favors packaged nicely beat expensive favors thrown in a plastic bag every time
BTW, I always appreciate favors that are either useful (bath products), edible (I’m eating them in the car), or growable (succulents). Nothing that’s just going to sit on a shelf collecting dust!
Ocean-Themed Baby Predictions and Advice Cards
Image Prompt: A charming advice card station showing printable cards with mermaid and ocean graphics. Display cards with prompts like “Baby will arrive on…”, “Baby will weigh…”, “Mom’s craving will be…”, and “Parenting advice for the new parents…” Each card features watercolor ocean waves, tiny seahorses, or mermaid tails in the corners. Show a decorative box or basket for collecting completed cards, quality pens in ocean colors, and a small sign explaining the activity: “Share Your Predictions and Wisdom.” Include a few completed examples to show guests what to do. Add a small table with comfortable writing space, a clipboard for each guest, and beautiful lighting making the activity inviting and accessible.
How to Do It
- Design or purchase printable cards: Etsy has mermaid-themed prediction cards for about $5-8
- Print on quality cardstock: Makes a huge difference in how special they feel
- Include specific prompts: Date of arrival, weight, length, first word, mom’s craving
- Add an advice section: “Best parenting advice I’ve received is…”
- Provide nice writing tools: Good pens make the activity feel more special
- Create a collection system: Pretty box or basket keeps cards organized
- Make it accessible: Set up during arrival so early guests have something to do
- Time needed: About 20-30 minutes for prep and setup
- Why I love this: Mom gets a keepsake book of memories and predictions she can look back on—some will be hilariously wrong!
These cards become such treasures. Imagine reading what everyone predicted about your baby when they’re actually 5 years old—it’s adorable and often surprisingly accurate (or way off, which is equally entertaining).
For more group celebration themes, check out good team names to inspire your baby shower planning.
Mermaid Tail Napkin Folding Tutorial
Image Prompt: A step-by-step visual tutorial showing how to fold napkins into mermaid tails. Display four stages: 1) A flat napkin laid diagonally, 2) The napkin folded into a triangle with corners brought to center, 3) The napkin rolled from the wide end creating a tail shape, 4) The finished mermaid tail standing upright in a glass or napkin ring, fanned at the top to create the fin effect. Show the final result in iridescent or teal napkins, standing beautifully on each place setting. Include both paper and cloth napkin versions, demonstrating that both work well. Add a small printed instruction card that could be shared with helpers.
How to Do It
- Start with square napkins: 16-inch or 20-inch napkins work best
- Fold diagonally to create a triangle: Point facing up
- Bring bottom corners to the center point: Creates a diamond shape
- Roll tightly from the wide end: This creates the tail body
- Fan out the top: Creates the mermaid fin effect
- Secure with a napkin ring if needed: Helps hold the shape, especially with paper napkins
- Practice a few times: It takes 2-3 tries to get the technique down
- Time per napkin: About 1-2 minutes once you’ve got the hang of it
- Pro tip: Do this the morning of the shower, not days ahead—napkins hold their shape better when fresh
This is one of those details that takes minimal effort but makes guests go “Wow, she really thought of everything!” Plus, it’s kind of fun to do while catching up with whoever’s helping you set up.
Mermaid-Themed Invitations That Set the Tone
Image Prompt: Beautiful mermaid baby shower invitations showing various design options. Display digital and printed versions featuring watercolor ocean waves, mermaid tails, shells, and starfish borders. Show one invitation with elegant script reading “Join us Under the Sea to Celebrate Baby [Name]” with party details in coordinating fonts. Include RSVP cards with matching ocean theme, small envelope liners in iridescent paper, and addressing in metallic ink. Display both formal and casual invitation styles, showing how the mermaid theme can be sophisticated or playful. Add invitation embellishments like wax seals with shell stamps, ribbon ties, and small charm attachments. Show the complete invitation suite laid out on a styled surface with shells and flowers.
How to Do It
- Decide on digital vs. printed: Digital saves money ($10-15 for a template), printed feels more formal ($2-4 each)
- Choose your tone: Elegant watercolor or fun cartoon mermaids—match the shower vibe
- Include all essential information: Date, time, location, RSVP details, registry info, theme/dress code
- Match your color palette: Use the same ocean colors you’ll use in decorations
- Send 4-6 weeks in advance: Gives guests time to plan, especially if travel is involved
- Create matching RSVP cards: Makes tracking responses so much easier
- Add special touches to printed versions: Envelope liners, wax seals, or ribbon for about $0.50-1 extra each
- Budget for invitations: $30-50 for digital, $75-150 for printed (for 30-40 guests)
- FYI: Whatever you choose, make sure the theme is immediately clear—guests love knowing what to expect!
Your invitation is literally the first impression of your shower. I’ve kept beautiful invitations in memory boxes for years—they set the tone for the whole celebration and build excitement before anyone even arrives.
So there you have it—15 mermaid baby shower ideas that’ll help you create an absolutely magical celebration! Whether you go all-out with every single idea or pick just a few favorites to incorporate, the most important thing is creating a warm, loving atmosphere where everyone feels welcome to celebrate this new little life.
Remember, the best baby showers aren’t about having the fanciest decorations or spending the most money—they’re about bringing together people who love the parents-to-be and creating memories that’ll last long after the last piece of cake is gone.
The mermaid theme just happens to be a beautiful, whimsical way to do that. Plus, you’ll have the most gorgeous photos to look back on!
Take a deep breath, trust yourself, and have fun with it. You’re going to create something absolutely special. And when that mom-to-be walks in and her face lights up at seeing her under-the-sea celebration, you’ll know every bit of planning was worth it. Now go make some waves! <3

Greetings, I’m Alex – an expert in the art of naming teams, groups or brands, and businesses. With years of experience as a consultant for some of the most recognized companies out there, I want to pass on my knowledge and share tips that will help you craft an unforgettable name for your project through TeamGroupNames.Com!