
You know that awkward attic space you’ve been using as a graveyard for holiday decorations and boxes you haven’t opened since 2019?
What if I told you it has serious walk-in closet potential?
Attic conversions are honestly one of the most satisfying home transformations you can tackle — you’re not just organizing, you’re claiming space that’s been quietly waiting for you up there.
Whether you’re working with steep sloped ceilings, weird angles, or questionable lighting (classic attic energy), there’s a closet layout that will work beautifully for your space.
Let me walk you through 10 ideas that actually work in real attic conditions — not just on perfectly proportioned Pinterest mock-ups.
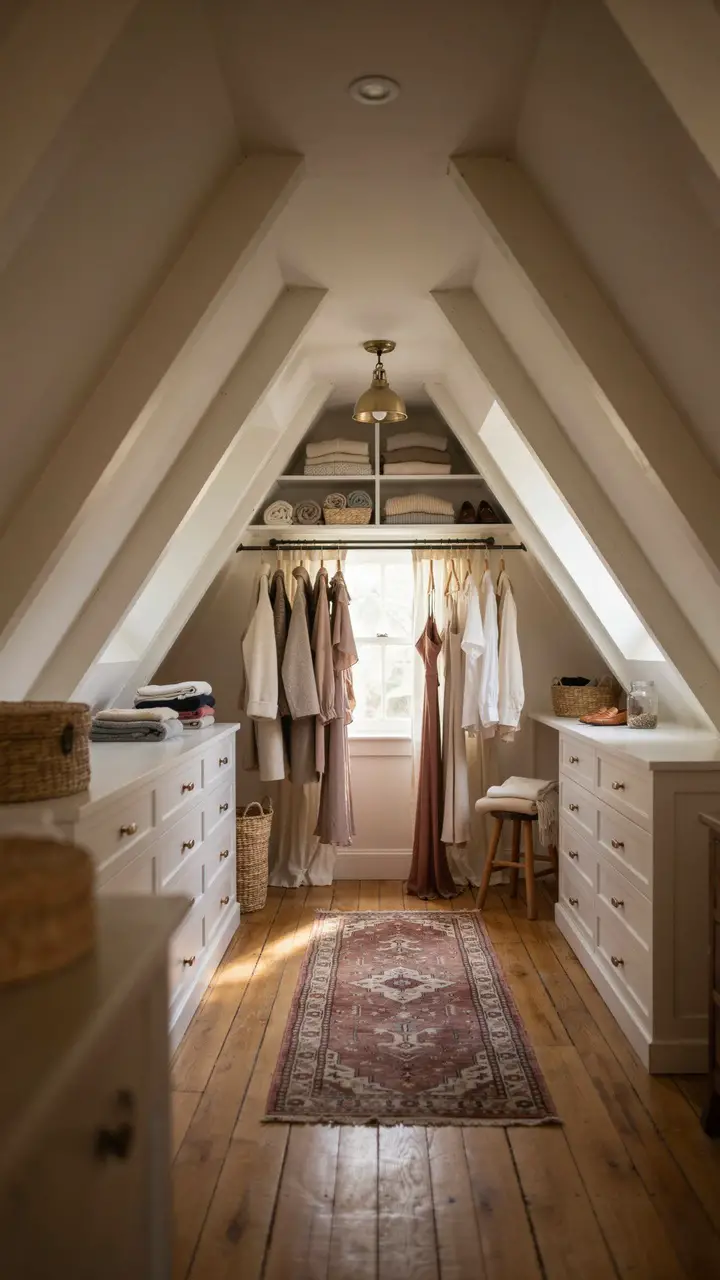
1. Embrace the Sloped Ceiling With Built-In Drawers
Here’s the thing about attic angles that most people miss: those sloped sections where you can’t stand upright aren’t wasted space — they’re perfect drawer territory. The areas under eaves typically run between 18–30 inches high, which is exactly right for deep built-in dresser drawers, shoe cubbies, or pull-out accessory trays.
How to Recreate This Look
Shopping List:
- Unfinished base cabinet drawers (IKEA SEKTION or Home Depot Hampton Bay): $40–$120 per unit
- Cabinet hardware (brushed brass pulls): $3–$8 each
- White or cream semi-gloss paint for a cohesive built-in look: $30–$50/gallon
- Vintage runner rug (thrifted or eBay): $20–$150
Step-by-Step Styling:
- Measure your eave height at its tallest point and purchase drawer units no taller than 2 inches below that measurement
- Paint them the same color as the wall for a seamless built-in effect
- Install a simple hanging rod along the tallest center section
- Style open shelving with folded items in a consistent color palette
Budget Breakdown:
- Under $100: Repurpose an old dresser cut to fit under the eave; sand and repaint
- $100–$500: IKEA flat-pack cabinets with coordinated hardware
- $500+: Custom carpenter-built drawers with dovetail joinery and soft-close slides
Difficulty Level: Intermediate — fitting cabinets under sloped ceilings requires careful measuring and sometimes minor trimming
Common Mistake: Installing drawers too tall, so they can’t fully open without hitting the slope. Always measure the swing clearance, not just the cabinet height.
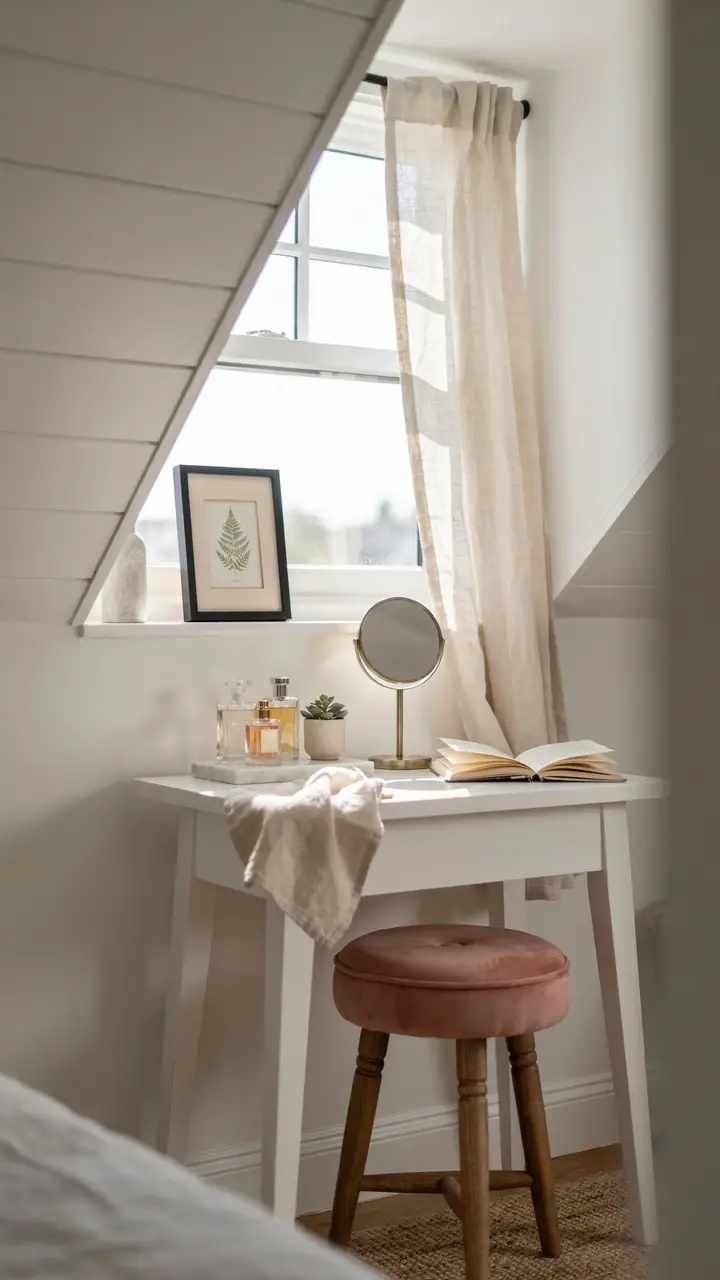
2. Install a Dormer Vanity Nook
If your attic has even one dormer window, congratulations — you have the most naturally lit makeup vanity spot in the entire house. Natural light from a dormer hits your face evenly and honestly (no more foundation disasters discovered in parking lot lighting).
How to Recreate This Look
Shopping List:
- Slim console or desk (30 inches wide or less for tight dormers): $60–$300
- Round Hollywood-style mirror with built-in lighting for cloudy days: $40–$150
- Velvet or boucle accent stool: $45–$200
- Small marble or ceramic tray for organization: $15–$40
Step-by-Step Styling:
- Center your desk directly under the window for maximum natural light
- Keep the tabletop minimal — one mirror, one tray, one small plant
- Add a wall-mounted shelf above the window if you need more storage
- Use the stool as a display surface when not in use
Budget Breakdown:
- Under $100: Thrifted desk repainted white + round mirror from Amazon
- $100–$500: West Elm or CB2 slim console + lighted vanity mirror
- $500+: Custom built-in vanity with integrated lighting and storage
Lifestyle Note: This spot doubles as a reading nook or remote work corner — versatility makes it worth the effort even in a small attic footprint.
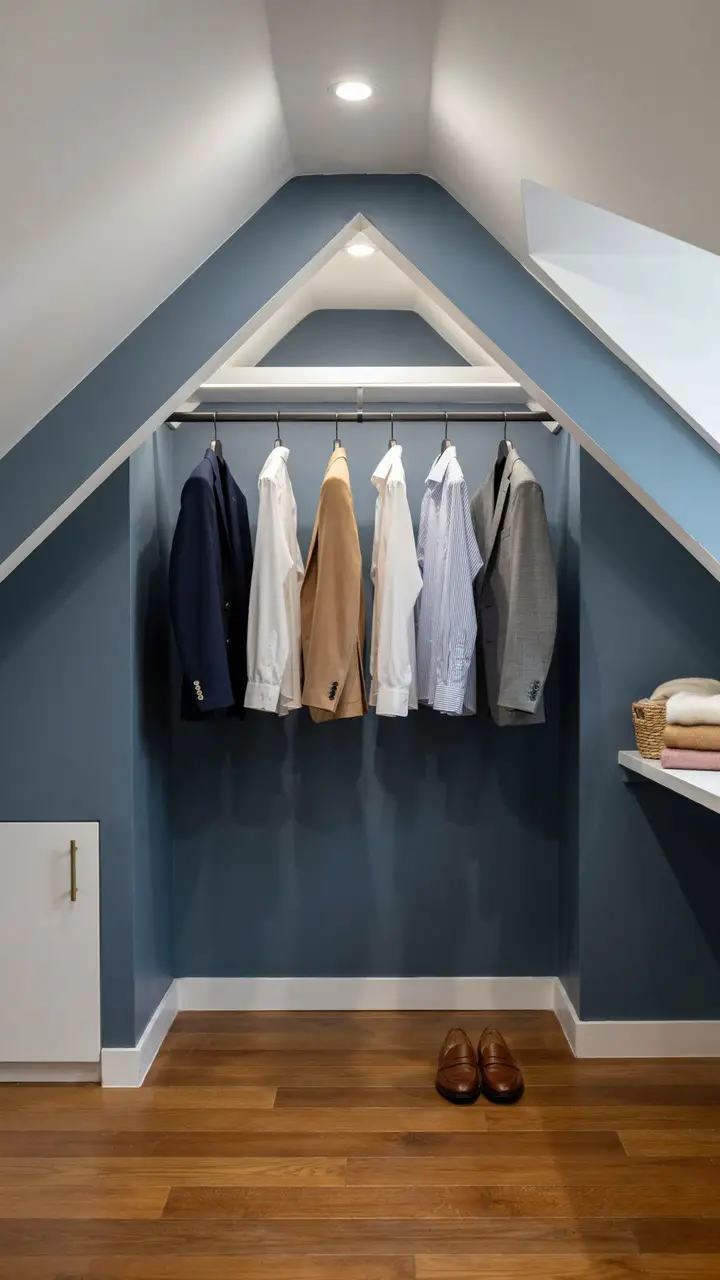
3. Use a Two-Rod System in the Tallest Section
Want to instantly double your hanging storage without doubling your floor space? A double-hang rod system in the tallest part of your attic — where ceiling height peaks along the ridgeline — gives you separate rails for shorter items on top (blazers, folded pants, jackets) and another below for shirts, skirts, and cardigans.
How to Recreate This Look
Shopping List:
- Double hang closet rod kit (ClosetMaid or Rubbermaid): $25–$80
- Slim velvet hangers (50-pack): $15–$25
- Woven storage baskets: $12–$35 each
- Deep slate blue or navy paint for dramatic contrast: $35–$55/gallon
Step-by-Step Styling:
- Measure ridge height and subtract 12 inches to set your upper rod position
- Space lower rod 40–42 inches below upper rod for shirts and shorter items
- Switch all hangers to matching velvet — this single change makes any closet look intentional
- Reserve lower shelves flanking the rods for folded items and baskets
Budget Breakdown:
- Under $100: Basic adjustable rod brackets from any hardware store
- $100–$500: ClosetMaid wire system with added shelving
- $500+: California Closets or custom wood system with adjustable components
Difficulty Level: Beginner to intermediate — basic drilling required; no carpentry skills needed
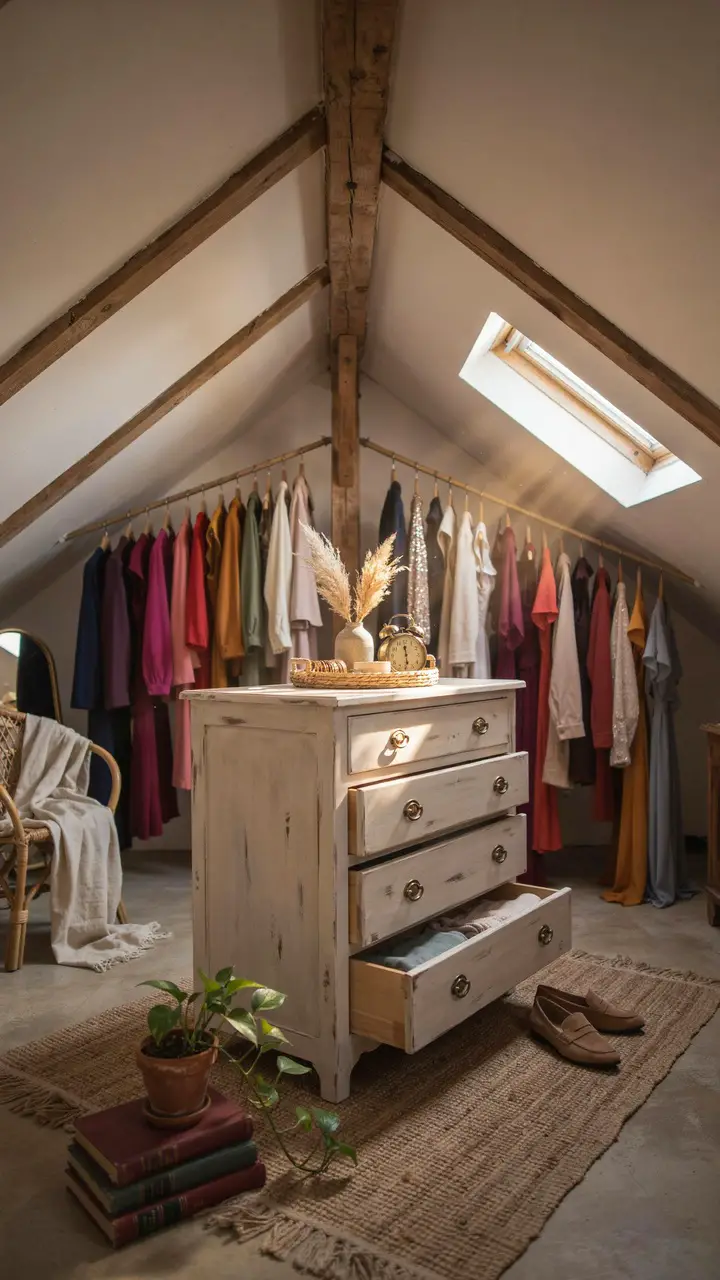
4. Create an Island With a Repurposed Dresser
Here’s a tip that professional stagers use all the time: if your attic has enough floor space at its center (roughly 8 feet wide minimum), a freestanding dresser placed in the middle functions exactly like a closet island. You get drawer storage and a flat surface for folding, laying out outfits, or displaying a beautiful tray with jewelry and accessories. BTW, this is one of the most budget-friendly ways to add serious luxury feel to an attic closet.
How to Recreate This Look
Shopping List:
- Vintage dresser (thrifted, Facebook Marketplace): $30–$150
- Chalk paint or mineral paint for refinishing: $20–$45
- New hardware (ceramic or brass knobs): $4–$12 each
- Decorative tray for the top surface: $15–$50
- Dried pampas grass or eucalyptus arrangement: $15–$40
Step-by-Step Styling:
- Sand and repaint your thrifted dresser in a color that complements your closet walls
- Replace all hardware for an instantly refreshed look
- Style the top with a tray (this visually contains the accessories and looks intentional)
- Leave at least 36 inches of walkway on all sides of the island
Budget Breakdown:
- Under $100: Thrifted dresser + chalk paint + new knobs
- $100–$500: Mid-century modern dresser from IKEA or Target with a refinished top
- $500+: Antique mahogany chest fully restored by a local furniture refinisher
Space Requirements: Minimum 8-foot width in center section; works best when attic floor plan is at least 100 square feet total
5. Add a Statement Chandelier or Pendant Light
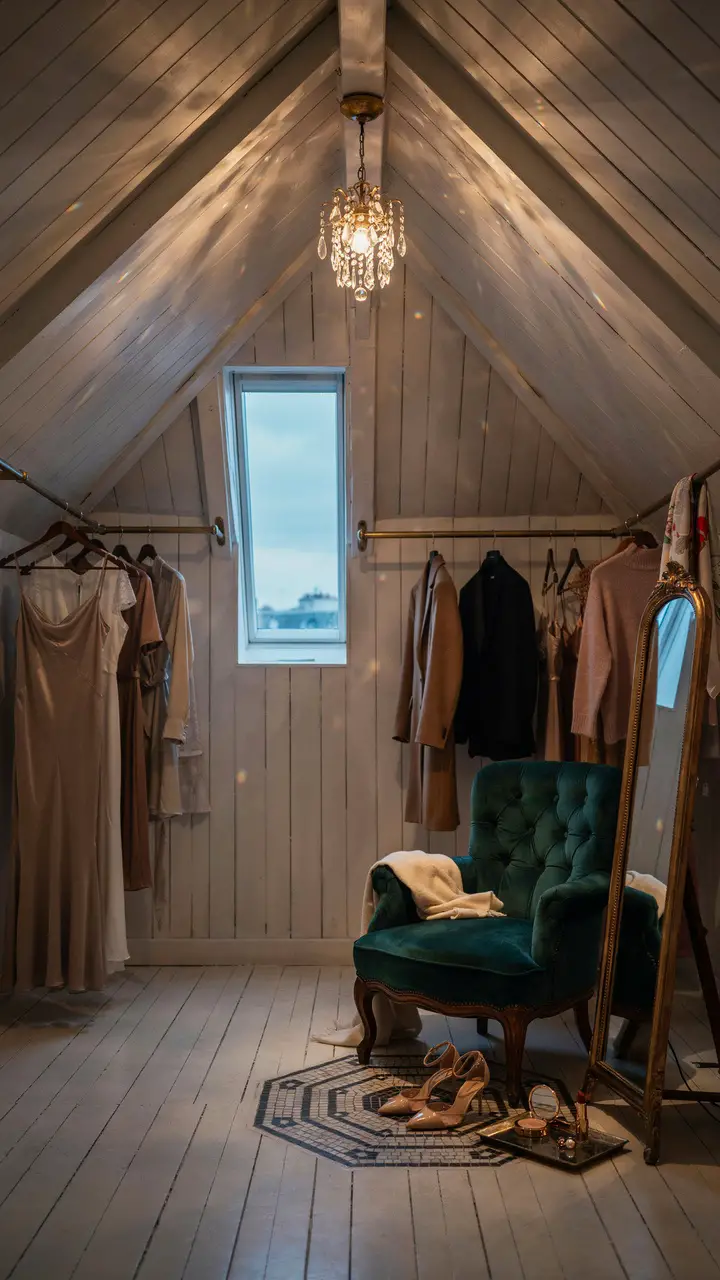
Lighting transforms an attic closet from a storage room into a dressing room. A small chandelier hung from the ridgeline peak — even a simple plug-in swag pendant — changes the entire emotional quality of the space. You want to get dressed in here, and that shift in wanting to be there matters more than people realize.
How to Recreate This Look
Shopping List:
- Plug-in swag chandelier (no electrician needed): $45–$200
- Adhesive ceiling hook rated for pendant weight: $8–$15
- Extension cord cover in fabric or braided style: $15–$30
- Full-length brass or gold-toned mirror: $60–$300
- Small velvet accent chair: $100–$400
Step-by-Step Styling:
- Find the highest point of your ridgeline and install a ceiling hook
- Hang plug-in pendant and route the cord along the ridge beam using cord clips
- Position your full-length mirror to reflect the chandelier light and double the glow
- Add one comfortable chair — even a small one — so the space functions as a room, not just a closet
Difficulty Level: Beginner — plug-in pendants require zero electrical work
Rental Friendly: Absolutely. Adhesive hooks and plug-in fixtures leave no permanent marks.
6. Build a Shoe Wall Along One Eave
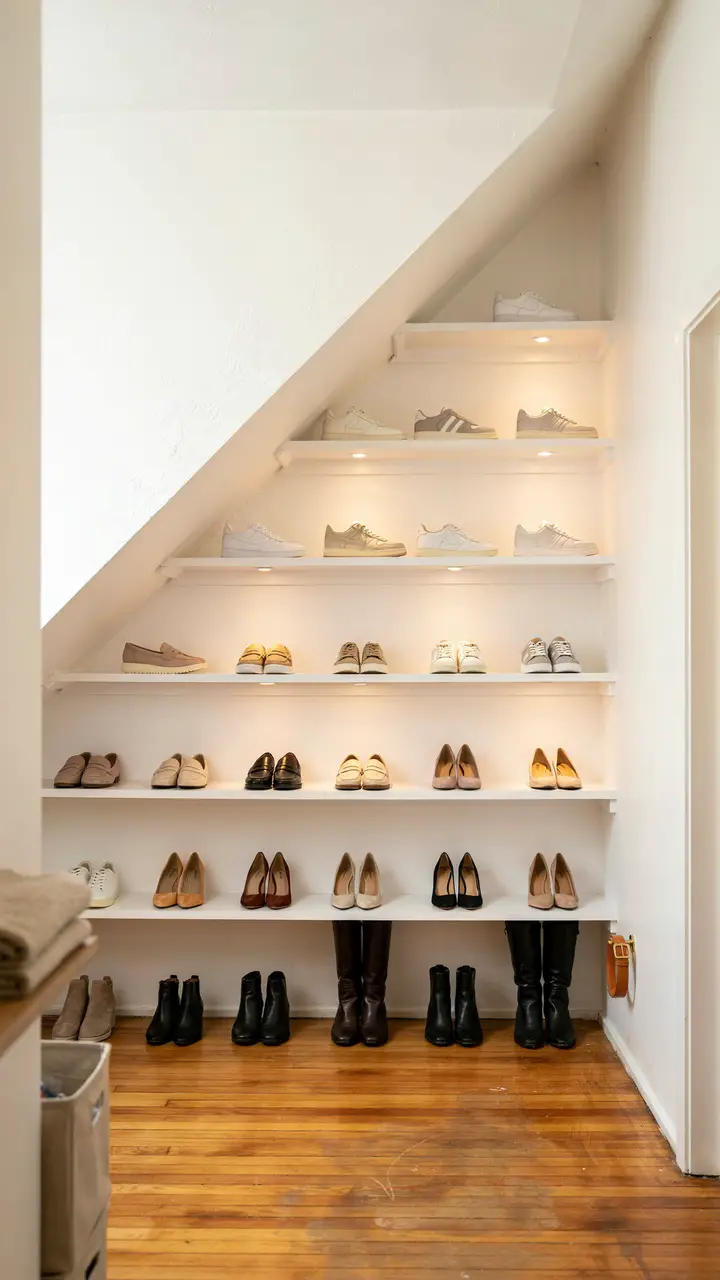
Shoe storage in attic closets is a puzzle — you often can’t use tall freestanding shoe racks under sloped ceilings. The solution? Horizontal floating shelves angled slightly upward along the eave wall, spaced about 6–7 inches apart. Each shelf holds one row of shoes displayed facing out, which also doubles as a genuinely gorgeous display wall. I once saw a version of this done in all-white with simple IKEA LACK shelves and it looked legitimately like a high-end boutique shoe department. 🙂
How to Recreate This Look
Shopping List:
- Floating wall shelves (IKEA LACK or similar): $8–$15 each
- Drill and wall anchors: $20–$40 if you don’t own one
- LED strip lights (warm white, adhesive-backed): $15–$30 for 16 feet
- Level tool for straight installation: $10–$20
Step-by-Step Styling:
- Map your eave wall and calculate how many shelves fit with 6–7 inches vertical spacing
- Install shelves with a slight upward tilt (2–3 degrees) so shoes don’t slide forward
- Apply LED strip lighting to the underside of each shelf before mounting
- Arrange shoes by color, style, or frequency of use — the color-gradient method is visually stunning and surprisingly easy to maintain
Budget Breakdown:
- Under $100: Six to eight IKEA LACK shelves + LED strips
- $100–$500: Custom wood floating shelves from a local lumber yard, sanded and stained
- $500+: Built-in shoe shelving with integrated lighting and a small upholstered bench below
Durability Note: Keep shoes in rotation. Shoes stored in attic spaces can be affected by temperature and humidity swings — add cedar shoe inserts and a small dehumidifier if your attic runs warm.
7. Designate a Seasonal Storage Zone in the Back
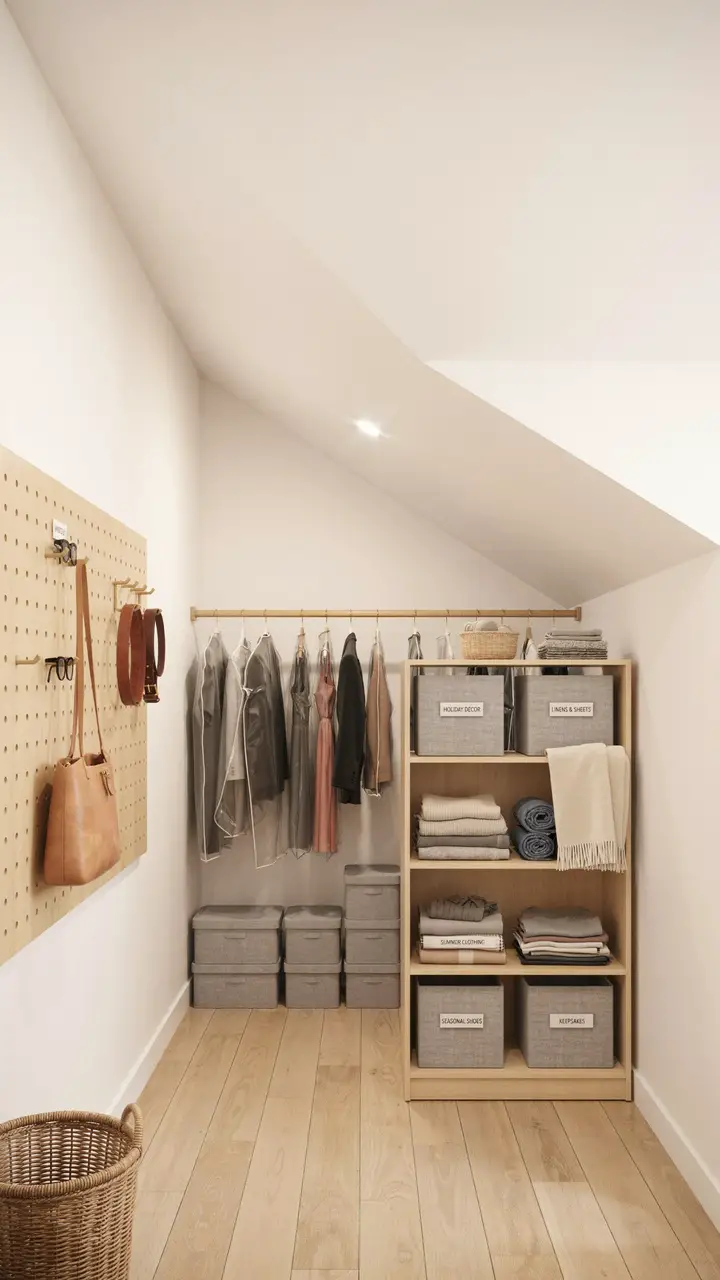
Smart attic closet design separates active daily use zones from occasional access zones. Push the lowest-ceiling areas at the far back of the attic into dedicated seasonal storage: lidded fabric storage bins for winter sweaters, garment bags for formal wear, vacuum storage bags for bulky coats. Labeling everything clearly (a label maker is genuinely one of the best $20 investments you can make) means you won’t dig through your whole closet in October looking for your flannel shirts.
How to Recreate This Look
Shopping List:
- Fabric lidded storage bins (matching set of 6–10): $8–$20 each
- Label maker (Brother P-touch): $20–$35
- Garment bags (clear or fabric): $5–$15 each
- Vacuum storage bags for bulky items: $15–$30 for a 10-pack
- Low wooden hanging rod for the back zone: $15–$40
Step-by-Step Styling:
- Divide your attic floor plan mentally into zones: front = daily use, back = seasonal
- Install a low rod (48–54 inches) for the back eave area to hang garment bags
- Stack matching labeled bins below the rod for folded seasonal items
- Do a full seasonal swap twice a year — it takes about two hours and the organizational payoff lasts months
Difficulty Level: Beginner — pure organization, no construction required
8. Add a Full-Length Mirror With Integrated Lighting
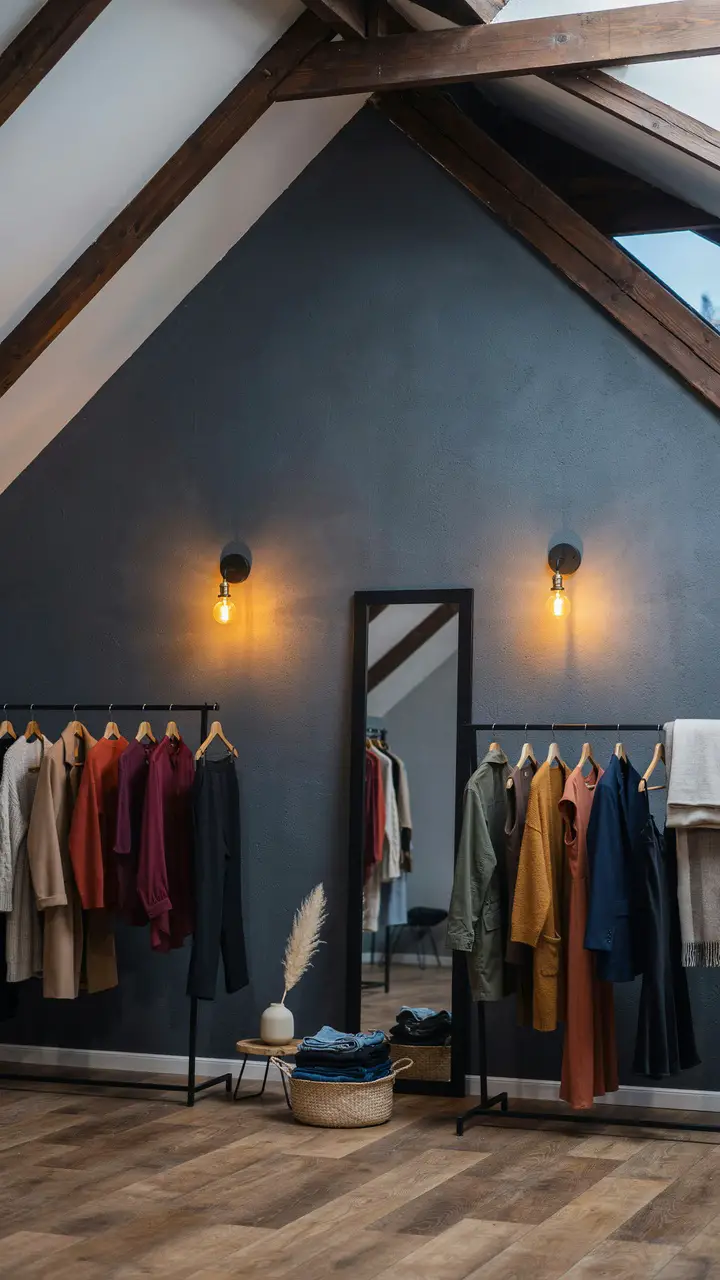
Every great dressing room needs a full-length mirror, and attic closets present the unique opportunity to lean one against the gable end wall (the vertical flat wall at the end of your attic ridge) where ceiling height is maximum. Framing it with wall sconces on either side creates the effect of a proper dressing room mirror — the kind you’d find backstage at a theater or in a fashion designer’s studio. Worried about choosing the wrong frame finish? Brass and matte black are the two most forgiving and trend-resilient choices right now.
How to Recreate This Look
Shopping List:
- Tall full-length mirror in matte black or brass frame: $60–$350
- Matching plug-in wall sconces (no hardwiring needed): $30–$90 each
- Command strips rated for mirror weight (up to 16 lbs): $12–$18
- Deep charcoal or navy paint for the gable wall: $35–$55/gallon
Step-by-Step Styling:
- Paint your gable end wall a deeper, richer tone than the rest of the space — this creates a natural focal point
- Center your mirror on the wall with the bottom 2–3 inches from the floor
- Mount sconces 8–10 inches to either side of the mirror at eye level (65–70 inches from floor)
- Style the floor area in front with a small rug or a single decorative basket
Rental Friendly: Use heavy-duty adhesive strips for both sconces and mirror. Test weight capacity before fully committing.
9. Install a Pegboard Accessories Wall
An entire attic closet section dedicated to visible accessories — bags, belts, hats, scarves — on a pegboard wall is one of those ideas that sounds simple and delivers massively. You can see everything at once, grab what you need without digging, and honestly, a well-styled pegboard filled with beautiful bags and accessories looks like modern art.
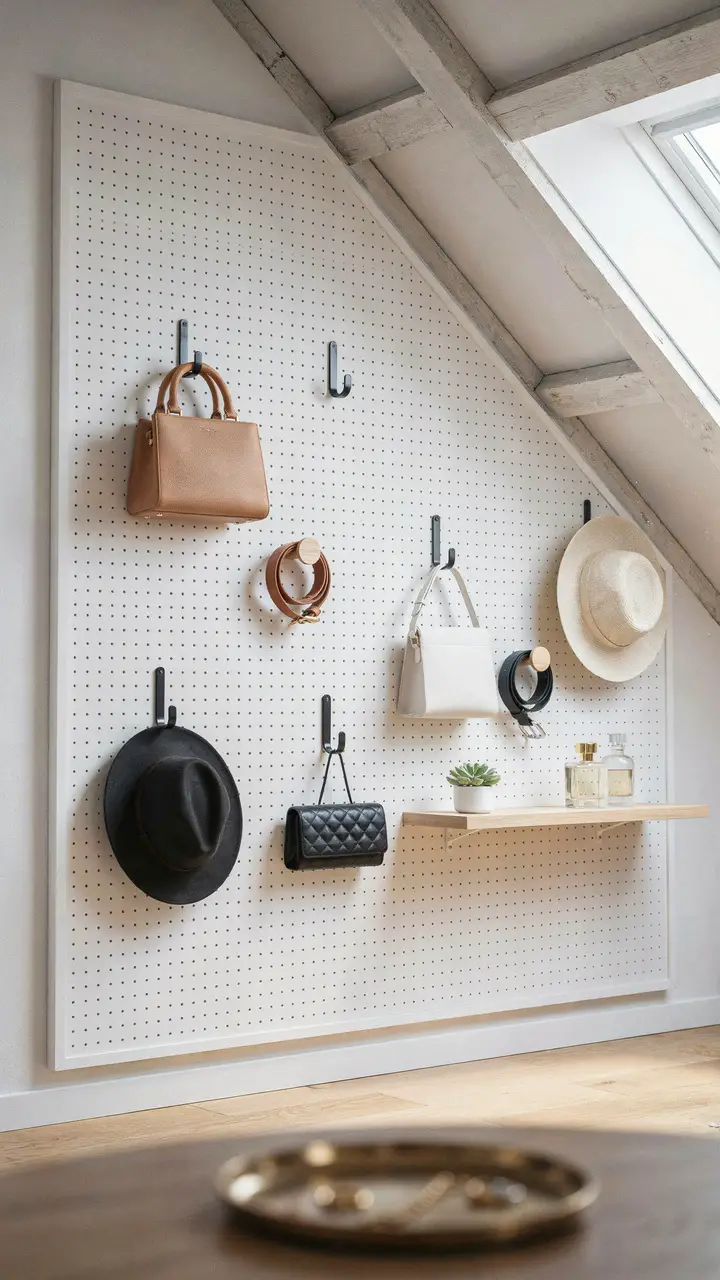
How to Recreate This Look
Shopping List:
- Standard pegboard panel (4×4 or 4×8 feet): $15–$35
- Pegboard hook variety pack: $12–$25
- White spray paint for pegboard: $8–$12
- Thin wood trim to frame the pegboard edge: $10–$25
- Small floating shelf insert for pegboard: $8–$15
Step-by-Step Styling:
- Paint your pegboard before installing — spray paint gives the smoothest, most even coverage
- Mount it with standoffs (small spacers) so hooks insert properly from behind
- Arrange your largest bags first, then fill in with smaller accessories
- Add one small plant or decorative object to break up the purely functional look
Difficulty Level: Beginner — basic wall anchors and a level are all you need
10. Design a Dedicated Getting-Ready Corner With Seating
The final upgrade that turns an attic storage closet into a genuine dressing room experience: one comfortable seat. It doesn’t have to be large — a small tufted ottoman, a slim slipper chair, a wooden stool with a tied cushion. Somewhere to sit while putting on shoes, layering jewelry, or simply pausing for a moment before heading out. FYI, this is the detail that makes people walk into an attic closet and immediately say “this is a room.”
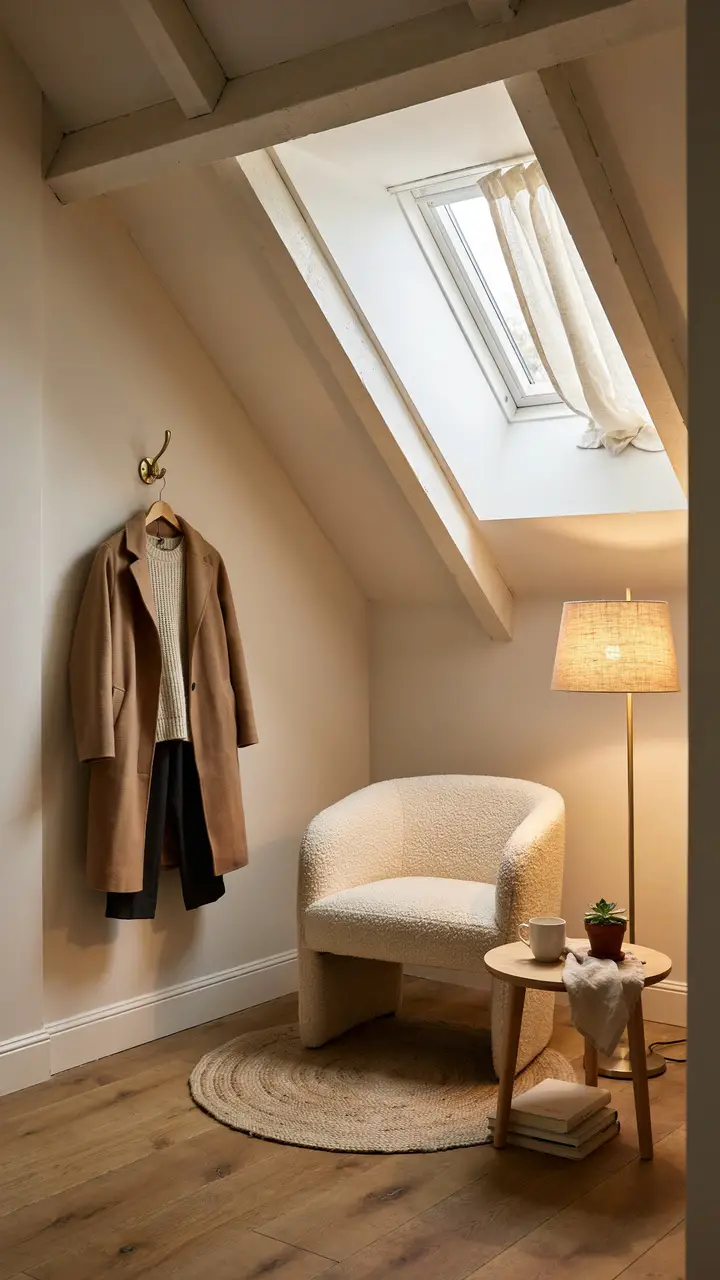
How to Recreate This Look
Shopping List:
- Small accent chair or slipper chair (boucle or velvet): $80–$450
- Small side table: $25–$120
- Floor lamp with fabric shade: $40–$180
- Small circular wool or cotton rug: $30–$150
- Single brass or black wall hook: $8–$20
Step-by-Step Styling:
- Choose a low-profile chair that fits comfortably under your eave height (seat height 15–17 inches works best for low areas)
- Position the floor lamp so it lights your face toward the mirror, not against a window
- Add a hook on the adjacent wall for hanging tomorrow’s outfit — this tiny habit saves enormous amounts of daily decision time
- Keep the side table minimal: one drink, one plant, nothing more
Budget Breakdown:
- Under $100: Thrifted wooden chair with a tied seat cushion in a fabric you love
- $100–$500: Target or IKEA accent chair + simple floor lamp
- $500+: Quality upholstered slipper chair from a furniture boutique that will genuinely last 15+ years
Difficulty Level: Beginner — pure furniture arrangement, zero installation required
Making Your Attic Closet Feel Like a Real Room
The throughline connecting all ten of these ideas is the same principle: treat your attic space like a room, not a utility zone. That means thoughtful lighting, intentional color choices, at least one decorative element that makes you smile when you walk in, and enough organization that the space actually reduces your daily stress rather than adding to it.
Attic closets have an inherent charm that standard bedroom closets simply don’t — the architectural character of sloped ceilings, the intimacy of a tucked-away space, the feeling of having claimed something previously overlooked. You don’t need to implement all ten ideas at once. Start with the one that solves your biggest daily frustration, whether that’s shoe chaos, poor lighting, or nowhere to sit while putting on boots, and build from there.
Your attic has been waiting up there patiently. It’s time to finally give it a purpose worth getting excited about. <3

Greetings, I’m Alex – an expert in the art of naming teams, groups or brands, and businesses. With years of experience as a consultant for some of the most recognized companies out there, I want to pass on my knowledge and share tips that will help you craft an unforgettable name for your project through TeamGroupNames.Com!