You know that moment when your toddler spots a fire truck and loses their absolute mind with excitement? Or when they insist on “helping” the mail carrier by shouting “THANK YOU!” from the porch? There’s something magical about how little ones light up when they encounter the people who keep our communities running.
I’ve watched my own kids transform into miniature firefighters, doctors, and mail carriers through imaginative play, and honestly, it’s one of my favorite phases of toddlerhood. These community helper activities aren’t just adorable photo ops (though you’ll definitely get those).
They’re powerful learning experiences that help toddlers understand the world beyond their front door, develop empathy, and start recognizing the people who make everyday life possible.
Whether you’re stuck inside on a rainy afternoon or planning a themed week of activities, these ten community helper ideas will spark imagination, encourage role-play, and maybe—just maybe—keep your little one engaged for longer than the usual seven minutes.
Let’s explore activities that turn your living room into a bustling neighborhood!
Firefighter Rescue Mission: Water Spray and Save
There’s something universally thrilling about firefighters to toddlers. The big trucks, the brave helpers, the dramatic rescues—it’s got everything a two-year-old could want.

How to Set This Up
- Materials needed:
- Small spray bottles (dollar store finds work perfectly)
- Toy animals, action figures, or stuffed animals
- Red construction paper or cardstock for firefighter hats
- Plastic toy fire truck (if you have one)
- Outdoor space or bathroom for contained mess
- Towels for cleanup
- Optional: Red bandana or scarf as a “firefighter cape”
- Step-by-step setup:
- Fill spray bottles with plain water (warm water if playing outside in cooler weather)
- Create simple firefighter hats by rolling construction paper into cone shapes and stapling
- Position toy animals or figures around your play area as “people who need rescuing”
- Show your toddler how to use the spray bottle with gentle squeezes
- Narrate the rescue mission: “Oh no! Teddy is stuck on the slide! Can you spray water to help?”
- Age appropriateness: Best for 18 months to 4 years (younger toddlers need hand-over-hand help with spray bottles; older preschoolers can create more elaborate rescue scenarios)
- Time commitment: 5 minutes setup, 15-30 minutes play, 5 minutes cleanup
- Mess level: Medium to high—expect wet floors, wet toddlers, wet everything (that’s why outdoor or bathroom settings work best!)
- Developmental benefits:
- Fine motor skill development through spray bottle squeezing
- Hand-eye coordination as they aim water at targets
- Problem-solving and cause-and-effect understanding
- Role-play and imaginative thinking
- Beginning understanding of community helper roles
- Safety considerations: Supervise water play closely, especially with younger toddlers; ensure spray bottles are easy to grip and don’t require excessive force; keep play area clear of slipping hazards
- Activity variations:
- Indoor version: Use mini spray bottles with very little water and place toys in a bathtub or large plastic bin
- Add pretend “flames” using orange and red tissue paper that blow away when sprayed
- Incorporate a bell for fire alarms or use a kitchen timer as a “fire station alarm”
- Older toddlers can take turns being the “dispatcher” who tells the firefighter where to go
- Cost-saving alternatives: Use empty, cleaned hand soap pump bottles instead of buying spray bottles; make firefighter hats from paper grocery bags; use household items as “buildings” needing rescue
- Cleanup strategy: Have towels ready from the start; let your toddler help with cleanup by giving them a small towel to “rescue the water puddles”—turns cleanup into extended play!
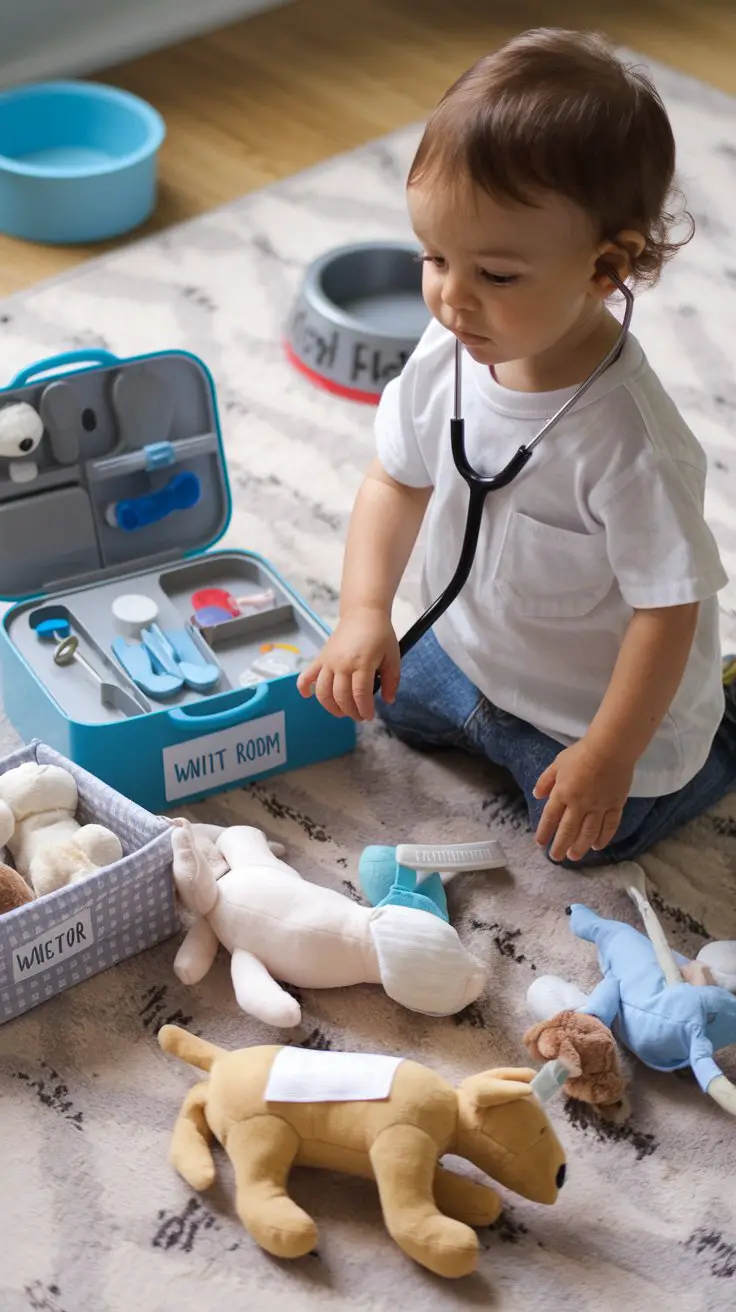
Doctor’s Office Check-Up Station
My daughter once gave her stuffed elephant seventeen bandaids in one sitting during “doctor play.” Did we go through half a box of bandaids? Yes. Was it worth watching her carefully examine each patient and use her gentlest voice? Absolutely.

How to Set This Up
- Materials needed:
- Toy doctor’s kit (or DIY version—see alternatives below)
- Stuffed animals or dolls as patients
- Bandaids (real or pretend)
- White t-shirt or pillowcase as a “doctor coat”
- Small notebook and pencil for “medical charts”
- Cotton balls, clean popsicle sticks, empty medicine bottles
- Optional: waiting room setup with small chairs
- Step-by-step setup:
- Arrange stuffed animals in a waiting room area
- Create an exam table using a small table, ottoman, or even a sturdy box with towel
- Organize medical supplies in a basket or kit for easy access
- Put white shirt on your toddler backwards so it buttons/looks like a coat
- Give a brief demonstration: listen to heartbeat, check temperature, give gentle bandaid
- Let your little doctor take over!
- Age appropriateness: 18 months to 5 years (younger toddlers enjoy simple bandaid application; older kids create elaborate treatment plans)
- Time commitment: 10 minutes setup, 20-45 minutes play (this one often has serious staying power), 5 minutes cleanup
- Mess level: Low—mostly involves bandaid wrappers and scattered medical supplies
- Developmental benefits:
- Empathy development through caring for “sick” patients
- Fine motor skills with small tools and bandaid application
- Language development as they explain what they’re doing
- Processing real doctor visits in a safe, controlled way
- Sequencing skills (check-in, exam, treatment, follow-up)
- Emotional regulation around medical experiences
- Safety considerations: Remove any actual sharp medical items; if using real bandaids, supervise to prevent eating sticky parts; ensure toy medical tools are age-appropriate with no choking hazards
- Activity variations:
- Set up appointment cards using index cards
- Create simple “prescriptions” with crayons
- Add a veterinarian twist by focusing on animal patients
- Include dental checkups with toothbrushes for teeth brushing practice
- Older toddlers can take turns being patient and doctor
- Cost-saving alternatives: DIY doctor kit using household items: toilet paper tubes as stethoscope, wooden spoon as reflex hammer, empty vitamin bottles as medicine, cut strips of white fabric as bandages, smartphone with flashlight as examination light
- Cleanup strategy: Turn cleanup into “end of day” routine where doctor puts all tools back; sing a cleanup song to the tune of “The Wheels on the Bus”: “The doctor puts the tools away, tools away, tools away…”
Mail Carrier Delivery Route
Nothing captures toddler attention quite like stuffing things into other things, which makes mail carrier play absolutely perfect. Plus, it’s an excuse to finally use all those Amazon boxes you’ve been hoarding!

How to Set This Up
- Materials needed:
- Small bag or tote for mail satchel
- Junk mail, old greeting cards, or paper in envelopes
- Cardboard boxes (various sizes)
- Markers for labeling
- Optional: stickers for “stamps”
- Optional: baseball cap as mail carrier uniform
- Toy mail truck or any riding toy
- Step-by-step setup:
- Label boxes with family members’ names (or pets, stuffed animals, favorite toys)
- Position boxes around your play area to create a delivery route
- Stuff mail satchel with junk mail, drawings, or homemade letters
- Show your toddler how to take one piece, walk to a mailbox, and deliver it
- Narrate: “Who should get this letter? Let’s deliver it to Daddy’s mailbox!”
- Let them create their own delivery system
- Age appropriateness: 15 months to 4 years (younger ones enjoy the walking and dropping; older toddlers understand the matching names component)
- Time commitment: 10 minutes setup, 20-40 minutes play, 3 minutes cleanup
- Mess level: Low—just paper scattered around (which you can gather together quickly)
- Developmental benefits:
- Gross motor skills through walking the route
- Name recognition as they match names to boxes
- Sequencing and routine understanding
- Pre-literacy exposure to letters and envelopes
- Spatial awareness navigating the route
- Independence and task completion confidence
- Safety considerations: Clear pathways between mailboxes to prevent tripping; avoid boxes with sharp edges or staples; supervise younger toddlers who might mouth the mail
- Activity variations:
- Create a “stamp” station where they add sticker stamps before delivery
- Include a post office where they “sort” mail first
- Add numbers to mailboxes for early number recognition
- Write simple picture-based letters together to deliver
- Set up a mailbox outside your front door for real family deliveries
- Cost-saving alternatives: Use grocery bags instead of tote bags; cereal boxes make perfect mailboxes; skip the toy truck and have them use their feet as “mail delivery shoes”; create envelopes from folded paper instead of using real ones
- Cleanup strategy: “Mail delivery is done for the day! Let’s collect all the letters and put them back in the post office.” Turn box gathering into the final delivery task
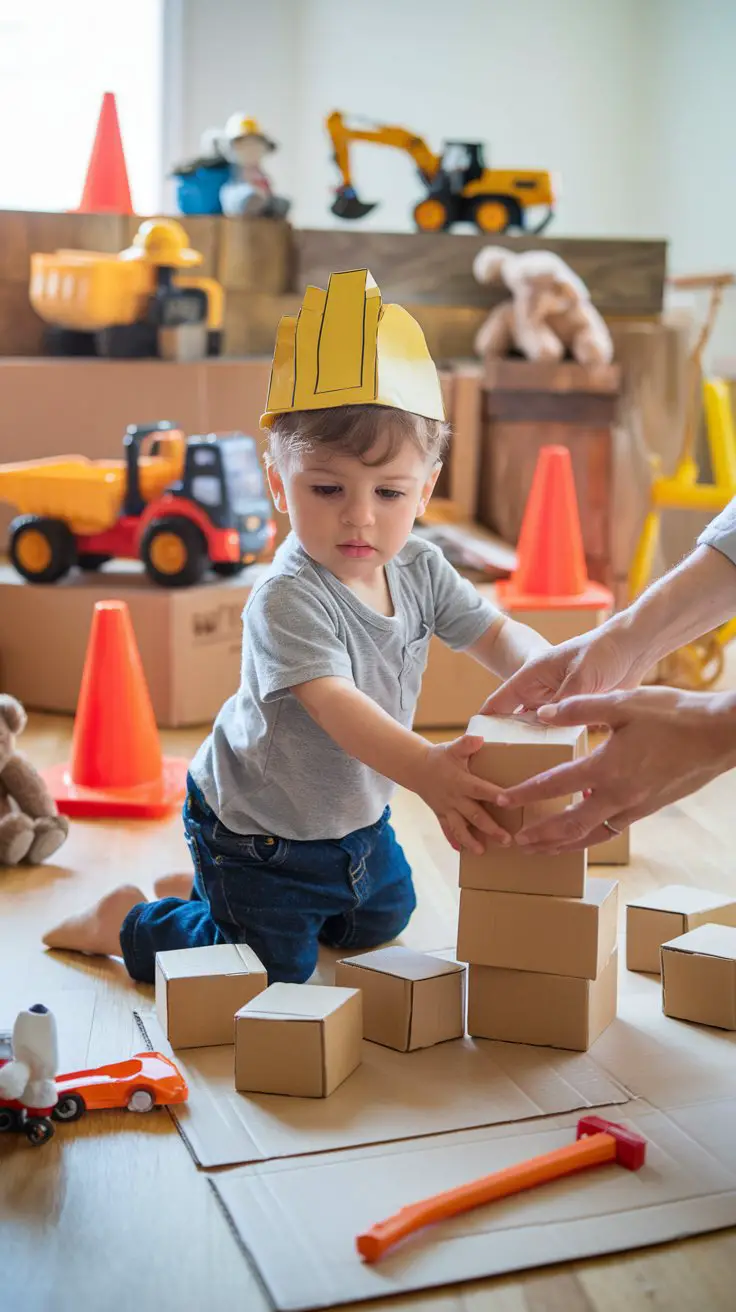
Construction Worker Building Site
Fair warning: this activity gets LOUD. Between the beeping truck sounds and the enthusiastic hammering, you’re basically inviting a construction zone into your home. But watching a toddler’s face light up as they “build” something important? Totally worth the noise.
How to Set This Up
- Materials needed:
- Building blocks (cardboard, wood, or large foam blocks)
- Toy construction vehicles (dump trucks, excavators, bulldozers)
- Toy tools (hammer, wrench, screwdriver)
- Yellow paper or cardboard for hard hats
- Orange paper cones or small cones for safety markers
- Small boxes or containers for “building materials”
- Optional: blueprint (simple drawing on paper)
- Optional: measuring tape, level, or other safe real tools
- Step-by-step setup:
- Clear a large floor space for the construction site
- Create simple hard hats from yellow cardstock or paper plates
- Arrange blocks and building materials in one area
- Position vehicles ready for work
- Set up orange cones to mark the work zone
- Draw a simple “blueprint” showing what to build (just basic shapes work great)
- Hand over tools and let construction begin!
- Age appropriateness: 18 months to 5 years (younger toddlers enjoy vehicle play and knocking down; older ones follow building plans)
- Time commitment: 15 minutes setup, 30-60 minutes play (construction play often has amazing staying power), 10 minutes cleanup
- Mess level: Medium—blocks everywhere, vehicles scattered, but everything contained to the play area
- Developmental benefits:
- Spatial reasoning and engineering thinking
- Problem-solving as they figure out how to build stable structures
- Fine and gross motor skills with tools and block manipulation
- Cause and effect (what happens when blocks are stacked wrong)
- Imaginative play and role-taking
- Following simple instructions or blueprints
- Cooperation if playing with siblings or friends
- Safety considerations: Ensure toy tools have no sharp edges; supervise block stacking to prevent tumbling towers landing on heads; keep small pieces away from younger siblings who might choke; designate safe knock-down areas away from breakable items
- Activity variations:
- Create a demolition site where old block structures get knocked down safely
- Add cleanup crew element with toy brooms and dustpans
- Include architect role with drawing plans before building
- Set up inspection station where “inspector” checks completed buildings
- Use kinetic sand as “dirt” for outdoor construction (very messy but incredibly engaging)
- Cost-saving alternatives: Cardboard boxes of all sizes work as building blocks; use kitchen utensils as tools; make construction vehicles from recycled containers; create hard hats from paper grocery bags; use painter’s tape on floor to mark construction zones instead of cones
- Cleanup strategy: Announce “End of work day!” and create a cleanup routine: tools back in toolbox, vehicles in garage (box or shelf), blocks in container. Sing work songs during cleanup: “This is the way we clean the site, clean the site, clean the site…”
Police Officer Traffic Safety Course
My son became obsessed with traffic rules after we set this up, which was adorable until he started “pulling over” his dad for “rolling through the stop sign” in our driveway. Creating mini traffic directors is both hilarious and slightly concerning for your future driving experiences!

How to Set This Up
- Materials needed:
- Riding toys, tricycles, wagons, or even walking “drivers”
- Chalk for drawing roads and parking spaces
- Paper plates and craft sticks for stop signs
- Red, yellow, green construction paper for traffic light
- Blue paper or fabric for badge
- Whistle (optional but highly entertaining)
- Orange cones or markers
- Optional: ticket pad (notebook) for parking violations
- Step-by-step setup:
- Use chalk to draw simple roads, intersections, and parking spaces on driveway or sidewalk
- Create stop sign from red paper plate on stick or paint existing toy sign
- Make traffic light from construction paper circles attached to cardboard
- Fashion badge from paper or cardstock with “POLICE” written on it
- Position cones to mark special zones (school zone, construction zone)
- Demonstrate traffic rules: stop at stop signs, slow for yellow, go on green
- Let your little officer take control!
- Age appropriateness: 2 to 5 years (younger toddlers enjoy the vehicles; older ones grasp rules and directions)
- Time commitment: 15-20 minutes setup, 30-45 minutes play, 5 minutes cleanup (chalk washes away easily)
- Mess level: Low—outdoor activity with minimal materials, chalk washes away with water
- Developmental benefits:
- Rule understanding and following
- Leadership skills when directing traffic
- Color recognition with traffic light colors
- Spatial awareness navigating the road
- Turn-taking and patience waiting for signals
- Safety education about real traffic rules
- Gross motor skills steering vehicles
- Pre-literacy with sign recognition
- Safety considerations: Ensure play area is away from real traffic; supervise younger children near riding toys; verify riding toys are age-appropriate and safe; create clear boundaries for the play area; watch that toddlers don’t accidentally direct each other into collisions!
- Activity variations:
- Add parking meter (paper tube) and coins for parking practice
- Include school crossing guard role with special vest
- Create drive-through restaurant or bank for combined community helper play
- Set up car wash station as another stop on the route
- Older toddlers can write pretend tickets for “violations” (great pre-writing practice)
- Cost-saving alternatives: Skip fancy road chalk and use regular sidewalk chalk; make traffic light from cereal box cardboard; use existing toys instead of buying badges; create roads with masking tape indoors on rainy days; repurpose old kitchen spoons or spatulas as traffic directing “paddles”
- Cleanup strategy: “End of shift for officer [name]! Let’s park all the vehicles in the garage.” If using chalk outdoors, a gentle hose spray makes cleanup fun water play; gather paper signs and store them in a special “police station” box for next time
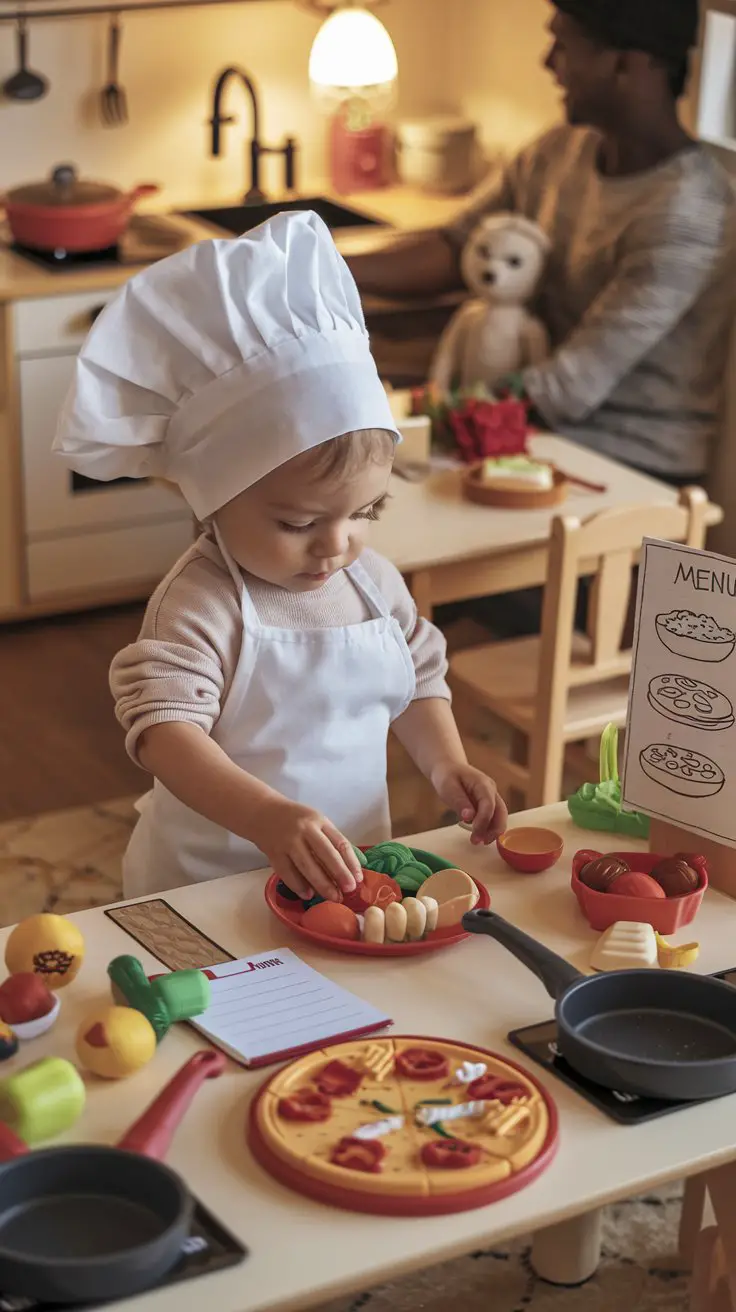
Chef’s Restaurant Kitchen
I’ve never seen a toddler more focused than when they’re arranging plastic food on plates and serving it with the utmost seriousness. Bonus: this activity often leads to actual willingness to try new foods later because “Chef made it!”
How to Set This Up
- Materials needed:
- Play food (plastic or felt versions)
- Toy pots, pans, and cooking utensils
- Plates, cups, and play silverware
- Apron (adult size works adorably oversized)
- Paper chef’s hat or white bandana
- Notepad and pencil for orders
- Simple picture menu (hand-drawn works great)
- Play kitchen or designated cooking area
- Optional: play money for payment
- Optional: table setting for “customers”
- Step-by-step setup:
- Arrange play kitchen or cooking area with utensils and food within reach
- Create chef hat from white paper formed into a puffy circle and headband
- Put apron on toddler (cinch it tight or it’ll become a tripping hazard!)
- Draw simple picture menu with 3-4 items (burger, pizza, salad, etc.)
- Set up customer seating area with table and chair
- Give brief demonstration: take order, “cook” food, serve on plate, deliver to customer
- Let chef take over the kitchen!
- Age appropriateness: 18 months to 5 years (younger ones enjoy the cooking motions; older toddlers create elaborate multi-course meals)
- Time commitment: 10 minutes setup, 25-45 minutes play, 5 minutes cleanup
- Mess level: Low to medium—play food gets scattered but easy to gather
- Developmental benefits:
- Fine motor skills with utensil use and food arrangement
- Sequencing understanding (take order, prepare, serve)
- Social skills and customer service concepts
- Pretend play and imagination
- Food vocabulary and healthy eating discussions
- Memory skills remembering customer orders
- Math readiness with counting food items
- Safety considerations: Ensure play food pieces are large enough to prevent choking for younger toddlers; verify toy kitchen has no sharp edges or pinch points; supervise “cooking” to ensure they understand difference between pretend and real stove
- Activity variations:
- Add bakery element with play dough “baking”
- Include pizza shop with toppings selection
- Create ice cream parlor with scoops and cones
- Set up breakfast café focusing on morning foods
- Combine with grocery store play (shop for ingredients first, then cook)
- Cost-saving alternatives: Use real (unbreakable) kitchen items instead of toys; cut food pictures from grocery flyers for menu and pretend food; make chef hat from white paper bag; use real produce like potatoes, apples, or bananas that won’t spoil during play; repurpose cardboard boxes as ovens and refrigerators
- Cleanup strategy: “Restaurant is closing! Time to clean the kitchen.” Make it a sorting game: “All the fruits go in this basket, vegetables in that one.” Sing cleanup song to “If You’re Happy and You Know It”: “If you’re closing the restaurant, clean it up! If you’re closing the restaurant, clean it up!”
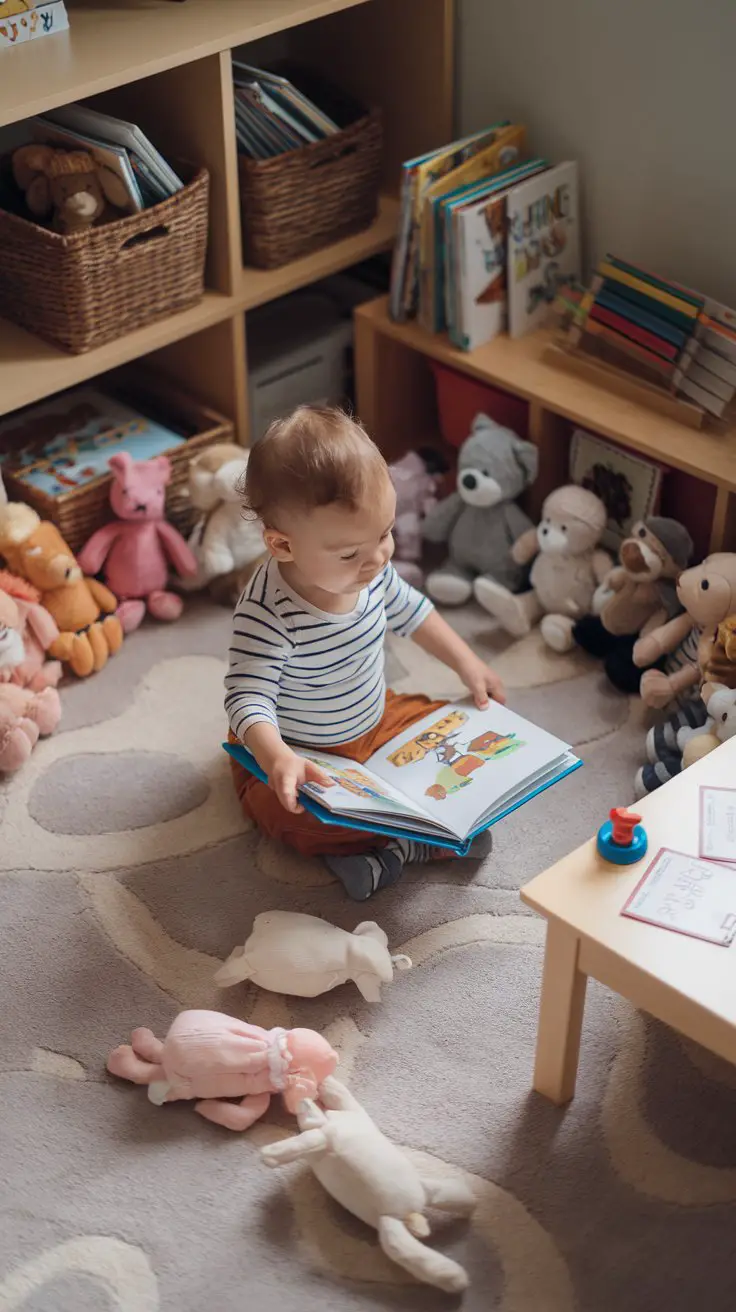
Librarian’s Story Time Station
This activity has saved countless rainy afternoons at our house. There’s something incredibly sweet about watching a toddler very seriously “read” picture books to stuffed animals, even if the story is just them pointing at pictures and saying “doggy! doggy! DOGGY!”
How to Set This Up
- Materials needed:
- Board books and picture books
- Stuffed animals or dolls as audience
- Baskets or low shelves for book organization
- Index cards for library cards
- Toy stamp or stickers for “checking out”
- Small table or surface for librarian desk
- Blanket or rug for story time area
- Optional: tote bag for carrying checked-out books
- Optional: “QUIET” sign (ironically, for a toddler activity)
- Step-by-step setup:
- Arrange books in baskets by type or color (toddlers love sorting)
- Create cozy reading corner with blanket or rug
- Set up stuffed animals in a semicircle as story time audience
- Position librarian desk with stamp and cards nearby
- Create simple library cards from index cards
- Show your toddler how to select a book, stamp the card, and read to animals
- Demonstrate gentle page turning and book care
- Let the story time begin!
- Age appropriateness: 18 months to 5 years (younger toddlers enjoy looking at pictures and turning pages; older ones tell elaborate stories)
- Time commitment: 5 minutes setup, 20-40 minutes play, 2 minutes cleanup
- Mess level: Very low—just books and stuffed animals to gather afterward
- Developmental benefits:
- Pre-literacy skills and book handling
- Language development through storytelling
- Sequencing as they tell story in order
- Caring for books and materials
- Public speaking confidence (even to stuffed audiences!)
- Empathy and teaching others
- Quiet, focused play skills
- Memory recall retelling familiar stories
- Safety considerations: Ensure books are age-appropriate board books for younger toddlers who might chew; supervise to prevent rough handling that damages books; keep small book pieces away from mouths
- Activity variations:
- Add puppet show element with finger puppets acting out stories
- Create book return drop box from cardboard box
- Set up computer check-out station with old keyboard
- Include library craft time with crayons and coloring pages
- Older toddlers can organize books by color, size, or favorite characters
- Cost-saving alternatives: Visit real library for free books to rotate through play; use family photos in album as “books” for storytelling; create homemade books from folded paper and drawings; repurpose old greeting cards as library cards; skip the stamp and use stickers from the dollar store
- Cleanup strategy: “Library is closing! Let’s put all the books back on the shelves.” This is perfect for teaching book care and organization. Make it a game: “Can you find all the books about animals? How about books with blue covers?”
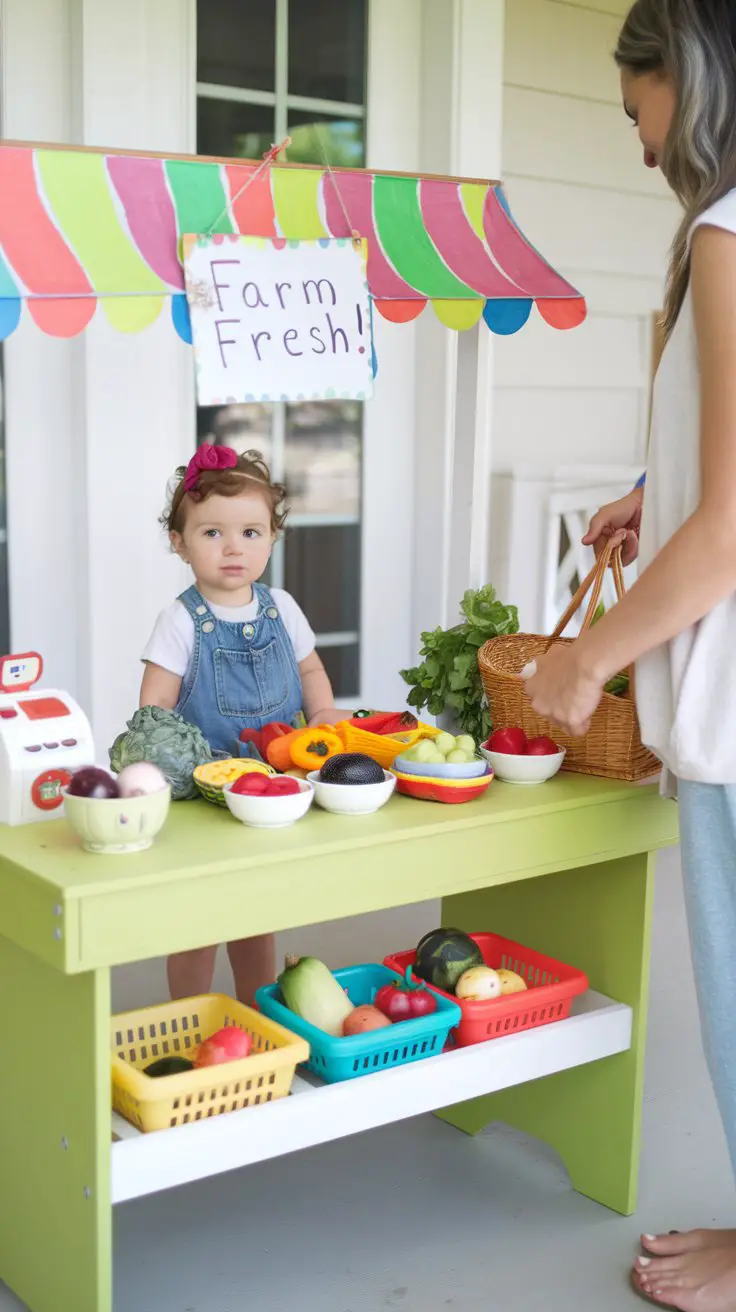
Farmer’s Market Stand
This combines so many toddler obsessions: sorting things, putting things in bags, and pretending to go shopping. Plus, it sneaks in early math concepts without anyone noticing they’re learning!
How to Set This Up
- Materials needed:
- Play food (fruits, vegetables) or real produce that won’t spoil
- Small baskets or bowls for display
- Low table or surface
- Paper bags or small reusable shopping bags
- Toy cash register or container for play money
- Play money or tokens
- Price tags (hand-drawn or printed)
- Apron for farmer
- Optional: hand-drawn sign for stand
- Optional: scale for weighing produce
- Step-by-step setup:
- Cover table with simple cloth if desired
- Arrange produce in baskets by type
- Create price tags with pictures of coins (1 coin, 2 coins, etc.)
- Set up cash register or money container
- Give child apron and explain they’re the farmer selling food
- Demonstrate: customer asks for item, farmer gets it, customer pays
- Switch roles so toddler experiences both buying and selling
- Let the market open for business!
- Age appropriateness: 2 to 5 years (younger toddlers enjoy bagging items; older ones grasp money exchange and counting)
- Time commitment: 10 minutes setup, 25-40 minutes play, 5 minutes cleanup
- Mess level: Low to medium—produce scattered around but easy to collect
- Developmental benefits:
- Early math skills with counting and money concepts
- Social skills through customer interaction
- Vocabulary expansion with produce names and colors
- Sorting and categorizing skills
- Fine motor skills bagging items
- Nutrition awareness and healthy food discussions
- Problem-solving when items run out or customers want specific things
- Safety considerations: If using real produce, supervise to ensure items aren’t eaten unwashed; keep plastic bags away from faces; ensure play money and price tags are large enough to prevent choking
- Activity variations:
- Add flower stand with real or paper flowers
- Include bakery section with play baked goods
- Create egg carton with plastic eggs for egg sales
- Set up honey stand with small jars (empty and sealed)
- Combine with chef play—buy ingredients, then cook them!
- Cost-saving alternatives: Use actual kitchen produce that won’t spoil during play; make money from paper or cardboard; create price tags from sticky notes; use actual brown paper lunch bags; fashion cash register from tissue box; cut fruit/vegetable pictures from grocery flyers as play food
- Cleanup strategy: “Market is closed for the day! Let’s put all our food back in storage.” Sort produce back into baskets or refrigerator. Count items as you clean: “How many apples do we have? Let’s count them into the basket!”
Veterinarian Animal Hospital
This one is perfect for animal-loving toddlers (so… all toddlers). I’ve watched my kids be gentler with their stuffed animals during “vet play” than they are at any other time. Something about being the caretaker really brings out their nurturing side.
How to Set This Up
- Materials needed:
- Stuffed animals of various sizes
- Toy veterinary or doctor’s kit
- Bandaids and fabric strips for bandages
- Small blankets or washcloths for animal beds
- Bowls for food and water (toy or real)
- Toy pet carriers or small boxes
- White shirt or pillowcase for vet coat
- Notebook for patient charts
- Optional: x-ray pictures (draw bones on dark paper)
- Optional: pet adoption certificates – Step-by-step setup:
- Create exam area with towel or small mat
- Organize medical supplies within easy reach
- Set up waiting room with basket of animal patients
- Arrange recovery area with small blankets for animals to rest
- Put vet coat on toddler and give them stethoscope
- Demonstrate gentle animal handling and basic checks
- Narrate what’s wrong with each animal: “This puppy has a hurt paw. Can you help?”
- Let your little veterinarian start caring for patients!
- Age appropriateness: 18 months to 5 years (younger toddlers enjoy gentle petting and bandaid application; older ones create complex medical scenarios)
- Time commitment: 10 minutes setup, 30-50 minutes play (caring play often holds attention well), 5 minutes cleanup
- Mess level: Low—stuffed animals and medical supplies to gather
- Developmental benefits:
- Empathy and compassion development
- Gentle touch and caring behavior
- Fine motor skills with small medical tools
- Animal knowledge and characteristics
- Problem-solving what each animal needs
- Responsibility and caregiving concepts
- Processing feelings about pet care or vet visits
- Language development describing symptoms and treatments
- Safety considerations: Supervise bandaid use to prevent eating sticky parts; ensure medical toys have no sharp edges; verify stuffed animals are clean and age-appropriate; teach gentle handling to prevent rough play
- Activity variations:
- Add grooming station with toy brushes and combs
- Include adoption center where animals find new homes
- Create pet hotel where animals stay overnight
- Set up farm vet practice with larger stuffed animals
- Combine with craft time making collars or name tags for pets
- Cost-saving alternatives: Use household items as medical tools; fashion vet coat from white pillowcase with neck hole; create charts from scrap paper; make x-rays by drawing bones on black construction paper; use actual pet supplies like clean food bowls or old brushes; create patient carriers from shoeboxes
- Cleanup strategy: “All the animals are healthy now! Time to send them home.” Let toddler tuck each animal into their designated spots. Sing farewell song: “Goodbye puppy, goodbye cat, all the animals are happy now, imagine that!”
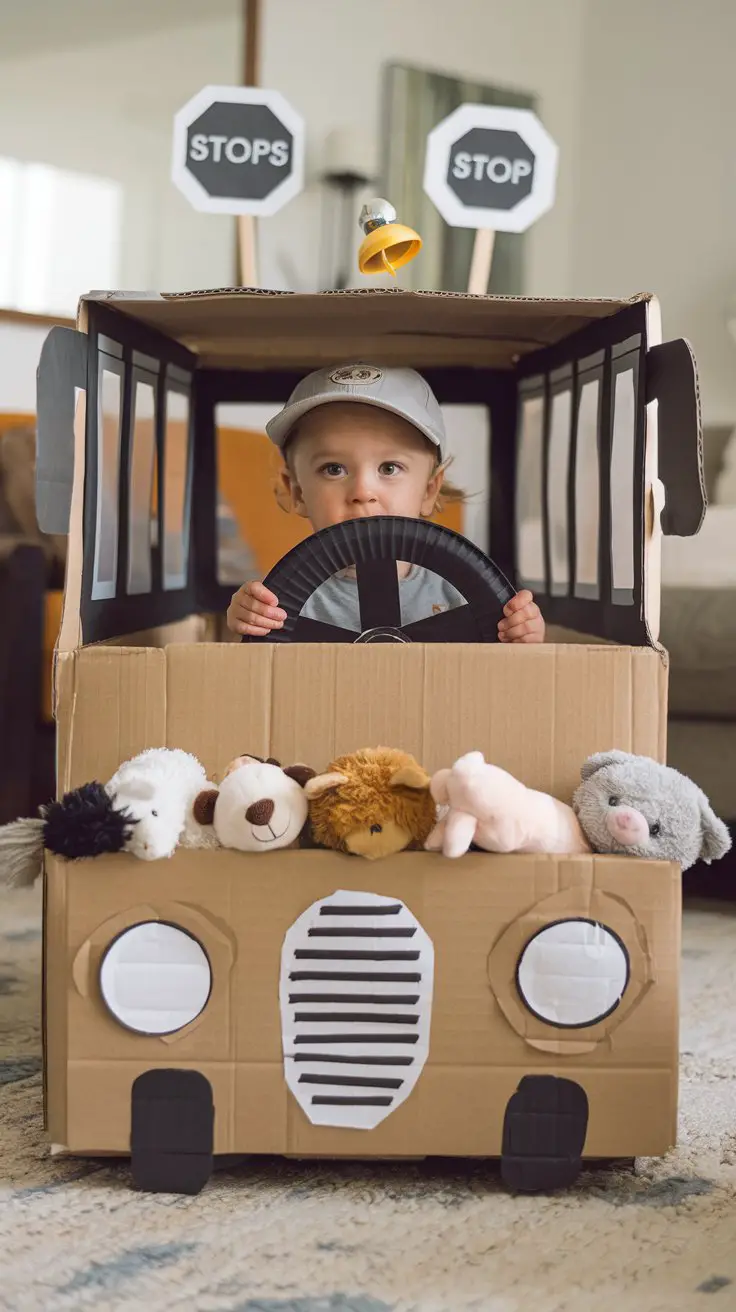
Bus Driver Transportation Station
The appeal of driving and picking up passengers never gets old for toddlers. This activity turns your living room into a bustling public transportation system, and watching little ones carefully “pick up” each stuffed animal passenger is surprisingly heartwarming.
How to Set This Up
- Materials needed:
- Large cardboard box (refrigerator or appliance box works great)
- Paper plate for steering wheel
- Markers or paint for decorating
- Scissors (adult use only for cutting windows)
- Stuffed animals or dolls as passengers
- Paper and sticks for bus stop signs
- Cap or hat for driver
- Bell or toy horn
- Optional: tickets from hole-punched paper
- Optional: small chairs for additional passenger seating
- Step-by-step setup:
- Cut one side of box open for driver to enter and exit
- Cut windows on sides (adult task—keep edges smooth)
- Attach paper plate to front interior as steering wheel
- Decorate box as bus with markers (numbers, colors, wheels)
- Create bus stops around room with signs: “School,” “Park,” “Home,” etc.
- Arrange stuffed animals as waiting passengers at stops
- Show toddler how to “drive” to stop, let passengers on, drive to next stop
- Let the route begin!
- Age appropriateness: 18 months to 5 years (younger ones enjoy sitting in bus and steering; older toddlers manage entire route with passengers)
- Time commitment: 20 minutes setup (box decorating is half the fun), 30-60 minutes play, 10 minutes cleanup (mostly just storing the box)
- Mess level: Low—box stays in one area, stuffed animals to collect afterward
- Developmental benefits:
- Gross motor skills with steering movements
- Spatial awareness navigating around furniture
- Sequencing understanding (route order)
- Social awareness about public transportation
- Counting passengers on and off
- Following routes and directions
- Role-play and imaginative scenarios
- Rule-following (stopping at stops, waiting for passengers)
- Safety considerations: Ensure box has no sharp edges or staples; supervise younger toddlers in box to prevent tipping; keep pathways clear to prevent collisions; verify box is sturdy enough for safe play
- Activity variations:
- Create subway train with multiple connected boxes
- Add ticket booth where passengers buy tickets before boarding
- Include school bus route picking up toy people
- Set up train station with tracks marked by tape on floor
- Older toddlers can create bus schedules with picture charts
- Cost-saving alternatives: Use existing ride-on toy instead of box; create simple cardboard steering wheel without full bus; make bus stops from paper taped to chairs; skip decoration and just imagine the bus; use laundry basket as simple vehicle alternative
- Cleanup strategy: “Last stop! Everyone off the bus!” Collect all passengers and return them to their homes. The box can be stored and brought out repeatedly, making cleanup mainly about gathering animals and signs
Creating Your Community Helper Learning Experience
Here’s what I’ve learned after years of community helper play: the messier and more interactive the activity, the more toddlers remember. They might not recall your carefully planned lesson about community helpers, but they’ll definitely remember the time they “delivered mail” to Daddy’s office and he pretended to be so surprised.
The beauty of these activities is they grow with your child. A 18-month-old might simply enjoy putting plastic food in bags at the farmer’s market, while a four-year-old creates elaborate scenarios with money exchange and customer complaints about sold-out bananas. Same activity, completely different developmental levels, equally engaging.
Don’t stress about making everything Pinterest-perfect. I promise your toddler doesn’t care if the firefighter hat is construction paper held together with twelve pieces of tape instead of a pristine store-bought version. They care about the spray bottle, the “mission,” and your enthusiastic narration of their heroic water rescue.
The real magic happens when you participate alongside them. Become the patient needing a doctor, the customer at the restaurant, the person whose mail delivery makes their day. Your engagement transforms simple pretend play into rich learning experiences where toddlers practice empathy, develop language skills, and start understanding how communities work together.
Mix and match these activities based on your child’s interests. Obsessed with animals? Combine the veterinarian clinic with the farmer’s market selling pet food. Fascinated by vehicles? Merge the construction site with the bus driver route. Following your toddler’s lead creates the most meaningful play experiences.
And when things inevitably go sideways—when the doctor gives the patient 47 bandaids, or the mail carrier delivers everything to one mailbox, or the chef serves plastic broccoli with a side of blocks—just roll with it. These moments of toddler logic are what make this stage so special (and hilarious to look back on later).
Your living room might transform into a chaotic combination of fire station, hospital, and post office all at once, and that’s perfectly okay. In fact, that’s when you know you’re doing it right. Community helper play isn’t about perfect execution; it’s about watching your little one discover the wide, wonderful world of people who help others—and realizing they can be helpers too.
Now grab that cardboard box, some play food, and whatever random supplies are in your craft drawer. Your toddler’s favorite community helper is waiting to come to life, and I promise you, the slightly crooked paper hat and enthusiastically scattered props will create memories neither of you will forget. Happy playing! 🙂

Greetings, I’m Alex – an expert in the art of naming teams, groups or brands, and businesses. With years of experience as a consultant for some of the most recognized companies out there, I want to pass on my knowledge and share tips that will help you craft an unforgettable name for your project through TeamGroupNames.Com!