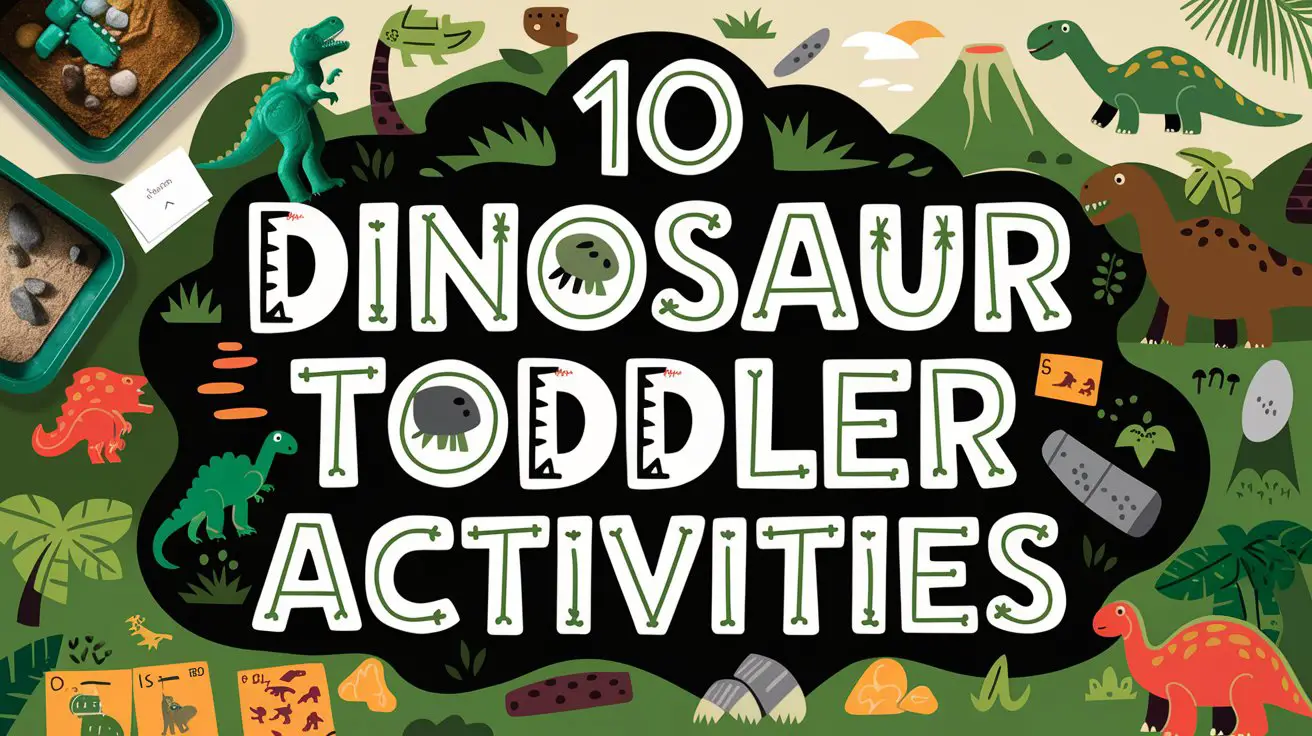
Let me tell you something about toddlers and dinosaurs: it’s a love affair that starts early and burns bright.
Maybe it’s the roaring, maybe it’s the stomping, or maybe it’s just that preschoolers relate to creatures who were basically giant, chaos-loving beings who knocked stuff over.
Whatever the reason, when your little one discovers dinosaurs, you’re in for a wild (and wonderful) ride.
I’ve watched my own toddler become completely obsessed with these prehistoric creatures, and honestly? It’s one of the most delightful phases we’ve experienced. The good news is that dinosaur activities offer incredible learning opportunities wrapped up in pure, roar-filled fun.
We’re talking fine motor practice, sensory exploration, early science concepts, and imaginative play—all while your kiddo thinks they’re just playing with their beloved T-Rex.
Whether your toddler is just discovering dinosaurs or has been obsessed for months, these ten activities will keep them engaged, learning, and thoroughly entertained.
Some are gloriously messy (fair warning), others are surprisingly calm, and all of them have been parent-tested in real homes with real toddlers who have real opinions about everything. Let’s dig in!
Dinosaur Fossil Excavation (aka Frozen Dino Rescue)
There’s something magical about watching a toddler’s face light up when they “discover” a frozen dinosaur. This activity combines sensory play, problem-solving, and just enough challenge to keep them engaged without causing meltdowns.
Image Prompt: A 2.5-year-old boy sits at a small outdoor table on a sunny patio, completely focused on a large ice block in a shallow plastic bin. Several small plastic dinosaurs are frozen inside the cloudy ice. He’s holding a small spray bottle in one hand and a plastic spoon in the other, with water droplets glistening on the ice surface. His expression shows intense concentration mixed with excitement. Additional tools are scattered nearby: a toy hammer, paintbrushes, and salt shakers. Water puddles around the bin, and partially freed dinosaurs sit triumphantly beside it. The scene captures the perfect balance of focused learning and joyful mess. Natural lighting emphasizes the sparkle of melting ice.
How to Set This Up
Materials you’ll need:
- 4-6 small plastic dinosaurs (the cheap multi-pack kind work perfectly)
- Large plastic container or bread loaf pan
- Water
- Freezer space overnight
- Shallow bin or tray for containing the mess
- Rescue tools: spray bottles filled with warm water, plastic spoons, toy hammers, paintbrushes, salt shakers
- Towels for cleanup (trust me on this)
- Optional: food coloring to tint the ice
Step-by-step setup:
- Place dinosaurs in your container and fill with water (add a few drops of food coloring if you want colored ice)
- Freeze overnight until completely solid
- Remove ice block from container by running warm water over the outside
- Place frozen block in a shallow bin to catch melting water
- Set up your “excavation site” outdoors or in a bathtub
- Provide various tools and let your toddler discover what works best
Age appropriateness: Best for 18 months to 4 years (younger toddlers will need simpler tools and closer supervision)
Time commitment: 2 minutes setup (plus freezing time), 20-45 minutes of engaged play, 5 minutes cleanup
Mess level: Medium-high (it’s water everywhere, but it dries)
Developmental benefits:
- Problem-solving skills as they figure out how to free the dinosaurs
- Fine motor development through tool manipulation
- Cause and effect understanding (warm water melts ice faster than hammering)
- Sensory exploration with temperature and texture changes
- Patience and persistence (those dinos don’t come out instantly)
Safety notes: Supervise closely with salt and spray bottles. Consider this an outdoor or bathroom activity unless you love mopping.
Activity variations:
- For younger toddlers (15-24 months): Use smaller ice cubes with one dinosaur each
- For older kids (3-4 years): Add multiple layers by freezing in stages, hiding “fossils” at different depths
- Winter twist: Make these during cold weather and let them melt naturally outside
- Add excavation drama with “paleontologist” dress-up (safety goggles, brushes, notebooks for “field notes”)
Budget-saving tips: Dollar store dinosaurs work perfectly. Reuse the same toys repeatedly—toddlers won’t mind one bit. Use recycled containers instead of buying special molds.
Parent sanity-saving tip: Do this right before bath time. When they’re soaked and the activity winds down, transition straight to the tub. Boom—two activities handled, one very happy toddler. 🙂
Explore more creative activities with our guide to crafting team names
Dinosaur Sensory Bin Adventure
IMO, sensory bins are the MVP of toddler activities, and adding dinosaurs takes them from great to absolutely irresistible. I’ve created probably fifty sensory bins over the years, and the dinosaur versions get the longest play sessions by far.
Image Prompt: A wide, clear plastic storage bin sits on a kitchen floor covered with a splat mat. Inside, the bin contains layers of green and brown dyed rice creating a “prehistoric landscape” with small rocks, artificial plants, and blue felt pieces representing water. A 2-year-old girl kneels beside it, her hands buried in the rice as she moves a small stegosaurus through the terrain. Several other dinosaurs are positioned throughout the bin, and measuring cups, small scoops, and toy eggs are scattered in the rice. Her expression shows complete absorption in her imaginative play. The lighting is warm and natural from a nearby window, and a few grains of rice have escaped onto the mat—realistic but contained chaos. The scene captures independent, focused play.
How to Set This Up
Materials you’ll need:
- Large plastic storage bin with high sides (at least 4-6 inches deep)
- Base material: 3-4 cups dried rice, pasta, dried beans, sand, or kinetic sand
- Food coloring or liquid watercolors (if dyeing rice/pasta)
- 6-10 plastic dinosaurs in various sizes
- Scene elements: rocks, sticks, plastic plants, blue felt or fabric scraps for “water”
- Tools: measuring cups, scoops, tongs, small containers
- Splat mat or old shower curtain underneath
- Optional: dinosaur eggs (plastic Easter eggs work), small toy trees, figurines of other prehistoric creatures
Step-by-step setup:
- Dye your rice the night before: place 1 cup rice in a ziplock bag with 1 tablespoon vinegar and 5-8 drops food coloring. Shake vigorously, spread on a baking sheet, and let dry overnight. (Or skip this and use plain rice—your toddler won’t care.)
- Pour base material into your bin
- Add rocks, plants, and other landscape elements
- Hide some dinosaurs partially buried, place others on top
- Set bin on protective mat in an easy-to-supervise area
- Introduce tools and let exploration begin
Age appropriateness: 18 months to 5 years (monitor younger toddlers closely to prevent eating non-food items)
Time commitment: 15-20 minutes setup (less if using plain materials), 30-60 minutes of play, 10 minutes cleanup
Mess level: Medium (rice will escape, but it sweeps up easily)
Developmental benefits:
- Fine motor skills through scooping, pouring, and pincer grasp with tongs
- Sensory processing with various textures and materials
- Imaginative play and storytelling as they create dinosaur adventures
- Mathematical thinking through measuring, comparing sizes, and counting
- Emotional regulation—sensory bins are incredibly calming for many toddlers
Safety notes: Supervise closely with small items. Choose age-appropriate base materials (larger items for younger toddlers who still mouth things). Keep bins at floor level to prevent tipping.
Activity variations:
- Arctic dino adventure: Use white rice or cotton balls with “ice” (clear gems) and winter dinosaurs
- Volcanic landscape: Add red and orange rice, black beans for “lava rocks,” and a small toy volcano
- Dino dig site: Use brown rice, sand, and partially buried “fossils” (painted pasta or bones)
- Swamp scene: Add blue-dyed rice for water, green for vegetation, and include aquatic dinosaurs
- Rainbow dino world: Use multiple colors of rice in separate sections
Budget-saving tips: Rice is incredibly cheap and reusable. Store your dyed rice in ziplock bags and rotate different bin themes. Use rocks from your yard instead of buying decorative ones. Raid your recycling for containers and scoops.
Parent sanity-saving tip: Keep a handheld vacuum nearby. When play is done, let your toddler “help” vacuum up escaped rice—mine thinks this is a whole separate activity and will happily clean up their own mess.
Find inspiration for group activities with our collection of creative group name ideas
Dinosaur Footprint Painting Stomp
If your toddler loves getting messy and making noise (so, all toddlers), this activity is pure gold. It combines art, gross motor movement, and the sheer joy of stomping around like a T-Rex.
Image Prompt: A 3-year-old boy stands on a large sheet of butcher paper spread across a backyard patio, wearing only a diaper and a huge smile. His feet are covered in green washable paint, and he’s mid-stomp, creating dinosaur footprints across the paper. His arms are raised and bent like tiny T-Rex arms, and his mouth is open in a gleeful roar. Several colors of paint in shallow trays sit at the edge of the paper—green, brown, orange, and purple. Previously made footprints trail across the paper in chaotic patterns. A parent’s legs are visible at the edge of the frame, and a garden hose is coiled nearby for inevitable cleanup. The scene radiates pure toddler joy and creative freedom. Bright natural sunlight, summer afternoon vibe.
How to Set This Up
Materials you’ll need:
- Large roll of butcher paper or several taped-together pieces of poster board (alternatively: old cardboard boxes opened flat)
- Washable tempera paint in dinosaur colors (green, brown, orange, purple)
- Shallow paint trays or disposable plates
- Hose or large bucket of soapy water for foot cleanup
- Old towels
- Optional: dinosaur foot templates to trace on feet first, sponges cut into foot shapes for mess-averse kids
- Camera for capturing the chaos (you’ll want photos, trust me)
Step-by-step setup:
- Spread paper on grass, patio, or driveway (secure corners with rocks or tape)
- Pour paint into shallow trays—just enough to coat feet without deep puddles
- Strip kiddo down to diaper or bathing suit (clothing will absolutely get paint on it)
- Demonstrate “dinosaur stomping” and stepping in paint
- Stand back and let the magic (chaos) happen
- Keep hose or cleanup station ready for when they’re done
Age appropriateness: 18 months to 4 years (younger toddlers may need hand-holding for balance)
Time commitment: 10 minutes setup, 15-30 minutes of stomping joy, 15 minutes cleanup (of both child and area)
Mess level: High (but outdoors and washable, so manageable)
Developmental benefits:
- Gross motor development through stomping, balancing, and coordinated movement
- Body awareness and spatial understanding
- Sensory exploration with paint texture between toes
- Creative expression and cause-effect understanding (I stomp, colors appear)
- Following directions (stomp here, make big steps, try different colors)
Safety notes: Supervise on potentially slippery painted surfaces. Use non-toxic washable paint only. Keep paint away from faces and mouths. Consider doing this right before bath/pool time.
Activity variations:
- Dino dance party: Play music and let them dance-stomp in paint
- Handprint dinosaurs: Use hands instead of feet to create different dinosaur shapes
- Rainbow tracks: Set up paint stations in a line and have them walk through creating rainbow trails
- Mess-free version: Put paint in a large ziplock bag, tape to floor, and let them step on it to squish colors around (no actual mess!)
- Size comparison: Make parent footprints too—talk about big dinosaurs vs. little dinosaurs
Budget-saving tips: Washable tempera paint is cheap at dollar stores. Use old boxes instead of buying paper. Let the painted creation dry and use it as wrapping paper for grandparent gifts.
Parent sanity-saving tip: Set up a “cleaning station” finish line—when they’re done stomping, they step into soapy water bucket, then onto towel. Makes cleanup systematic instead of chasing a paint-covered toddler around the yard.
Discover more outdoor activity ideas with our guide to adventure group names
DIY Dinosaur Eggs Hatching Activity
There’s something deeply satisfying about watching toddlers carefully peel away plaster or salt dough to reveal a hidden dinosaur. This activity requires patience (well, toddler-level patience), and the payoff is SO worth it.
Image Prompt: A 2.5-year-old girl sits at a small wooden table with three homemade “dinosaur eggs”—lumpy, white plaster ovals about the size of tennis balls. She’s using a small plastic spoon to carefully chip away at one egg, her tongue poking out slightly in concentration. One egg beside her is partially opened, revealing a small green T-Rex peeking out. The table is covered with a plastic tablecloth scattered with white plaster chips. A small bowl of water and paintbrush sit nearby for softening stubborn spots. Natural window light creates a calm, focused atmosphere. Her expression shows determined focus mixed with excitement. The scene captures the perfect blend of fine motor challenge and discovery joy.
How to Set This Up
Materials you’ll need:
- Small plastic dinosaurs (one per egg)
- Plaster of Paris OR homemade salt dough (1 cup salt, 2 cups flour, 1 cup water)
- Balloons (for plaster method) OR plastic Easter eggs (for salt dough method)
- Mixing bowl and spoon
- “Excavation” tools: plastic spoons, wooden popsicle sticks, small paintbrushes, water in spray bottle
- Tray or bin to contain the mess
- Optional: food coloring to tint eggs different colors
Step-by-step setup (plaster method):
- Stretch balloon opening and insert small dinosaur
- Mix plaster according to package directions (or make salt dough)
- Carefully pour/spoon mixture into balloon around dinosaur
- Tie balloon closed and let set 24-48 hours
- Once completely hardened, cut away balloon
- Present “eggs” to your toddler with excavation tools
Step-by-step setup (salt dough method—easier for younger kids):
- Make salt dough by mixing ingredients until smooth
- Press dough into plastic Easter egg halves with dinosaur inside
- Close egg and let dry 2-3 days (or bake at 200°F for 2-3 hours)
- Carefully remove plastic egg, leaving salt dough shell
- Present for hatching adventure
Age appropriateness: 2-5 years (younger toddlers need softer salt dough eggs; older kids can handle plaster)
Time commitment: 20 minutes prep (plus 1-3 days drying time), 20-45 minutes hatching play, 5 minutes cleanup
Mess level: Medium (dusty chips, but contained in a bin)
Developmental benefits:
- Fine motor precision through careful chipping and brushing
- Patience and delayed gratification (eggs take time to open)
- Problem-solving (figuring out which tools work best where)
- Hand-eye coordination and controlled movements
- Cause and effect understanding (I chip here, egg cracks there)
Safety notes: Supervise tool use closely. Choose softer salt dough for younger toddlers who might get frustrated with hard plaster. Keep dust minimal by using water/spray bottle to dampen.
Activity variations:
- Rainbow eggs: Add different food coloring to each egg mixture
- Numbered eggs: Write numbers on eggs for a hatching countdown
- Mixed creatures: Hide other small toys—insects, ocean animals, gems
- Giant egg: Make one large egg with multiple small dinosaurs inside
- Painting first: Let kids paint dried eggs before hatching them
Budget-saving tips: Salt dough is pennies per batch. Reuse the same dinosaurs repeatedly—your toddler won’t remember they “hatched” that T-Rex last month. Skip fancy tools and use plastic utensils from takeout.
Parent sanity-saving tip: Make eggs during nap time so they’re ready when needed. Keep them as a rainy day rescue activity. The anticipation of “eggs drying” builds excitement, and the activity itself buys you at least 30 minutes of focused quiet play.
Create memorable experiences with ideas from our party name collection
Dinosaur Color Sorting & Matching Game
Not every dinosaur activity needs to be high-energy chaos (though let’s be honest, most are). This calmer activity sneaks in early math and color recognition skills while your toddler thinks they’re just organizing their dino friends.
Image Prompt: A 20-month-old toddler sits cross-legged on a soft play rug with a muffin tin placed in front of him. Each cup of the tin is lined with a different colored piece of construction paper—red, blue, green, yellow, orange, purple. Scattered around him are colorful plastic dinosaurs in matching colors. He’s carefully placing a blue triceratops into the blue cup, his little fingers showing precise pincer grasp. His face shows concentration, and several dinosaurs are already correctly sorted in their cups. Soft morning light from a nearby window, cozy homeschool vibe. The scene feels calm, educational, and developmentally appropriate—the kind of activity that happens during a younger sibling’s nap.
How to Set This Up
Materials you’ll need:
- Muffin tin (12-cup or 6-cup depending on age)
- Construction paper or cardstock in various colors
- Small plastic dinosaurs in colors matching your paper (12-20 dinosaurs)
- Optional: color dice, color flashcards, or color paint chips
- Optional: clothespins with colored dots for added fine motor challenge
Step-by-step setup:
- Cut construction paper circles to fit inside muffin cups
- Place one color in each cup
- Gather dinosaurs and spread them out
- Demonstrate sorting one dinosaur into matching cup
- Let your toddler take over (resist the urge to correct immediately—learning happens through trial and error)
Age appropriateness: 15 months to 3 years (simplify with fewer colors for younger toddlers)
Time commitment: 5 minutes setup, 10-20 minutes play, 2 minutes cleanup
Mess level: Low (contained, quiet, blessedly calm)
Developmental benefits:
- Color recognition and naming
- Fine motor precision placing dinosaurs carefully
- Sorting and categorization (early math skills)
- Visual discrimination (finding matching colors)
- Focus and concentration in a calm activity
- Sense of completion and achievement
Safety notes: Monitor younger toddlers with small dinosaurs. Choose appropriately sized toys for your child’s age and mouthing tendencies.
Activity variations:
- Size sorting: Use different sized dinosaurs instead of colors (small, medium, large cups)
- Type sorting: Sort by dinosaur species (meat-eaters vs. plant-eaters)
- Pattern play: Arrange dinosaurs in color patterns (red, blue, red, blue)
- Counting challenge: Put specific numbers in each cup (one in first cup, two in second, etc.)
- Tong practice: Use child-safe tongs to pick up and sort (excellent for developing those pre-writing muscles)
Budget-saving tips: Use an egg carton instead of a muffin tin. Don’t have colored dinosaurs? Use any small toys or objects you already own. Paint white paper circles instead of buying construction paper.
Parent sanity-saving tip: Keep this activity in a special basket and only bring it out when you need 15 minutes of quiet focus time (during phone calls, cooking dinner, nursing a baby). The novelty factor keeps toddlers engaged longer. BTW, this activity grows with your child—my 4-year-old still enjoys it with more complex sorting rules.
Explore more learning activities with our educational team names collection
Dinosaur Swamp Slime Sensory Play
Let’s talk slime. Toddlers are obsessed with it, and honestly, it’s incredibly beneficial for sensory processing and stress relief (for both kids and adults—no judgment if you squish it yourself). Adding dinosaurs makes it even more irresistible.
Image Prompt: A shallow plastic tray contains vibrant green slime with swirls of brown mixed through, creating a swampy appearance. A 3-year-old boy has both hands buried wrist-deep in the slime, pulling it up in stretchy strands with a look of absolute delight. Several small plastic dinosaurs are partially submerged in the slime—some swimming through, others “stuck” waiting to be rescued. Plastic leaves and small twigs are scattered in the slime for added prehistoric texture. The tray sits on a plastic-covered table, and the child wears a smock (which is somehow still spotless while his hands are completely covered). Bright, clean lighting emphasizes the tactile, gooey fun. Pure sensory joy captured in one image.
How to Set This Up
Materials you’ll need:
- Store-bought slime OR homemade slime (4 oz clear school glue, 1/2 tablespoon baking soda, 1 tablespoon contact lens solution)
- Green food coloring or washable paint
- Brown food coloring for swamp effect
- Shallow plastic tray or bin
- 5-8 plastic dinosaurs (waterproof ones you don’t mind washing)
- Optional add-ins: plastic leaves, googly eyes, small pebbles, glitter
- Smocks or old t-shirts
- Baby wipes or damp cloth nearby
Step-by-step setup:
- Make or purchase slime (homemade is cheaper; store-bought saves time—both are fine)
- Add green food coloring and knead until evenly colored
- Add drops of brown for swampy, mucky color
- Place slime in tray and press dinosaurs into it
- Add plastic vegetation or other elements
- Set up at table and let exploration begin (with clear “slime stays in the bin” boundaries)
Age appropriateness: 2-5 years (supervise closely—slime is not for eating, though some toddlers will try)
Time commitment: 10 minutes setup (or 5 if using store-bought), 20-40 minutes play, 10 minutes cleanup
Mess level: Medium-high if rules aren’t followed; medium if contained in bin
Developmental benefits:
- Sensory exploration with unique textures
- Fine motor strengthening through squishing, pulling, and pinching
- Emotional regulation—slime play is incredibly calming
- Imaginative play creating swamp adventures
- Scientific thinking (observing how slime stretches, flows, sticks)
Safety notes: Supervise closely with slime—it’s not edible. Keep away from hair, fabric furniture, and carpets. Choose contact lens solution slime recipe for safest homemade version. Wash hands thoroughly after play.
Activity variations:
- Volcano slime: Make red and orange slime with plastic volcanoes
- Arctic slime: White or light blue slime with “ice crystals” (clear gems) and snow dinosaurs
- Glitter swamp: Add biodegradable glitter for sparkly prehistoric play
- Stretchy rescue: Challenge kids to pull dinosaurs out without breaking slime strands
- Slime science: Make batches with different textures (fluffy slime, clear slime, butter slime) and compare
Budget-saving tips: Homemade slime costs about $2 per batch. Store in airtight container and reuse for weeks. Dollar store food coloring and glue work perfectly—don’t overspend on fancy versions.
Parent sanity-saving tip: Keep baby wipes within arm’s reach before starting. When you say “slime play is done,” have kids hold hands up and wipe immediately before they touch anything. Also? Do this activity when you’re mentally prepared for potential mess—never when you’re already frazzled. Your stress level directly affects how smoothly slime play goes.
Find more sensory activity inspiration with our creative kids’ team names
Dinosaur Stomp & Count Movement Game
Some days, your toddler needs to MOVE. Like, dinosaur-level stomping, jumping, roaring movement. This active game burns energy while sneaking in counting, color recognition, and following directions—all disguised as pure chaos.
Image Prompt: A living room transformed into a dinosaur movement course. Colored paper circles (red, blue, green, yellow) are taped to the floor in a winding path. A 2.5-year-old girl mid-jump, frozen in the air between a green circle and a blue one, arms spread wide, mouth open in a gleeful roar. She’s wearing a dinosaur tail (fabric tied around her waist) and has face paint whiskers. Each circle has a number and action written on it. A parent sits on the couch in the background, calling out instructions and holding number flashcards. The room is energetic and joyful, with motion blur capturing the movement. Late afternoon indoor light, active and engaging atmosphere.
How to Set This Up
Materials you’ll need:
- 10-15 sheets of colored construction paper or cardstock
- Markers for writing numbers/actions
- Painter’s tape or masking tape (won’t damage floors)
- Optional: dinosaur costume pieces (tail, mask, face paint)
- Optional: music player for added fun
- Number cards or dice
Step-by-step setup:
- Write numbers 1-10 on colored paper circles
- Add simple actions to each: “stomp 3 times,” “roar loudly,” “jump twice,” “spin around,” “freeze like a statue”
- Create a path with papers taped to floor (straight line for beginners, winding path for challenge)
- Add “start” and “finish” markers
- Explain rules (or demonstrate—showing works better than telling with toddlers)
- Let the stomping begin!
Age appropriateness: 18 months to 4 years (simplify actions for younger toddlers)
Time commitment: 10 minutes setup, 15-30 minutes play (or until exhaustion), 5 minutes cleanup
Mess level: Low (just paper on floor)
Developmental benefits:
- Gross motor skills through jumping, stomping, balancing
- Number recognition and counting practice
- Following multi-step directions (listen, move, perform action)
- Color identification
- Body control and spatial awareness
- Energy release (crucial for indoor days)
Safety notes: Clear furniture from the play path. Ensure paper doesn’t slip on smooth floors (add tape underneath if needed). Supervise jumping, especially near furniture edges.
Activity variations:
- Simon Says Dinosaur: Play traditional Simon Says with dinosaur actions
- Musical dinosaur: Play music; when it stops, they freeze on nearest circle and do that action
- Color calling: Call out colors and they stomp to that color as fast as possible
- Quiet dinosaur: Make some circles “whisper actions” for volume control practice
- Partner play: Add a second set of circles and race siblings or parent
Budget-saving tips: Reuse the same circles repeatedly—just peel up tape and store flat. Use scrap paper or old magazines. Skip the costume pieces entirely—imagination works perfectly.
Parent sanity-saving tip: Set this up before a time when you need calm (before quiet time, before dinner when you’re cooking, before bedtime routine). Let them burn all that dinosaur energy, then transition to calmer activities. Also works brilliantly for indoor rainy days when walls are starting to close in.
Get more active play ideas from our sports team names collection
Dinosaur Play Dough Fossil Imprints
Play dough is already a toddler favorite, but add dinosaurs and suddenly it’s a paleontology lab. This activity is surprisingly calming and can keep toddlers engaged for impressive stretches of time (by toddler standards, anyway).
Image Prompt: A kitchen table covered with a silicone mat. Three balls of homemade play dough in earthy colors (brown, grey, tan) sit in front of a 3-year-old girl. She’s carefully pressing a small dinosaur foot into flattened dough, creating a fossil imprint. Her expression shows focused concentration. Surrounding her are finished “fossils”—flattened dough pieces with various dinosaur footprints, skeleton imprints, and body impressions preserved in the surface. Rolling pins, cookie cutters in dinosaur shapes, and plastic dinosaur skeletons are scattered nearby as tools. Natural kitchen lighting, peaceful and educational atmosphere. The scene captures independent, creative, fine-motor-building play.
How to Set This Up
Materials you’ll need:
- Play dough (store-bought OR homemade: 2 cups flour, 1 cup salt, 2 tablespoons cream of tartar, 2 tablespoons oil, 1.5 cups boiling water, food coloring)
- Plastic dinosaurs with textured feet/bodies
- Optional: plastic dinosaur skeletons, fossil replicas, or dinosaur bone toys
- Rolling pin or play dough tools
- Cookie cutters (dinosaur shapes if you have them)
- Plastic knife or popsicle sticks for “excavating”
- Tray or mat to contain the activity
Step-by-step setup:
- Make or set out play dough in natural “fossil” colors
- Gather dinosaurs and tools
- Demonstrate pressing dinosaur into flattened dough to create imprint
- Show how to “excavate” by cutting around fossil with tools
- Let creativity and exploration take over
Age appropriateness: 18 months to 5 years (all ages love play dough)
Time commitment: 5 minutes setup (or 10 for homemade dough), 20-45 minutes play, 5 minutes cleanup
Mess level: Low (play dough is wonderfully contained)
Developmental benefits:
- Fine motor strengthening through squishing, rolling, pressing
- Hand-eye coordination placing dinosaurs precisely
- Creativity and imagination making fossil scenes
- Pre-writing muscle development (those same hand muscles will hold pencils later)
- Pattern recognition observing how different dinosaurs make different prints
Safety notes: Supervise younger toddlers who might eat play dough (homemade salt dough tastes terrible, which helps). Keep small pieces away from mouths. Non-toxic materials only.
Activity variations:
- Fossil dig: Hide small dinosaurs in play dough and excavate with tools
- Layered fossils: Press dinosaurs at different depths to show “geological layers”
- Fossil painting: Let imprints dry overnight, then paint them with watercolors
- Dinosaur tracks: Create a path of footprints telling a dinosaur story
- Skeleton assembly: Press bones (popsicle sticks, straws) into dough to build skeletons
Budget-saving tips: Homemade play dough costs pennies and lasts months in airtight containers. Reuse the same batch over and over—just refresh with drops of water if it dries out. Skip special dinosaur tools—plastic utensils work great.
Parent sanity-saving tip: Keep a special “fossil lab” basket with play dough and dinosaurs. Rotate it in when you need quiet, focused play (during Zoom calls, while cooking, when baby is napping). The novelty of the special basket extends engagement time significantly.
Discover more creative play ideas with our arts and crafts team names
Dinosaur Shadow Matching Game
This activity combines dinosaurs with light play, which is basically toddler magic. It’s calm, educational, and has that special quality that makes toddlers whisper “whoa” with wonder.
Image Prompt: A sunny playroom with a blank wall. A small flashlight beam creates a shadow of a plastic T-Rex on the wall. A 2-year-old boy sits on the floor holding the dinosaur and flashlight, completely mesmerized by the shadow he’s creating. On the wall are taped paper cutouts of various dinosaur silhouettes—matching shapes for him to align his shadow with. He’s moving his dinosaur closer and farther from the wall, watching the shadow change size. His expression shows pure wonder and concentration. Soft afternoon sunlight streams through windows, creating additional natural shadows. The scene captures discovery learning and cause-effect exploration.
How to Set This Up
Materials you’ll need:
- Flashlight or small lamp (kid-friendly, not too hot)
- Blank wall space or large white sheet hung up
- 6-10 plastic dinosaurs with distinct shapes
- Black construction paper or cardstock
- Scissors
- Painter’s tape
- Optional: overhead projector or bright lamp for bigger shadows
Step -by-step setup:
- Trace dinosaur silhouettes onto black paper and cut out
- Tape silhouettes to wall at toddler height
- Darken room slightly (doesn’t need to be pitch black)
- Show how flashlight creates shadow when held behind dinosaur
- Challenge them to match shadow to correct silhouette
- Let experimentation and discovery happen
Age appropriateness: 2-5 years (younger toddlers enjoy watching; older kids can do matching)
Time commitment: 15 minutes setup, 15-30 minutes play, 5 minutes cleanup
Mess level: None (this is a blessedly mess-free activity)
Developmental benefits:
- Visual perception and spatial reasoning
- Problem-solving (adjusting distance to match size)
- Cause and effect (closer = bigger shadow)
- Shape recognition and matching
- Science concepts (light, shadows, how they’re created)
- Fine motor control positioning dinosaur precisely
Safety notes: Use cool LED flashlights only. Supervise closely—don’t let toddlers shine lights in eyes. Ensure lamp isn’t hot if using instead of flashlight.
Activity variations:
- Size challenge: Make silhouettes in different sizes to match
- Shadow puppet show: Create dinosaur stories with shadow movements
- Outdoor shadow play: Do this activity outside with natural sunlight
- Guess the dinosaur: Show shadow only and have them guess which dinosaur
- Mixed-up match: Use non-dinosaur silhouettes too (animals, objects) for varied challenge
Budget-saving tips: Use natural sunlight from windows instead of flashlight. Trace dinosaurs on free cardboard instead of construction paper. Skip buying new—use dinosaurs you already own.
Parent sanity-saving tip: This activity naturally encourages quiet, focused behavior (something about shadows makes kids whisper). Use it during times you need calm—before nap, when you’re trying to settle evening energy, or when you just need 20 minutes of peace.
Explore more indoor activity ideas with our list of creative group names
Dinosaur Washing Station Water Play
Combine toddlers’ love of water, dinosaurs, AND helping with “chores,” and you’ve got yourself an activity that can last surprisingly long. Plus, you end up with clean toys—that’s a parenting win right there.
Image Prompt: A sunny backyard patio setup with two large plastic bins filled with soapy water (bubbles visible on the surface). A 2.5-year-old boy kneels between the bins wearing just swim trunks, completely absorbed in scrubbing a muddy dinosaur with a small brush. His tongue pokes out in concentration as he works. One bin contains “dirty” dinosaurs covered in dirt and mud; the other has clean ones drying on a towel. Beside him are supplies: small sponges, toothbrushes, spray bottles, and a bucket of clean rinse water. Water droplets glisten on his skin and the ground around him is splattered—controlled chaos. The scene radiates summer fun and purposeful play. Golden hour lighting, joyful messiness.
How to Set This Up
Materials you’ll need:
- 2-3 plastic bins or large bowls
- Warm water
- Baby shampoo or dish soap (tearless and gentle)
- Plastic dinosaurs (deliberately get them dirty first—mud, dirt, washable paint)
- Cleaning tools: sponges, soft brushes, old toothbrushes, spray bottles
- Towels for drying
- Optional: apron or swimsuit for your toddler
- Optional: small “dinosaur spa” sign for extra fun
Step-by-step setup:
- Take dinosaurs outside and get them dirty (mud, dirt, sandbox—toddlers LOVE this part)
- Set up bins with warm soapy water
- Arrange cleaning tools within reach
- Put dirty dinosaurs in one bin
- Demonstrate washing and transferring to clean bin
- Step back and let the washing commence
Age appropriateness: 18 months to 4 years (perfect for any age that loves water)
Time commitment: 5 minutes setup, 30-60 minutes play (seriously, water play goes LONG), 10 minutes cleanup
Mess level: High (it’s water outside, so who cares—it dries)
Developmental benefits:
- Fine motor skills scrubbing, spraying, wringing sponges
- Life skills learning washing and cleaning
- Sensory exploration with water temperature, soap texture, wet vs. dry
- Responsibility and care (taking care of belongings)
- Cause and effect (scrubbing makes dirt come off)
Safety notes: Supervise around water always. Use tearless soap to avoid eye stinging. Keep this outside or in bathtub. Monitor water temperature.
Activity variations:
- Car wash: Wash toy cars, trucks, or bikes instead
- Baby doll bath: Wash baby dolls or stuffed animals (washable ones only)
- Color science: Add food coloring to demonstrate how soap breaks down colors
- Ice rescue wash: Freeze small dinosaurs in ice, then wash/melt them free
- Bubble science: Experiment with different amounts of soap to make varied bubbles
Budget-saving tips: Use regular dish soap instead of buying fancy bubble bath. Repurpose old toothbrushes and kitchen sponges. Let them wash toys you need cleaned anyway—double purpose!
Parent sanity-saving tip: Set this up during hot weather when you want them to cool down anyway. Let them end with spraying themselves with spray bottles or running through the hose. Transition straight to bath time if needed—they’re already wet and the dirt is loosened. FYI, this activity buys you serious time to sit nearby with coffee and supervise from a chair (the dream).
Find more outdoor fun with our summer activity team names
Dinosaur-Themed Obstacle Course
When your toddler has been bouncing off walls and you’re considering just opening the door and letting them run free in the neighborhood (kidding…mostly), this activity channel that energy into focused, challenging fun.
Image Prompt: A living room transformed into a dinosaur obstacle course. Couch cushions create “mountains” to climb over. A blue blanket spread on the floor represents a “lava river” to jump across. A tunnel made from a large cardboard box has dinosaur cutouts taped to it. Pool noodles are arranged as a “jungle” to weave through. A 3-year-old mid-action, jumping off cushions with arms spread wide like wings, pure joy on his face. Small plastic dinosaurs are positioned throughout as “checkpoints.” A start and finish line made with painter’s tape. The room is energetic chaos, but purposeful. Parent visible in background timing him with phone. Active, engaging, burn-that-energy atmosphere.
How to Set This Up
Materials you’ll need:
- Couch cushions, pillows, or foam mats for climbing/jumping
- Blankets or towels for “rivers” or “quicksand”
- Chairs or small furniture for crawling under
- Cardboard boxes for tunnels
- Pool noodles, cones, or stuffed animals for weaving obstacles
- Painter’s tape for start/finish lines
- Small dinosaur toys as checkpoints or obstacles to collect
- Optional: timer, whistle, or music for added excitement
Step-by-step setup:
- Clear furniture to create open floor space
- Create “stations”: climbing mountain (cushions), lava river (blanket to jump over), cave tunnel (box), jungle maze (pool noodles)
- Add dinosaurs throughout as visual markers
- Tape clear start and finish lines
- Demonstrate the course once
- Time them or let them practice repeatedly (they’ll want to)
Age appropriateness: 2-5 years (modify difficulty for age)
Time commitment: 15 minutes setup, 20-45 minutes play (they’ll want multiple rounds), 10 minutes cleanup
Mess level: Medium (furniture rearranged, cushions everywhere, but nothing actually messy)
Developmental benefits:
- Gross motor skills through climbing, jumping, crawling, balancing
- Sequential thinking (remembering course order)
- Body awareness and spatial reasoning
- Following directions and problem-solving
- Confidence building as they master challenges
- Energy burning (the main benefit for parents’ sanity)
Safety notes: Ensure all jumping surfaces are stable and low to ground. Clear sharp corners or hard furniture from tumbling zones. Supervise closely throughout. Adjust difficulty so it’s challenging but achievable—frustration ruins the fun.
Activity variations:
- Timed challenge: Race against the clock to beat personal best
- Reverse course: Complete obstacle course backward
- Dinosaur rescue: Collect dinosaurs throughout course and bring to “rescue station”
- Partner course: Race siblings or parent (modify for fairness)
- Freeze dance addition: Play music, freeze when it stops on certain stations
Budget-saving tips: Use only items you already own. Couch cushions work better than expensive foam blocks anyway. Get creative with household items—laundry baskets, painter’s tape, cardboard boxes are all free or cheap.
Parent sanity-saving tip: Take video of them completing the course. They’ll want to watch it repeatedly, which gives you another 10 minutes of quiet time. Also? Set up course, let them practice while you cook dinner. They burn energy, you accomplish tasks, everyone wins. <3
Conclusion
Here’s what I’ve learned after countless hours of dinosaur activities: your toddler doesn’t need Pinterest-perfect setups or expensive supplies. They need your presence, some basic materials, and permission to explore, learn, and yes—make some mess along the way.
These ten dinosaur activities hit the sweet spot between educational and genuinely fun, between structured and flexible, between challenging and achievable. Some days, the fossil excavation will captivate them for 45 glorious minutes. Other days, they’ll stomp through your obstacle course twice and declare they’re done. Both outcomes are completely fine.
The real magic isn’t in perfect execution or Instagram-worthy photos. It’s in those moments when your toddler roars with pure joy, carefully places a dinosaur in the correct colored cup, or discovers that warm water melts ice faster than hammering. It’s in their growing fine motor skills, expanding vocabulary (did you know a three-year-old can pronounce “pachycephalosaurus”?), and boundless imagination.
Trust your instincts about what your child needs on any given day. Need to burn energy? Go for the obstacle course or dinosaur stomp painting. Need calm focus? Try play dough fossils or shadow matching. Seeking sensory input? Slime and sensory bins are calling. Want an activity that doubles as actual cleaning? Dinosaur washing station for the win.
Most importantly, give yourself grace. The activity that works brilliantly today might flop tomorrow. Your toddler might eat the play dough, refuse to hatch the eggs, or dump the entire sensory bin on the floor (okay, that last one is pretty much guaranteed). You’re doing an incredible job providing engaging, enriching experiences for your little paleontologist. Even the “failed” activities are teaching them something.
So grab those plastic dinosaurs, embrace the chaos, and watch your toddler’s face light up. These prehistoric friends aren’t just toys—they’re tools for learning, growing, and creating memories you’ll both treasure. Now go forth and roar! 🙂
Find more inspiration for family activities with our collection of family group names

Greetings, I’m Alex – an expert in the art of naming teams, groups or brands, and businesses. With years of experience as a consultant for some of the most recognized companies out there, I want to pass on my knowledge and share tips that will help you craft an unforgettable name for your project through TeamGroupNames.Com!