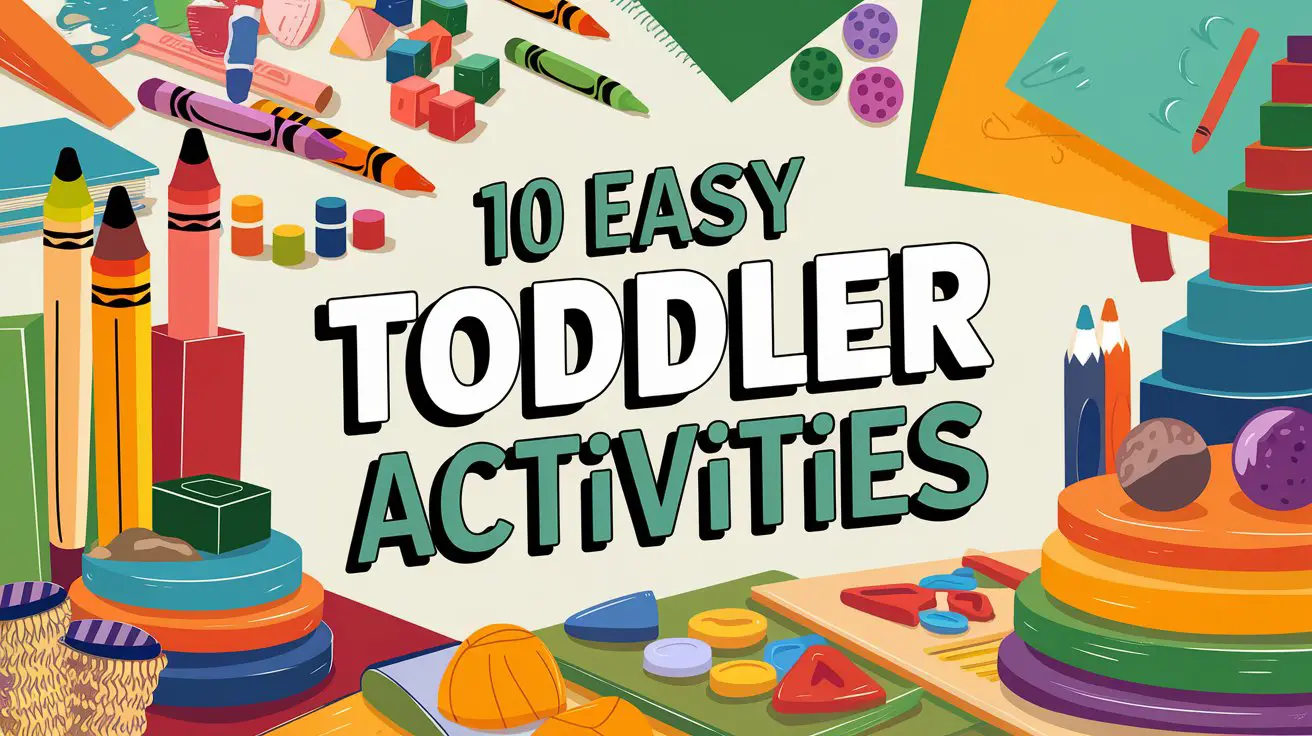
Listen, I get it. You’re staring at your energetic toddler who’s been awake for what feels like seventeen hours, and you’re fresh out of ideas.
Your phone is dying, screen time guilt is creeping in, and you’re wondering how it’s only 10 AM. Been there. Done that. Bought the overpriced sensory toys that got ignored after three minutes.
Here’s the thing about toddler activities—they don’t need to be elaborate, Instagram-worthy productions.
Some of my kid’s favorite moments have involved a cardboard box and wooden spoons, while my carefully planned “educational experiences” flopped spectacularly.
The activities I’m sharing actually work in real life, with real toddlers who have the attention span of goldfish (no offense to goldfish). They’re mess-manageable, setup-simple, and won’t require you to mortgage your house for supplies.
Whether you need something to fill a rainy Tuesday afternoon or you’re desperately seeking five minutes of peace to drink lukewarm coffee, these activities have saved my sanity more times than I can count. Let’s jump in!
Sensory Bins: The Ultimate Distraction Tool
Image Prompt: A cheerful toddler around 20 months old kneels beside a large, clear plastic storage bin filled with dried chickpeas on a kitchen floor. She’s using colorful measuring cups and spoons to scoop and pour, completely absorbed in the activity. Small plastic farm animals are partially buried in the chickpeas. The toddler wears comfortable play clothes with a few chickpeas stuck to her shirt. Natural afternoon light streams through a nearby window. A large beach towel is spread underneath the bin to catch spills. Mom’s legs are visible in the background, standing at the counter. The scene feels calm and focused, capturing that magical moment when a toddler is genuinely engaged.
Sensory bins are basically magic. Fill a container with something scoopable, add some tools and toys, and watch your LO get lost in exploration. The best part? You can create them with stuff you already have.
How to Set This Up
Materials needed:
- Large plastic bin or storage container with sides (the deeper, the better for containing mess)
- Base material: dried chickpeas, rice, oats, pasta, water beads, or even shredded paper
- Scooping tools: measuring cups, spoons, small containers, funnels
- Hidden treasures: small toys, plastic animals, pom-poms, or themed objects
- Large towel, shower curtain, or washable mat for underneath
Setup instructions:
- Spread your protective layer on the floor in an easy-to-clean area
- Fill your bin about 1/3 full with your chosen base material
- Hide small toys or objects throughout for discovery
- Place scooping tools inside or nearby
- Set your toddler up and let them explore (with supervision)
Age appropriateness: 18 months-4 years (younger toddlers need closer supervision and larger objects to prevent choking)
Time commitment: 5 minutes setup, 15-30 minutes play time, 5-10 minutes cleanup
Mess level: Medium (chickpeas will migrate everywhere, but they sweep up easily)
Developmental benefits: Fine motor skills, hand-eye coordination, sensory exploration, concentration, cause-and-effect learning, imaginative play
Safety notes: Always supervise sensory play. Choose materials appropriate for your child’s age—avoid small items with kids who still mouth everything. Water beads are a choking hazard for young toddlers.
Variations: Theme your bins! Construction site (kinetic sand + toy trucks), ocean (water + blue food coloring + sea creatures), farm (dried corn + farm animals), rainbow (dyed rice in different colors)
Budget tip: Skip the fancy store-bought sensory materials. Dried beans and pasta from your pantry work perfectly and cost practically nothing.
Cleanup hack: Do sensory bins outside when weather permits, or contain the activity in a baby pool or large cardboard box for easier cleanup.
For exploring different creative approaches, check out these art business name ideas if you’re considering turning your toddler activity planning into something bigger.
Water Play: Because Toddlers Are Basically Fish
Image Prompt: A grinning toddler boy about 2.5 years old stands at a small outdoor water table in a sunny backyard. He’s wearing only a swim diaper and has water droplets glistening on his skin. His hands are submerged in the water as he pours from a plastic pitcher into various floating cups and containers. Small plastic boats, measuring spoons, and a turkey baster are scattered around the table. His expression shows pure joy and fascination. Water puddles gather on the ground around the table. The background shows green grass and a wooden fence. The image captures the perfect summer afternoon activity—simple, engaging, and delightfully messy.
Honestly? Water play might be the most reliable activity in my parenting toolkit. I’ve never met a toddler who doesn’t lose their mind with happiness over water. You don’t need a fancy water table—a large plastic bin, baby pool, or even your bathroom sink works perfectly.
How to Set This Up
Materials needed:
- Water source: water table, large plastic bin, baby pool, bathtub, or sink
- Lukewarm water (test temperature—toddlers are sensitive to cold)
- Pouring tools: plastic cups, measuring cups, small pitchers, funnels, squeeze bottles
- Floating toys: boats, rubber ducks, plastic containers, sponges
- Optional add-ins: bubbles (dish soap), food coloring, ice cubes, water-safe toys
- Towels for drying off (you’ll need several)
Setup instructions:
- Choose your location—outside is ideal but bathrooms work too
- Fill your container with 2-3 inches of water (enough to play, not enough to be unsafe)
- Add all pouring tools and floating objects
- Strip your toddler down to a diaper or swimsuit (trust me on this)
- Stay close—water play requires constant supervision
- Embrace the splashing
Age appropriateness: 12 months-5 years (adjust depth and tools based on age)
Time commitment: 5 minutes setup, 20-45 minutes play time (they’ll stay engaged), 10 minutes cleanup and toddler drying
Mess level: High (it’s water—everything will be wet, including you)
Developmental benefits: Hand-eye coordination, understanding volume and measurement, sensory exploration, cause-and-effect learning, fine motor skills, temperature awareness
Safety notes: NEVER leave a toddler unattended around water, even shallow water. Drowning happens silently and quickly. Stay within arm’s reach at all times.
Variations: Add bubbles for extra excitement, freeze small toys in ice blocks for a discovery activity, use food coloring to teach color mixing, add kitchen tools like whisks and ladles for pretend cooking
Budget tip: Skip expensive water tables. A $5 plastic storage bin from the dollar store works identically.
Parent survival tip: Do water play before bath time to kill two birds with one stone, or outside on hot days when everyone (including you) needs cooling off.
Sticker Art: Low Effort, High Reward
Image Prompt: A focused toddler girl around 18 months old sits in a high chair at a dining table, carefully placing colorful dot stickers onto a large piece of white paper. Her tongue sticks out slightly in concentration. Sheets of stickers in various bright colors are scattered on the table, with some stuck to her fingers and shirt. The paper shows a random but enthusiastic pattern of stickers in reds, blues, yellows, and greens. Natural morning light illuminates the scene from a nearby window. Mom’s hand is visible at the edge of the frame, pointing to an empty space on the paper with gentle encouragement. The atmosphere feels calm and creative, capturing that sweet moment of independent toddler focus.
Let me tell you about sticker activities—they’re criminally underrated. My daughter once spent 40 minutes (FORTY MINUTES!) putting stickers on paper, peeling them off, and repositioning them. It was glorious.
How to Set This Up
Materials needed:
- Large sheet of paper or cardboard (bigger is better—gives them space to work)
- Dot stickers or any easy-to-peel stickers (find them at dollar stores, office supply stores, or online)
- High chair or table with washable surface
- Optional: markers or crayons for decorating around stickers
Setup instructions:
- Tape or place paper on table/high chair tray to prevent sliding
- Peel the first few stickers and stick them lightly to the edge of the paper to demonstrate
- Show your toddler how to peel and stick
- Let them go wild with placement
- Resist the urge to “fix” their placement—this is their art!
Age appropriateness: 15 months-3 years (younger toddlers need easier-to-peel stickers)
Time commitment: 2 minutes setup, 10-40 minutes play time (seriously depends on the kid and day), 2 minutes cleanup
Mess level: Low (stickers might end up on furniture, but they peel off easily)
Developmental benefits: Fine motor skills (peeling strengthens finger muscles), hand-eye coordination, color recognition, spatial awareness, patience, concentration, creative expression
Safety notes: Supervise younger toddlers who might try eating stickers. Choose large stickers for kids under 2.
Variations: Create themed sticker scenes (farm animals on green paper for a meadow, vehicle stickers on gray paper for roads), use contact paper sticky-side-up for a different peeling challenge, add stickers to cardboard boxes for 3D art
Budget tip: Dollar stores sell massive sheets of dot stickers incredibly cheaply. Stock up!
Bonus use: Keep a sticker sheet in your diaper bag for restaurant waits, waiting rooms, or desperate moments.
If you’re thinking about turning your creative activities into something more, these creative business name ideas might inspire you.
Tape and Go: The Zero-Prep Wonder
Image Prompt: A curious toddler boy around 2 years old crouches on a hardwood floor, intensely focused on pulling colorful washi tape strips off the floor. Multiple pieces of tape in different colors and patterns create a crisscross design across the floor space. Some tape strips are peeled halfway up, others remain flat. Small toy cars are positioned nearby, ready to “drive” on the tape roads. The toddler wears soft play clothes and has one piece of tape stuck to his hand. Bright afternoon sunlight creates interesting shadows across the taped floor. The scene feels playful and exploratory, showing how simple materials create engaging play.
This activity is my secret weapon for “I need ten minutes to answer this work email” moments. All you need is painter’s tape or washi tape and a floor. That’s it. I’m not kidding.
How to Set This Up
Materials needed:
- Painter’s tape or colorful washi tape (one roll minimum, multiple colors are more fun)
- Clean, smooth floor (hardwood or tile works best)
- Optional: small toy cars, stuffed animals, or action figures to “interact” with the tape design
Setup instructions:
- Tear or cut strips of tape in various lengths
- Stick them to the floor in patterns—lines, roads, geometric shapes, a simple maze, or random designs
- Show your toddler how to peel tape up and stick it elsewhere
- Encourage them to walk along tape lines, drive cars on tape roads, or create their own designs
- Let them take the lead
Age appropriateness: 18 months-4 years (younger toddlers focus on peeling, older kids create elaborate designs)
Time commitment: 3-5 minutes setup (or 30 seconds if you’re just tossing down random strips), 15-30 minutes play time, 5 minutes cleanup
Mess level: None (tape peels up cleanly from most floors—test first on delicate surfaces)
Developmental benefits: Fine motor skills, gross motor skills (walking along lines), problem-solving, spatial reasoning, creativity, balance and coordination
Safety notes: Avoid slippery tape on smooth floors where toddlers might slide. Test tape on your flooring first to ensure it doesn’t leave residue.
Variations: Create a hopscotch grid, make parking spaces for toy cars, design a balance beam line to walk across, build a giant spider web to throw pom-poms at, create letter or number shapes
Budget tip: Painter’s tape from hardware stores is incredibly cheap and lasts forever.
Pro tip: Let your toddler help you pull up the tape when playtime ends—that’s bonus fine motor practice and they love “helping.”
Kitchen Raid: Pots, Pans, and Pure Joy
Image Prompt: A delighted toddler around 15 months old sits on a clean kitchen floor surrounded by various pots, pans, plastic containers with lids, wooden spoons, and metal mixing bowls. She’s banging enthusiastically on an overturned stockpot with a wooden spoon, mouth open in a huge smile. More kitchen utensils are scattered around her—spatulas, measuring cups, and plastic storage containers. The kitchen cabinets behind her are open, showing where the “treasures” came from. Natural kitchen lighting illuminates the scene. The image captures pure toddler joy in making noise and exploring everyday objects. The chaos feels happy rather than overwhelming.
Real talk: your kitchen cabinets contain better toys than 90% of what you bought at the toy store. Give your toddler access to safe kitchen items and watch the magic happen.
How to Set This Up
Materials needed:
- Lower kitchen cabinets (dedicate one to toddler-safe items)
- Pots and pans of various sizes
- Plastic containers with lids (Tupperware, storage containers)
- Wooden spoons, plastic spatulas, measuring cups
- Metal mixing bowls (for excellent noise-making)
- Silicone muffin tins, pot holders, dish towels
- Optional: plastic pitcher and cups for pretend pouring
Setup instructions:
- Clear out one lower cabinet and make it the “toddler cabinet”
- Fill it with safe, unbreakable kitchen items
- Show your toddler which cabinet is theirs
- Let them pull everything out, stack, nest, bang, and explore
- Join them occasionally for pretend cooking together
Age appropriateness: 9 months-3 years (babies love exploring, older toddlers engage in pretend play)
Time commitment: 15 minutes one-time setup, unlimited play time whenever they want, 5-10 minutes cleanup (or have them “help” put things away)
Mess level: Low to medium (items will be scattered, but nothing breaks or stains)
Developmental benefits: Cause-and-effect understanding, problem-solving (nesting containers), gross and fine motor skills, auditory exploration (different sounds from different materials), independence, pretend play, spatial reasoning
Safety notes: Remove anything sharp, breakable, or with small detachable parts. Avoid glass, sharp-edged items, or anything they could get stuck on their head. Check items regularly for wear.
Variations: Add play food for restaurant games, include measuring cups and spoons for pretend baking, provide a small pitcher of water (outside!) for “cooking,” hide small toys in containers for discovery games
Budget tip: This costs exactly $0 because you already own everything.
Sanity-saving tip: Having a designated toddler cabinet means they can independently access entertainment while you cook dinner. Game changer.
For more ideas on organizing creative spaces for kids, explore these gift shop names for inspiration on how to present activities attractively.
Cardboard Box Kingdom: Every Toddler’s Dream
Image Prompt: A thrilled toddler boy around 2.5 years old sits inside a large cardboard box in a bright living room. He’s peeking through a hand-cut window in the box side, grinning widely. The box has simple decorations—scribbled crayon designs and a few stickers on the outside. More boxes in various sizes are scattered nearby, creating a little cardboard city. A small stuffed animal sits beside him inside the box. Natural light from a nearby window illuminates the scene. The toddler’s joy is palpable—this simple box is pure magic to him. The living room furniture is visible in soft focus in the background, creating a cozy, lived-in feeling.
I will never understand why we spend money on toys when cardboard boxes exist. My son once played with an Amazon box for three days straight, turning it into a car, house, cave, boat, and “rocket ship to the dinosaur planet.”
How to Set This Up
Materials needed:
- Large cardboard box (appliance boxes are gold, but any decent-sized box works)
- Scissors or box cutter for adult cutting
- Optional decorations: crayons, markers, stickers, paint, construction paper
- Optional add-ons: flashlight, blanket for roof, stuffed animals for “passengers”
Setup instructions:
- Find or save a large cardboard box (furniture deliveries, appliance purchases, or ask stores)
- Cut out a door and windows using your box cutter (adults only!)
- Let your toddler decorate the outside with crayons, stickers, or markers
- Suggest what it could be—house, car, spaceship, fort—or let their imagination lead
- Add blankets inside for coziness
- Let them play independently or join their pretend world
Age appropriateness: 18 months-5+ years (appeal lasts surprisingly long)
Time commitment: 10-15 minutes adult prep (cutting), 30 minutes to several hours of play (they’ll come back to it repeatedly), 2 minutes cleanup (or days if you leave it up)
Mess level: Low (boxes contain the play, though decorating might get messy)
Developmental benefits: Imaginative play, gross motor skills (climbing in and out), spatial awareness, problem-solving, language development (narrating their play), independence, creativity
Safety notes: Ensure all cut edges are smooth. Avoid staples or sharp corners. Supervise if your toddler is still very young or tends to climb recklessly.
Variations: Connect multiple boxes with cut doorways for a box tunnel, create a “drive-through” restaurant with two windows, make a “reading nook” with pillows and books inside, transform it into a puppet theater with a curtain
Budget tip: Cardboard boxes are free! Ask furniture stores, appliance stores, or check your neighborhood buy-nothing groups.
Real-life note: These boxes will eventually get destroyed, and that’s okay. The play value before destruction is 100% worth it. When it gets too beat up, recycle it and start fresh.
Color Sorting: Sneaky Learning Disguised as Fun
Image Prompt: A concentrated toddler girl around 22 months old sits cross-legged on a soft rug, sorting colorful pom-poms into three muffin tins. Each muffin tin section is lined with colored paper—red, blue, and yellow. The toddler carefully holds a blue pom-pom between her thumb and forefinger, preparing to drop it into the correct blue section. Her expression shows intense focus. More pom-poms in various colors are scattered on the rug around her. A small basket of mixed pom-poms sits nearby. Morning sunlight streams through a window, creating a warm, peaceful learning atmosphere. The image captures the beauty of simple, educational play.
This activity makes me feel like a genius parent because it’s educational, but my daughter thinks it’s just playing with fluffy pom-poms. Win-win.
How to Set This Up
Materials needed:
- Pom-poms in 3-4 bright colors (craft stores or online)
- Sorting containers: muffin tin, ice cube tray, small bowls, or plastic cups
- Colored paper or tape to mark each container with a color
- Kitchen tongs or large tweezers (optional, for advanced fine motor challenge)
- Large bowl or basket for storing mixed pom-poms
Setup instructions:
- Place colored paper in bottom of each container section or tape colored paper next to bowls
- Mix all pom-poms together in one bowl
- Show your toddler how to match colors: “Red pom-pom goes in the red cup!”
- Demonstrate placing a few pom-poms correctly
- Let them take over sorting
- Celebrate their success with enthusiasm
Age appropriateness: 18 months-3 years (younger kids just enjoy transferring, older kids actually sort by color)
Time commitment: 5 minutes setup, 10-25 minutes play time, 3 minutes cleanup (toss everything back in one container)
Mess level: Low (pom-poms are easy to pick up)
Developmental benefits: Color recognition, matching skills, fine motor skills, hand-eye coordination, concentration, pattern recognition, cognitive development, following instructions
Safety notes: Supervise young toddlers who still mouth objects—pom-poms are soft but shouldn’t be eaten. Choose larger pom-poms for younger kids.
Variations: Sort other items (toy cars by color, plastic animals by type, blocks by shape), use tongs for grabbing practice, hide pom-poms around the room for a color scavenger hunt, sort by size instead of color
Budget tip: Buy pom-poms in bulk online—a giant bag costs $10 and lasts forever. You can also use colored paper balls, plastic Easter eggs, or building blocks.
Extension idea: Once colors are mastered, sort by size (big vs. small) or introduce patterns (red, blue, red, blue).
Looking for ways to organize all these activity supplies? Check out these gift basket business name ideas for inspiration on storage solutions.
Dance Party: The Energy Burner
Image Prompt: Two energetic toddlers—one around 18 months, one about 3 years old—dance enthusiastically in a living room with hardwood floors. The older toddler has both arms raised in the air, spinning around with a huge smile. The younger one bounces up and down with pure joy, still a bit wobbly on their feet. Both wear comfortable play clothes. A phone or small speaker sits on a side table, presumably playing music. The living room furniture is pushed slightly back, creating a safe dance floor. Afternoon sunlight streams through windows. Motion blur in the image suggests active movement. The scene radiates pure, uninhibited childhood joy and energy release.
Some days, your toddler has so much energy that gentle activities won’t cut it. Enter: the impromptu dance party. No setup required, just music and willingness to look ridiculous.
How to Set This Up
Materials needed:
- Music source: phone, tablet, smart speaker, or old-fashioned radio
- Safe open space with enough room for movement
- Optional: scarves or ribbons for waving, musical instruments, disco light or flashlight
Setup instructions:
- Clear away any furniture or obstacles from your dance space
- Queue up kid-friendly, upbeat music (or honestly, whatever you all enjoy)
- Turn up the volume (within reasonable limits for your neighbors)
- Start dancing like no one’s watching (because toddlers have no judgment)
- Encourage your toddler to copy your moves or invent their own
- Try different dance styles: jumping, spinning, marching, wiggling, freezing when music stops
Age appropriateness: 12 months-5+ years (babies can bounce in your arms, older kids choreograph routines)
Time commitment: Zero setup, 10-30 minutes play time (great energy burner), zero cleanup
Mess level: None (unless you count the mess of scattered couch cushions used as “stages”)
Developmental benefits: Gross motor skills, coordination, rhythm and musicality, emotional expression, cardiovascular fitness, listening skills (for freeze dance), self-confidence, joy and stress relief
Safety notes: Ensure the dance space is free of sharp corners or tripping hazards. Remind enthusiastic dancers to watch where they’re jumping/spinning.
Variations: Play freeze dance (stop when music stops), add props like scarves or stuffed animals to dance with, create a “concert” with toy instruments, teach specific moves (the wheels on the bus, head-shoulders-knees-toes), dim lights and use a flashlight for disco effect
Budget tip: This activity is completely free. Use streaming services, YouTube, or dust off old CDs.
Parent survival tip: Dance parties work brilliantly before bath time (they’re already sweaty) or before quiet time (burn that energy!). Plus, dancing with your kid is genuinely fun and counts as your workout for the day. 🙂
Playdough Magic: The Classic That Never Gets Old
Image Prompt: A focused toddler around 2 years old sits at a small table covered with a plastic tablecloth, working intently with bright blue playdough. Cookie cutters in various shapes are scattered around—stars, circles, animals. The toddler uses a plastic rolling pin to flatten the dough, tongue poking out in concentration. Small playdough “creations”—lumpy animals and abstract shapes—are displayed proudly nearby. The toddler’s hands and the table are covered in bits of playdough. A parent sits beside them, working on their own playdough creation, modeling the activity. Natural afternoon light creates a warm, creative atmosphere. The scene feels calm and focused, showing the meditative quality of playdough play.
Playdough is the MVP of toddler activities. It’s sensory, creative, skill-building, and quiet. QUIET. That alone makes it worth its weight in gold.
How to Set This Up
Materials needed:
- Playdough (store-bought or homemade—recipe below!)
- Play surface: plastic tablecloth, silicone mat, or cookie sheet
- Tools: plastic cookie cutters, rolling pin, plastic knives, craft sticks, garlic press
- Optional add-ins: googly eyes, beads, small toys to press into dough
- Airtight container for storage
Setup instructions:
- Cover your table or work surface with plastic tablecloth (cleanup helper)
- Give your toddler a ball of playdough to start exploring
- Introduce tools one at a time to avoid overwhelm
- Show them how to roll, press, cut, and create
- Sit with them initially, modeling different techniques
- Let their creativity guide the play
Age appropriateness: 18 months-5+ years (supervise younger toddlers closely)
Time commitment: 5 minutes setup, 20-45 minutes play time (surprising focus!), 5-10 minutes cleanup
Mess level: Medium (playdough bits stick to things, but they vacuum up or pick off easily once dry)
Developmental benefits: Fine motor skills (squishing and rolling strengthens hand muscles needed for writing), creativity, sensory exploration, hand-eye coordination, focus and concentration, emotional regulation (calming activity)
Safety notes: Commercial playdough is salty and non-toxic but shouldn’t be eaten in large amounts. Homemade playdough contains flour and salt—avoid if allergies are present. Supervise young toddlers who might still mouth play materials. Watch for small detached pieces that could be choking hazards.
Variations: Make homemade scented playdough (add essential oils or vanilla extract), create playdough “cakes” and “cookies” for pretend bakery, hide small toys inside for discovery, freeze playdough for different sensory experience, add glitter or food coloring for extra appeal
Simple Homemade Playdough Recipe: Mix 2 cups flour, 1 cup salt, 2 tablespoons cream of tartar, 2 tablespoons oil, 2 cups boiling water, food coloring. Stir until combined. Knead when cool enough. Store in airtight container.
Budget tip: Homemade playdough costs about $1 per batch and works exactly like store-bought. It’s also a fun activity to make together!
Parent sanity note: Keep playdough contained to one area. Set clear rules about keeping it on the table (good luck—I’m still working on this rule at my house).
For more creative business ideas that could incorporate play-based learning, check out these preschool name ideas.**
Stuffed Animal Tea Party: Imagination Station
Image Prompt: A sweet toddler girl around 2.5 years old sits on the floor in her bedroom, hosting an elaborate tea party for her stuffed animals. Five or six stuffed animals—bears, rabbits, a dinosaur—are arranged in a circle. Small plastic plates and cups are placed in front of each animal. The toddler carefully “pours” imaginary tea from a toy teapot into a cup, her expression serious and focused on her hosting duties. A small blanket spread on the floor serves as the “picnic area.” Natural light from a window illuminates the scene. The toddler’s face shows pure imagination at work—she’s completely absorbed in her pretend world. The atmosphere feels gentle, quiet, and creatively rich.
Imaginative play is where toddlers really shine, and stuffed animal tea parties require zero prep but provide maximum pretend play opportunities.
How to Set This Up
Materials needed:
- Stuffed animals (whatever your toddler already loves)
- Play dishes: plastic plates, cups, teapot, utensils (toy kitchen sets or old plastic dishware)
- Blanket or towel for picnic setup
- Optional: play food, real snacks (crackers, apple slices), napkins, tablecloth
- Optional: dress-up items like hats or play jewelry for “fancy” tea parties
Setup instructions:
- Spread out blanket or towel on floor as the “tea party area”
- Help your toddler arrange stuffed animals in a circle
- Set out plates and cups in front of each guest
- Provide the teapot and pretend food
- Model pretend pouring and serving
- Ask questions: “What would Teddy like to eat?” “Is Bunny thirsty?”
- Let your toddler take the lead as host
Age appropriateness: 18 months-4 years (younger kids love serving, older kids create complex narratives)
Time commitment: 5 minutes setup, 15-40 minutes play time (great quiet time activity), 5 minutes cleanup
Mess level: Low (unless you include real snacks—then medium)
Developmental benefits: Imaginative play, language development (narrating stories), social-emotional learning (caring for others), fine motor skills (pouring, serving), sequencing and routine understanding, empathy development
Safety notes: If using real food, supervise to prevent choking. Ensure play dishes are toddler-safe with no sharp edges.
Variations: Have a picnic outside with real snacks, create a restaurant instead of tea party, include dolls or action figures, add dress-up clothes for fancy dining, rotate which stuffed animal is the “host,” create a “menu” with pictures
Budget tip: Use items you already own. Plastic storage containers work as dishes if you don’t have a play kitchen set.
Participation tip: Join occasionally as a “guest” at the tea party. Being served by your solemn, serious toddler is absolutely delightful. Accept their imaginary offerings graciously!
The Beautiful Chaos of Simple Play
Here’s what I’ve learned after countless activity attempts, Pinterest fails, and surprise successes: toddlers don’t need elaborate setups or expensive supplies. They need time, space, and a few simple materials to explore. The activities that work best are usually the simplest ones—things that let them lead, create, and make (controlled) messes.
Some days, activities will be a hit for 45 minutes. Other days, your carefully planned sensory bin will be ignored after 90 seconds while they play with the empty container instead. That’s toddlerhood. They’re unpredictable, gloriously messy, and learning constantly—even when it doesn’t look like “learning” to us.
The most important thing? You don’t need to be a Pinterest mom doing color-coordinated craft projects daily. You just need to show up, offer some options, and celebrate their curiosity. These ten activities have saved me on rainy days, sick days, and “I-cannot-think-of-one-more-thing-to-do” days. They’re not fancy, but they work.
Give yourself permission to keep it simple. Your toddler will be just as happy (maybe happier) with pots and wooden spoons as with the latest trending toy. Trust the process, embrace the mess, and remember that these chaotic, exhausting, joyful days of toddlerhood are actually pretty magical—even when you’re finding playdough in your hair at bedtime.
You’ve got this. Now go forth and conquer naptime with a sensory bin and a prayer. <3

Greetings, I’m Alex – an expert in the art of naming teams, groups or brands, and businesses. With years of experience as a consultant for some of the most recognized companies out there, I want to pass on my knowledge and share tips that will help you craft an unforgettable name for your project through TeamGroupNames.Com!