Look, I’m not going to pretend that camping with a toddler is all s’mores and starlight. The first time I took my 2-year-old camping, I spent half the night convinced she’d somehow unzip the tent and befriend a bear.
But here’s what I discovered: toddlers actually love camping when you give them the right activities.
They’re naturally wired for outdoor exploration, and a little preparation can transform your trip from “what were we thinking?” to “when can we do this again?”
The secret isn’t elaborate entertainment—it’s understanding that toddlers experience nature completely differently than we do. A stick isn’t just a stick; it’s a magic wand, a digging tool, a drumstick, and a horse all in one afternoon.
When you lean into their natural curiosity and provide simple, engaging activities, camping becomes magical for everyone. No tablets required.
I’ve pulled together 10 camping activities that have saved countless trips for families I know. These aren’t Pinterest-perfect projects that require a cargo van full of supplies.
They’re realistic, tried-and-tested ideas that work with squirmy, curious, easily-distracted little humans who think 3 PM is an acceptable dinner time and that sleeping bags are trampolines.
Let’s make your camping trip one you’ll actually want to remember.
Nature Scavenger Hunt Adventures
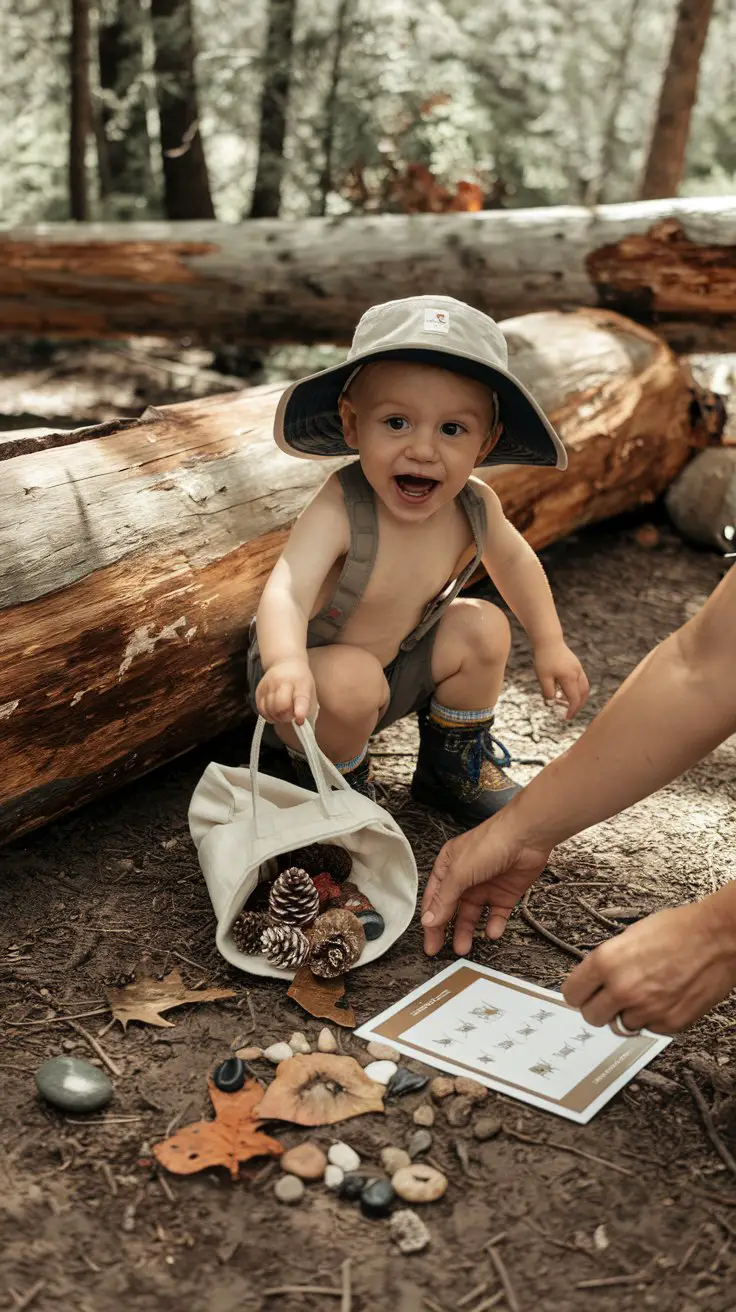
Nothing captures a toddler’s attention quite like a treasure hunt, and nature provides the perfect items. I’ve watched kids who claimed they were “too tired to walk” suddenly sprint around the campsite when armed with a scavenger hunt list.
How to Set This Up
Materials needed:
- Small collection bag or bucket for each child (canvas tote, paper bag, or small backpack work great)
- Simple scavenger hunt list with pictures (laminate it or use a plastic bag to protect from dirt/water)
- Crayons or stickers for marking off found items
- Camera or phone to document discoveries (optional but toddlers love being “nature photographers”)
Setup instructions:
- Before your trip, create a picture-based scavenger hunt list with 6-8 items toddlers can safely collect: smooth rock, pinecone, leaf, stick, acorn, feather, something soft, something rough
- Laminate the list or slip it into a plastic sleeve so it survives toddler handling
- At the campsite, show your toddler the list and explain they’re going on a “nature treasure hunt”
- Set clear boundaries for the search area and establish a collection spot for displaying finds
- Hunt together, making a big deal about each discovery
Age appropriateness: 18 months – 5 years (adjust number of items and difficulty based on age)
Time investment: 5 minutes setup, 20-45 minutes of engaged play, minimal cleanup
Mess level: Low to medium—you’ll have nature bits in bags and pockets, but it’s outdoor mess that brushes off easily
Developmental benefits:
- Observation skills and attention to detail
- Matching abilities (picture on list to real object)
- Vocabulary building through naming nature items
- Gross motor skills through searching, bending, reaching
- Classification skills (comparing size, texture, color of finds)
Safety considerations: Supervise closely to ensure toddlers don’t put items in mouths, avoid poison ivy/oak, and stay within sight. Pre-teach “look but don’t touch” for mushrooms and unknown plants.
Activity variations:
- For younger toddlers (18-24 months): Use just 3-4 items with very distinct pictures
- For older kids (3-5 years): Add color challenges (“find something red”) or texture hunts (“find something bumpy”)
- Rainy day version: Hunt for items visible from under a tarp or pop-up shelter
- Evening twist: Use flashlights for a “nature detective” hunt before dark
Budget tips: Skip fancy scavenger hunt printables—draw simple pictures yourself or cut images from magazines. Use any bag you already own.
Cleanup & sanity-saving tips: Designate one “nature museum” spot at your campsite for displaying treasures. Before leaving, have kids “return treasures to nature” by scattering them back in the woods (makes cleanup easier and teaches Leave No Trace principles).
Campsite Obstacle Course Challenge
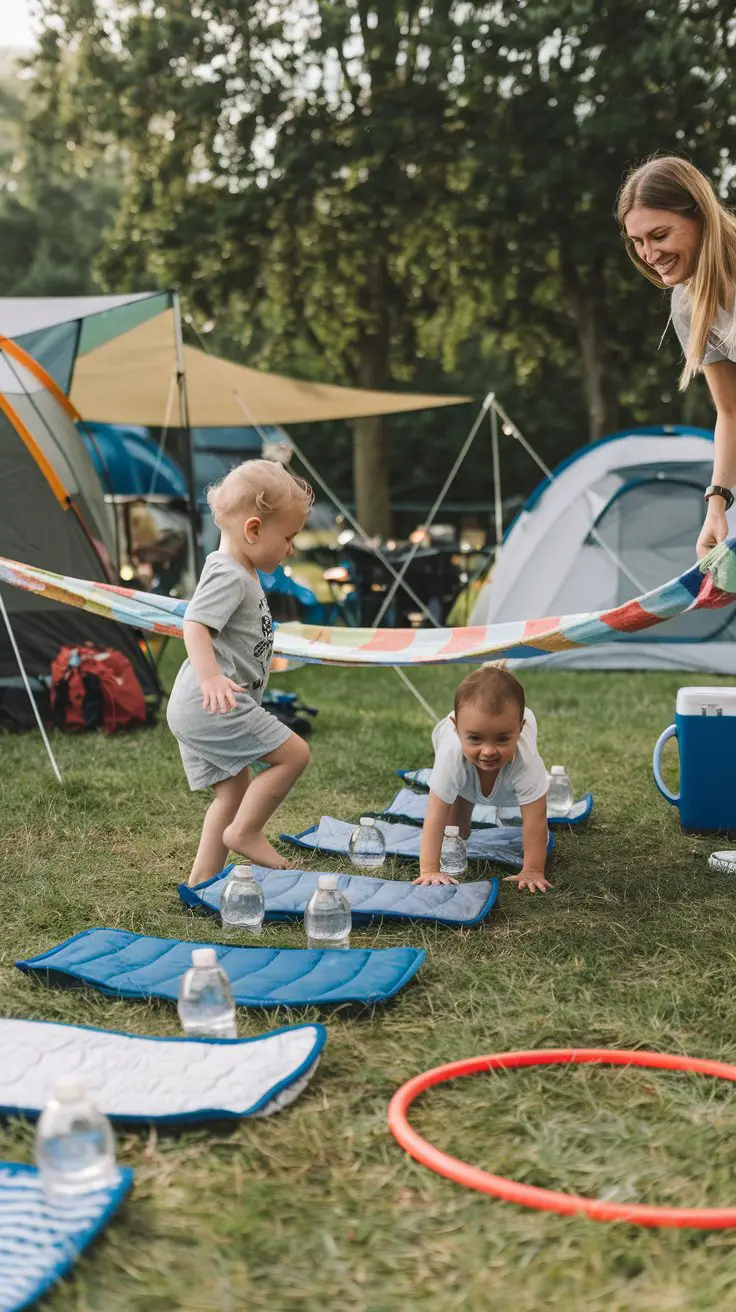
When my friend’s toddler started treating the tent like a bounce house at 6 AM, she got creative fast. An obstacle course burns energy, builds coordination, and can be assembled from literally anything at your campsite. Plus, it keeps them happily occupied while you drink that desperately-needed second cup of coffee.
How to Set This Up
Materials needed:
- Camp chairs (2-4)
- Beach towels or blankets
- Water bottles or camping gear to create boundaries
- Hula hoop (if you packed one) or make circles from rope/string
- Sleeping bags or camping mats
- Any other camping equipment that’s safe for play (coolers, backpacks, etc.)
- Optional: pool noodles, balls, or toys for added challenges
Setup instructions:
- Choose a flat, clear area of your campsite away from fire pits and tent stakes
- Create 5-7 stations using camping gear: crawl under a towel stretched between chairs, step over water bottles, balance walk along a sleeping bag, jump in/out of hula hoop, weave between backpacks
- Demonstrate each obstacle slowly and make it playful
- Run through the course together first, then let your toddler try independently
- Adjust difficulty based on their ability—no frustration allowed!
Age appropriateness: 18 months – 5 years (modify challenges for skill level)
Time investment: 10 minutes setup, 30-60 minutes of active play (they’ll want multiple rounds), 5 minutes cleanup
Mess level: Low—maybe some grass stains on knees, but you’re camping so who cares?
Developmental benefits:
- Gross motor skills and whole-body coordination
- Balance and spatial awareness
- Following multi-step directions
- Confidence building through physical achievement
- Problem-solving as they figure out how to navigate challenges
Safety considerations: Test all equipment stability before letting toddlers loose. Avoid anything too high or tippy. Stay close for toddlers under 2. Check area for sticks, rocks, or uneven ground that could cause trips.
Activity variations:
- Add a “rescue mission” element: stuffed animals need saving at each station
- Create a timed challenge for older kids (but keep it fun, not competitive)
- Reverse course direction for extra challenge
- Make it a “camping skills course” with tasks like rolling up a sleeping bag or sorting camping gear
- Incorporate nature: hop like a bunny, slither like a snake, stomp like a bear at different stations
Budget tips: This literally costs nothing if you use only camping gear you already brought. Zero extra supplies needed.
Cleanup & sanity-saving tips: Make cleanup part of the game—”Can you help the sleeping bag hop back to the tent?” When energy finally crashes, those same camping chairs become perfect quiet reading spots. The obstacle course doubles as a pre-nap energy burner (you’re welcome).
Rock Painting & Nature Art Studio
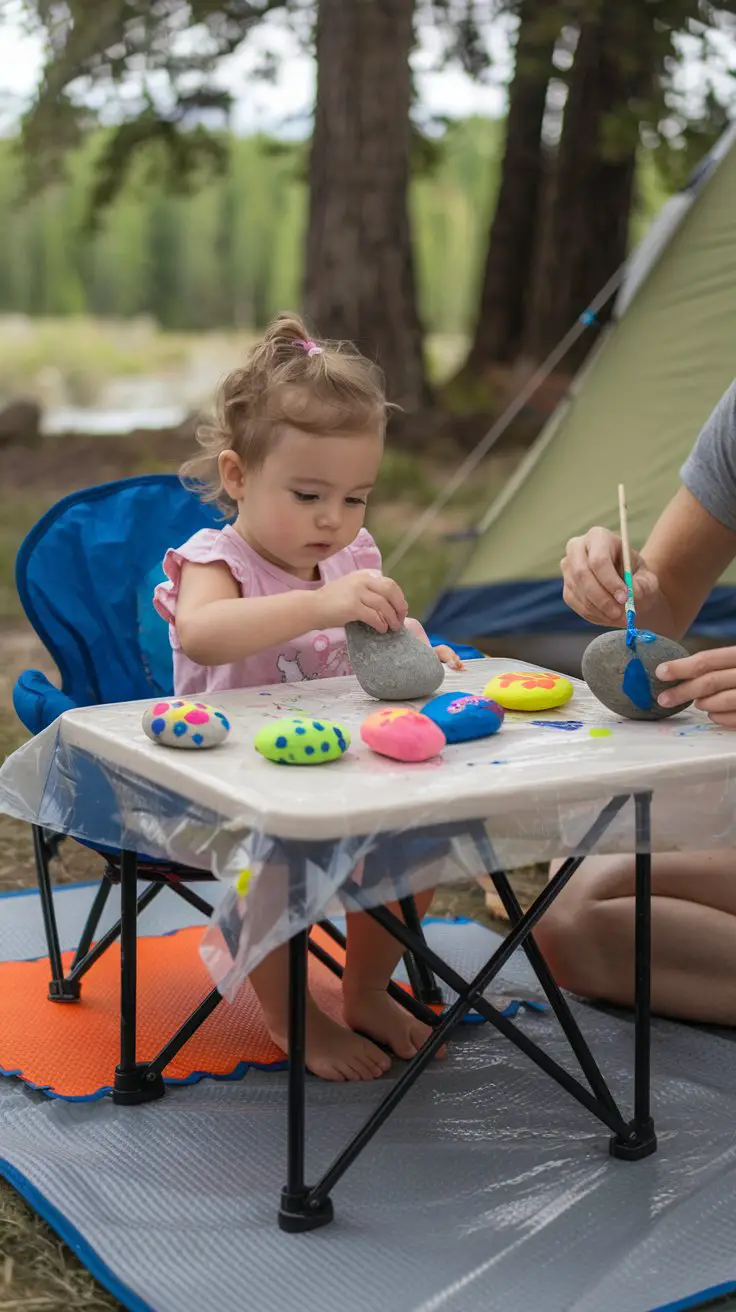
Here’s the thing about toddler art projects while camping: they need to be actually doable, not something that requires seventeen specialty items you forgot at home. Rock painting hits that sweet spot—it’s creative, uses nature materials, and those painted rocks make adorable campsite decorations or take-home souvenirs.
How to Set This Up
Materials needed:
- Smooth, flat rocks collected from around the campsite (wash and dry them first)
- Washable tempera paints or paint pens (3-4 colors is plenty)
- Paintbrushes (chunky ones for little hands)
- Paper plates or a palette for paint
- Newspaper, plastic tablecloth, or garbage bags to protect surface
- Container of water for rinsing brushes
- Old towels or baby wipes for cleanup
- Optional: googly eyes, permanent markers for details (for parents to add)
Setup instructions:
- Set up art station at a small camping table or on a large flat rock covered with protective layer
- Collect 5-10 smooth rocks per child (look near streams or ask at the campground office—some have rock collections)
- Wash rocks with water and let dry completely (damp rocks don’t hold paint well)
- Put small amounts of 3-4 paint colors on paper plates
- Demonstrate simple techniques: dots with fingertips, stripes with brushes, full coverage in one color
- Let them create freely—resist the urge to “fix” their art!
Age appropriateness: 18 months – 5 years (with increasing independence by age)
Time investment: 15 minutes setup (including rock collecting), 20-45 minutes painting time, 10 minutes cleanup
Mess level: Medium—paint on hands is guaranteed, maybe some on faces, definitely some on clothes (dress for mess!)
Developmental benefits:
- Fine motor skills through brush control and careful painting
- Hand-eye coordination
- Color recognition and mixing exploration
- Creative expression and decision-making
- Focus and concentration (watching a toddler paint rocks is surprisingly meditative)
- Patience while waiting for paint to dry
Safety considerations: Use only non-toxic, washable paints. Supervise to prevent paint eating (it will be tempting). Ensure rocks aren’t small enough to be choking hazards. Set up art station away from fire pit and cooking areas.
Activity variations:
- Create “story stones” with simple pictures (sun, tree, tent, fish) to use for campfire storytelling
- Make pet rocks with googly eyes and personality
- Paint rocks to mark hiking trails (check campground rules first—some prohibit leaving painted rocks)
- Do leaf or bark rubbings instead of painting for a quieter, less messy option
- Let them paint pinecones or sticks for 3D nature art
- Older kids can add messages or draw their favorite camping memories on rocks
Budget tips: Washable paint from the dollar store works perfectly. Skip fancy outdoor paints—tempera washes off with water anyway (which makes cleanup easier). Use old jars or yogurt containers instead of palettes.
Cleanup & sanity-saving tips: Baby wipes are your best friend for painted toddler hands. Set rocks on newspaper to dry overnight—they make sweet campsite decorations or gifts for grandparents. The beauty of washable paint? Hands clean up with water at the campground spigot, and any drips on camping gear rinse right off. If rain threatens, toss painted rocks in a box or bag before they get soaked. Pro tip: Keep one plastic grocery bag designated as your “art trash bag” so you’re not hunting for painted newspapers in the dark later.
Flashlight Shadow Puppet Theater
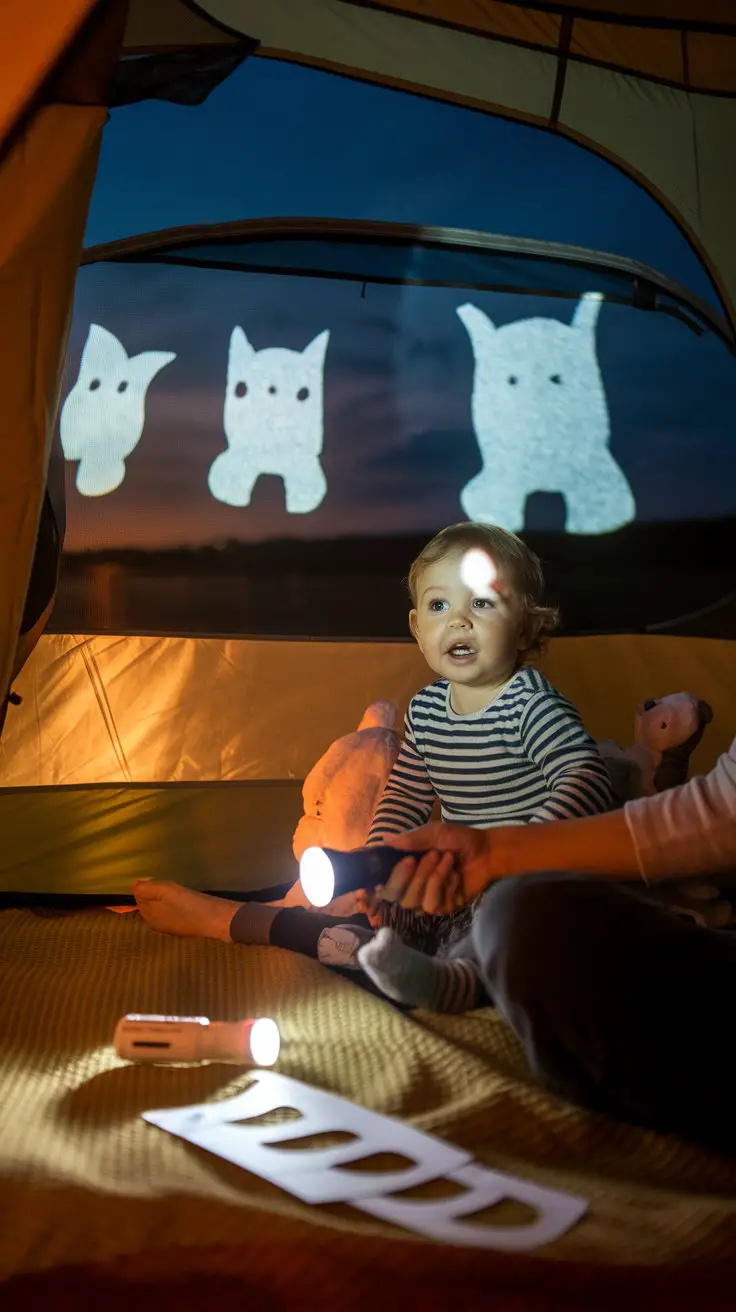
When it starts getting dark at the campsite and your toddler is too wound up to sleep but too tired for active play, shadow puppets save the day. This activity has rescued more pre-bedtime meltdowns than I can count, and it requires exactly one thing you already packed: a flashlight.
How to Set This Up
Materials needed:
- 2-3 flashlights (one for you, one for your toddler to experiment with)
- Your hands (seriously, that’s the main tool!)
- Tent wall or tarp as your “screen”
- Optional: simple paper cutouts of animals or shapes taped to popsicle sticks
- Optional: stuffed animals to create shadows with
Setup instructions:
- Wait until dusk when the tent interior gets dim enough for shadows (usually 30-60 minutes before bedtime)
- Turn off all lights inside the tent except one small lantern if needed for safety
- Sit across from your toddler with the tent wall behind you
- Shine flashlight at your hands positioned between the light and tent wall
- Start with simple shapes: bunny (peace sign with fingers up for ears), bird (thumbs linked, fingers flapping), dog (hand profile with thumb as jaw)
- Make the shadows “talk” in silly voices and act out simple stories
Age appropriateness: 18 months – 5 years (younger toddlers watch, older ones participate)
Time investment: Zero setup, 15-30 minutes of entertainment, zero cleanup
Mess level: None! Finally, a completely mess-free activity!
Developmental benefits:
- Imagination and storytelling skills
- Understanding of light and shadow (basic science!)
- Hand-eye coordination as they try making shapes
- Language development through narrative and dialogue
- Calming pre-sleep routine that transitions to bedtime
- Fine motor control attempting finger positions for different shapes
Safety considerations: Use LED flashlights that stay cool to touch. Teach toddlers not to shine lights in anyone’s eyes. Keep flashlight play inside the tent—wandering with lights outside at a dark campground is a safety issue.
Activity variations:
- Tell familiar stories using shadows (Three Little Pigs, Goldilocks, etc.)
- Let toddler hold flashlight while you make shadows—the changing angles create cool effects
- Create a “shadow zoo” where each family member makes different animal shadows
- Use cutout shapes for kids too young to make hand shadows—tape simple animal shapes to popsicle sticks
- Make shadows with actual toys, camping gear, or natural items (pinecones, leaves)
- Create a “shadow dance party” where everyone moves and watches their shadows groove
- For older kids: try more complex shapes like alligators, elephants, or spiders
Budget tips: Literally free if you packed a flashlight. If you want to get fancy, cut animal shapes from cardboard before your trip using templates found online, but honestly, hands work perfectly.
Cleanup & sanity-saving tips: This activity naturally transitions to bedtime—after shadow puppet stories, keep lights low and move straight into pajamas and sleeping bags. 🙂 When the flashlight “goes to sleep,” toddlers often follow suit. Some families make this a camping tradition: shadow puppets signal bedtime is approaching, creating a consistent routine even in the unfamiliar camping environment. Store flashlights in the same spot every night so middle-of-the-night bathroom trips don’t require a tent-wide search mission.
Stick Collection & Building Projects
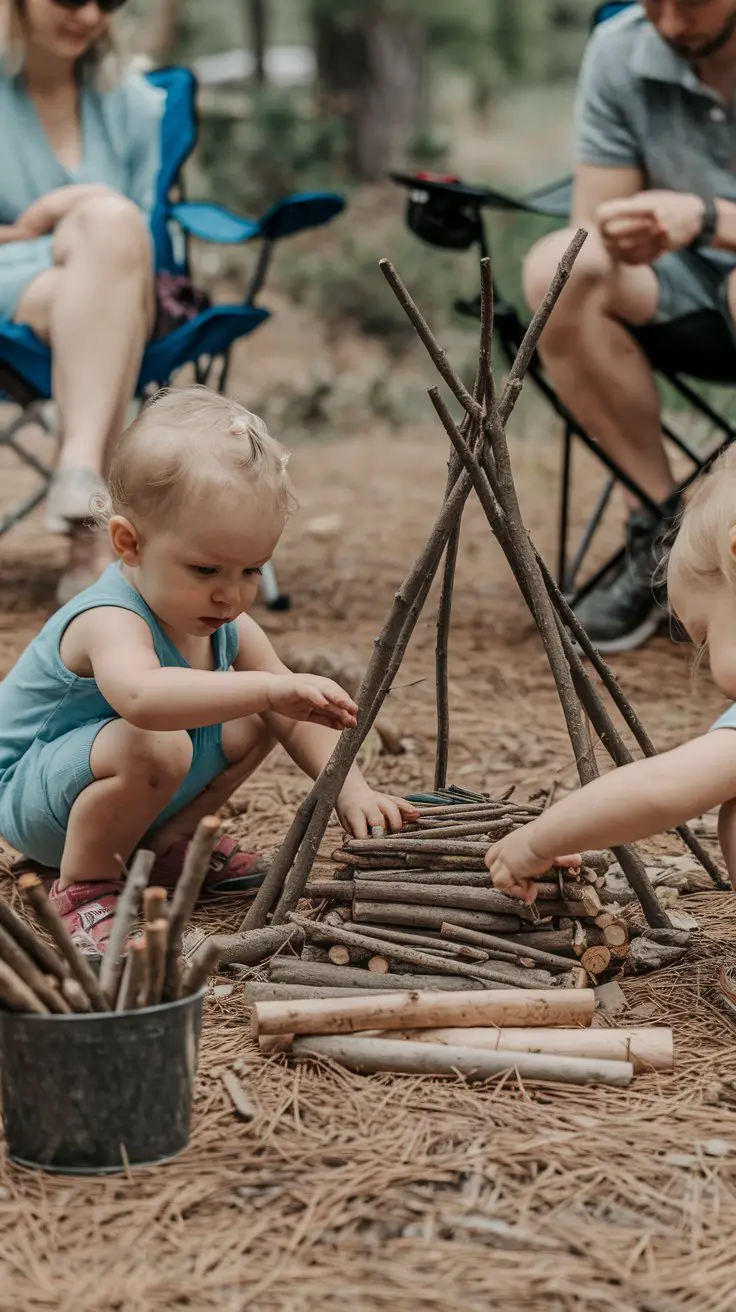
Want to know the camping activity that costs zero dollars and keeps toddlers engaged longer than almost anything else? Stick collecting and building. I know it sounds almost too simple, but toddlers are hardwired to gather natural materials and construct things. Give them permission to do exactly what they already want to do, and magic happens.
How to Set This Up
Materials needed:
- Sticks! Various sizes from small twigs to larger branches (let toddlers collect them)
- Optional: bucket or bag for collecting and storing sticks
- Optional: string, rubber bands, or tape for more secure building (for older kids)
- Optional: leaves, pinecones, or rocks to incorporate into buildings
- Designated building area at campsite
Setup instructions:
- Take a “stick collecting walk” around the campsite perimeter, staying within your site boundaries
- Let toddlers choose sticks that interest them—don’t overthink it!
- Avoid sticks that are rotted, moldy, or have sharp points (do a quick safety check)
- Bring collection back to a flat building area
- Demonstrate one simple building technique: stacking, leaning sticks against each other in teepee style, or creating patterns on the ground
- Step back and let them build whatever their imagination creates
Age appropriateness: 18 months – 5+ years (appeal spans wide age range with different complexity levels)
Time investment: 15-20 minutes collecting, 30-90 minutes building and playing (often longer than you’d expect!), 5 minutes cleanup if you choose to clean up at all
Mess level: Low—dirt on hands and maybe bark residue, but this is camping so embrace it
Developmental benefits:
- STEM skills through engineering and balance challenges
- Problem-solving when structures fall and need redesigning
- Spatial reasoning and understanding of physics (balance, gravity, weight distribution)
- Creativity and open-ended play
- Fine and gross motor skills through collecting, carrying, stacking, and arranging
- Patience and persistence when buildings don’t work on first try
Safety considerations: Check sticks for thorns, splinters, or sharp edges. Teach “gentle hands” with sticks—no sword fighting or throwing. Supervise younger toddlers who might mouth sticks. Ensure building area is away from fire pit and walkways where people might trip.
Activity variations:
- Build a “fairy house” or “bug hotel” and look for tiny nature friends to visit
- Create a stick fence around their tent or a special area
- Make stick letters or numbers on the ground
- Build a miniature campfire (with rocks as fire ring and sticks stacked like real campfire)
- Sort sticks by size, creating smallest-to-largest arrangements
- Use sticks as building blocks to create roads, bridges, or enclosures for small toys
- For older kids: challenge them to build tallest tower, strongest bridge, or most creative sculpture
- Let them “paint” with sticks dipped in mud or water on rocks
Budget tips: Free! Nature provides all supplies. This might be the most budget-friendly camping activity in existence.
Cleanup & sanity-saving tips: Here’s the beautiful part—you can often just leave stick creations where they are (check campground rules). If it’s natural and stays at your campsite, no cleanup needed. Toddlers love returning the next day to see if their creations survived the night. If you need to clean up before leaving, make it a game: “Can we return all the sticks to the forest?” Stick gathering is also a phenomenal activity when you need five minutes to set up the tent or start dinner prep—hand them a bucket and set them loose (within sight, obviously).
For even more creative outdoor adventures with your little ones, check out these nature-inspired team activities that can spark imagination during your camping trip.
Water Play & “Washing” Station
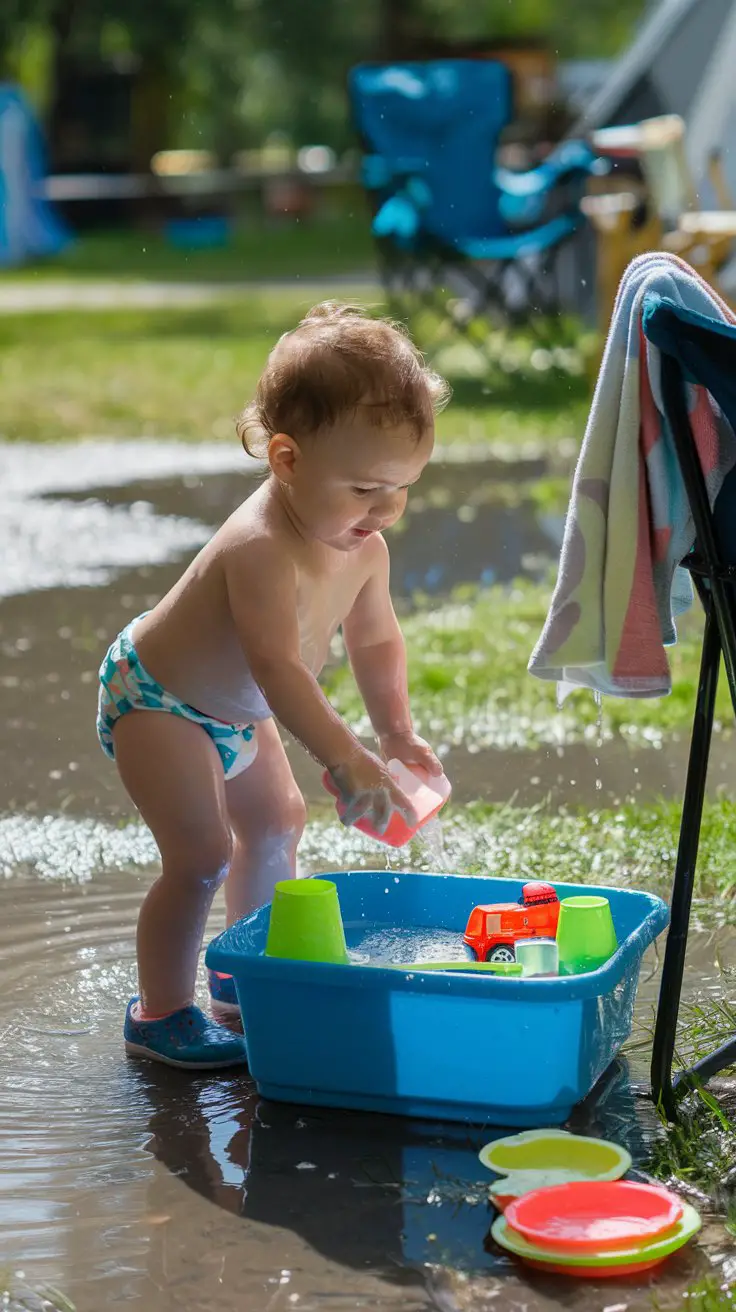
Toddlers and water are a match made in heaven, and camping provides the perfect setting for guilt-free water play. When my nephew discovered the “washing station” I set up (really just a plastic bin with soapy water), he spent 45 minutes “cleaning” the same cup over and over. Best investment of ten minutes ever.
How to Set This Up
Materials needed:
- Large plastic bin or basin (or use campsite provided buckets)
- Water from campground spigot
- Small squeeze of biodegradable dish soap (just a tiny bit!)
- Old sponges, washcloths, or small scrub brushes
- Plastic camping dishes, cups, utensils
- Optional: plastic toys, small watering cans, measuring cups, funnels
- Towels for drying (themselves and the area)
- Change of dry clothes nearby
Setup instructions:
- Fill plastic bin about 4-5 inches deep with cool or lukewarm water
- Add tiniest squirt of soap for bubbles (too much creates a slippery mess)
- Place bin on ground in a spot where water spillage is fine (not near tent entrance)
- Add plastic dishes and washing tools
- Strip toddler down to diaper/swimsuit for maximum water freedom
- Demonstrate “washing” one item, then let them take over
- Supervise constantly (even shallow water requires active watching)
Age appropriateness: 18 months – 4 years (prime water play age)
Time investment: 10 minutes setup, 30-60+ minutes of engaged play (water play has incredible staying power), 10 minutes cleanup
Mess level: High wetness factor but easy outdoor cleanup—just dump water in appropriate area and let sun dry everything
Developmental benefits:
- Fine motor skills through squeezing sponges, scrubbing, pouring
- Hand-eye coordination
- Sensory exploration with water temperature, textures, bubbles
- Imaginative play and role modeling (copying grown-up tasks)
- Cause and effect understanding (squeeze sponge = water comes out)
- Pre-math skills through pouring, filling, measuring
Safety considerations: NEVER leave toddler unattended near water, even shallow basins. Empty water when play is done to prevent drowning hazard. Use only biodegradable soap if water will go on ground. Check water temperature—not too cold on chilly days. Have dry clothes ready to prevent chills after water play.
Activity variations:
- Add toy cars or plastic animals for a “vehicle wash” or “pet spa”
- Include measuring cups and funnels for pouring practice
- Create a “kitchen” with pretend food washing
- Make it a “nature wash” where they clean rocks, sticks, or pinecones they’ve collected
- Set up two bins—one for washing, one for rinsing
- Add ice cubes for temperature exploration
- For older toddlers: add turkey baster or spray bottles for different water manipulation
Budget tips: Use any plastic bin you already own or even a large cooking pot. Grab plastic dishes from your camping kit or dollar store. Regular sponges cut in half work perfectly—no need for special toddler versions.
Cleanup & sanity-saving tips: Have towels ready before starting—wet, cold toddlers get cranky fast. Dump gray water (soapy water) at designated campground gray water dump stations or at least 200 feet from water sources if primitive camping. Spread out wet towels and clothes to dry on camp chairs or clothesline. The beauty of this activity is that toddler gets semi-clean in the process (all that water splashing hits them too!). Some parents time this right before naptime or bedtime—tired from play, already cleaned up, perfect transition to rest. BTW, this doubles as a cooling activity on hot camping days.
Campfire Sing-Along & Story Time
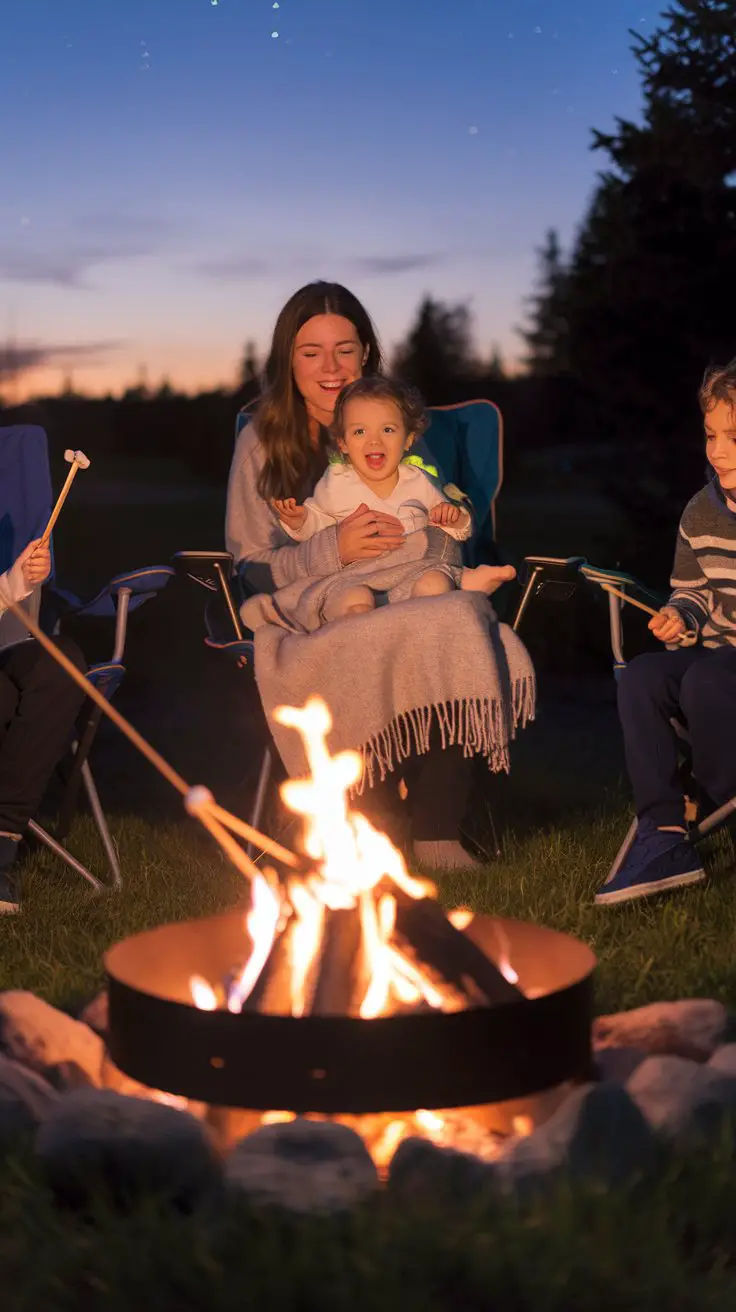
There’s something almost primal about gathering around a campfire with little ones. The flickering light mesmerizes them, the warmth feels cozy, and suddenly your tone-deaf rendition of “The Wheels on the Bus” sounds like a concert. This is the camping activity that creates the memories they’ll carry forever.
How to Set This Up
Materials needed:
- Safe, established campfire (follow all campground fire regulations)
- Firewood (purchase at campground to prevent spreading invasive species)
- Camp chairs or logs for seating positioned safely back from fire
- Blankets for warmth and coziness
- Optional: simple instruments (shakers, tambourines, small drums)
- Optional: s’mores supplies for older toddlers who can safely handle warm marshmallows
- Flashlight for reading books if doing story time
- Water bucket nearby for fire safety
Setup instructions:
- Build fire during daylight or early evening (never task a toddler with waiting while you struggle with fire starting)
- Let fire burn down to nice warm coals—flames are less safe and more unpredictable for toddlers
- Position seating in semi-circle around fire, maintaining safe distance (at least 3 feet for toddlers)
- Have younger toddlers sit on laps rather than independent chairs near fire
- Start with familiar, simple songs with hand motions
- Keep sessions short—15-20 minutes max before toddler attention drifts
Age appropriateness: 18 months – 5+ years (with appropriate safety measures by age)
Time investment: 20 minutes for fire setup (if you’re doing it), 15-30 minutes program time, 30+ minutes for fire to burn down safely before bed
Mess level: Low—maybe some sticky marshmallow fingers if doing s’mores, ash on hands if they get curious
Developmental benefits:
- Language development through singing and storytelling
- Memory skills learning and repeating songs
- Social bonding and family connection
- Rhythm and musical awareness
- Listening skills during story time
- Cultural tradition participation (campfire gathering is meaningful human experience)
Safety considerations: This is the activity requiring MOST active supervision. Never leave toddlers near fire unattended. Establish firm “no touching fire” rules before starting. Keep water bucket accessible. Ensure proper distance from flames. Avoid loose, flowing clothing that could catch sparks. Teach “stop, drop, and roll” before camping trip. Consider skipping this activity if toddler is in an especially active, boundary-testing phase.
Activity variations:
- Classic camping songs: “Down by the Bay,” “The Ants Go Marching,” “B-I-N-G-O,” “Old MacDonald”
- Action songs that let toddlers move while seated: “Head, Shoulders, Knees and Toes,” “If You’re Happy and You Know It”
- Simple, repetitive stories perfect for toddler attention spans
- Shadow puppet combo (use flashlight against tree or tent behind you)
- “Going on a Bear Hunt” interactive story (involves actions and sounds—total toddler hit)
- Make up stories about animals they saw that day or imagine what forest creatures are doing
- Older toddlers can “conduct” the music with a stick (from safe distance from fire)
Budget tips: No special supplies needed beyond what you already use for campfire. Songs are free! If you want instruments, make shakers at home before trip using plastic bottles filled with rice or beans.
Cleanup & sanity-saving tips: Make this the final activity before bedtime—cozy fire naturally creates drowsiness. Put out fire completely (drown it, stir it, drown again) and ensure it’s cold before anyone goes to sleep. The beautiful thing about campfire time is there’s essentially no cleanup—just ensure fire is fully extinguished and seating area is clear. Many families make this “camping tradition” where certain songs only get sung around the campfire, creating special memories kids request year after year. FYI, some campgrounds have fire bans during dry seasons—always check current regulations and have a backup quiet tent activity planned.
Looking for more ways to encourage teamwork and group activities with your little campers? These group activity ideas translate beautifully to family camping adventures.
Bug Hunt & Insect Observation
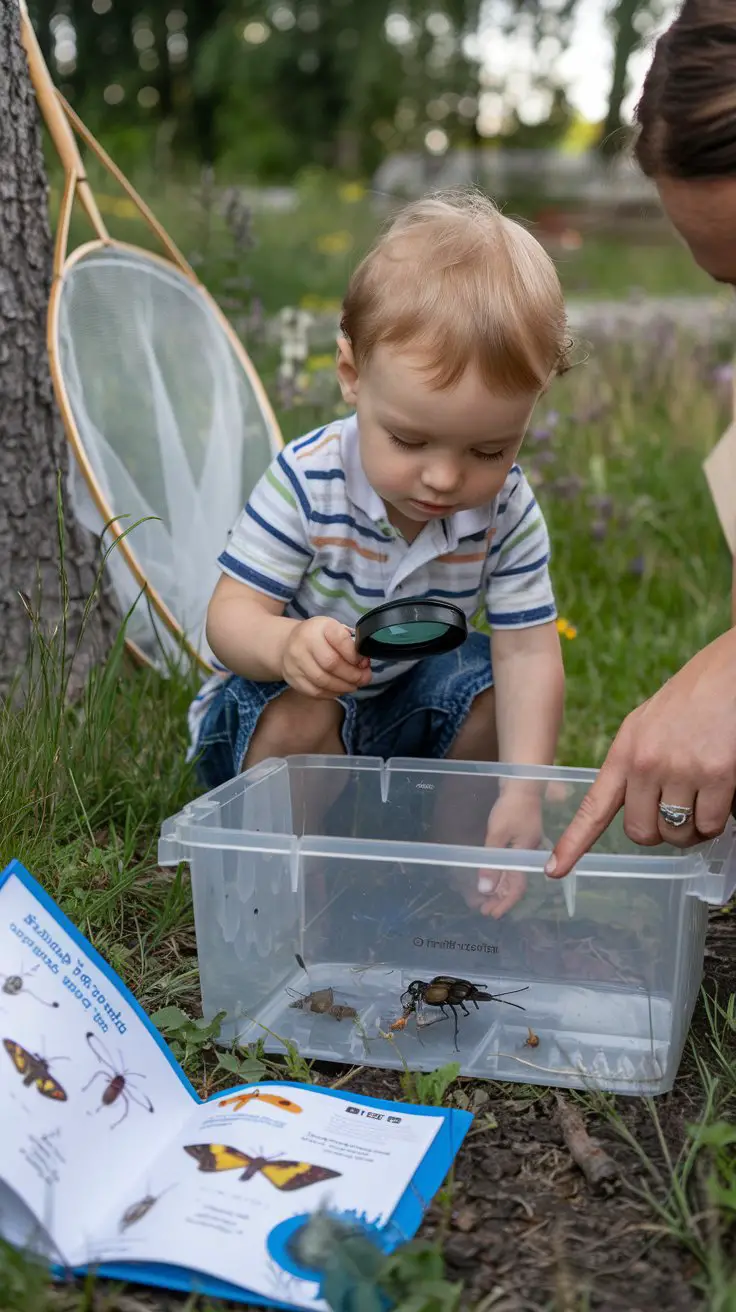
Here’s a secret: toddlers are natural entomologists. They’re absolutely fascinated by bugs in a way that most adults have completely forgotten. Channeling that interest into gentle observation (rather than enthusiastic squishing) creates incredible learning opportunities and kills serious time at the campsite.
How to Set This Up
Materials needed:
- Clear plastic containers with air holes (like deli containers with holes poked in lids)
- Small butterfly net or bug catcher (optional but fun)
- Magnifying glass (toddler-sized if possible)
- Simple bug identification guide or chart with pictures
- Small notebook and crayons for bug “journaling” (for older toddlers)
- Leaves, grass, or twigs to add to containers for bug comfort
- Camera or phone to photograph finds
Setup instructions:
- Establish gentle bug handling rules: look with eyes, soft hands only, bugs go back to nature when we’re done
- Show toddler how to carefully catch bugs (slow movements, gentle scooping)
- Transfer bugs to observation container with some of their natural habitat (grass for grasshoppers, etc.)
- Observe together—count legs, look at colors, watch movement
- Try to identify using picture guide (be okay with “we’re not sure” answers—mystery is part of science!)
- Always release bugs back where you found them after 10-15 minutes of observation
Age appropriateness: 2 – 5 years (younger than 2 are too grabby; this requires some impulse control)
Time investment: 5 minutes setup, 30-60 minutes hunting and observing (can easily become all-morning activity), 5 minutes cleanup
Mess level: Low—dirt on hands and knees, possibly grass stains, but manageable outdoor mess
Developmental benefits:
- Scientific observation and naturalist skills
- Patience and gentle handling (empathy development)
- Counting skills (legs, spots, antennae)
- Color and pattern recognition
- Vocabulary building with insect names and body parts
- Life science understanding (habitats, what bugs eat, how they move)
- Respect for living creatures and environmental stewardship
Safety considerations: Teach toddlers which bugs to avoid (bees, wasps, spiders they can’t identify, ants near big hills). No touching with bare hands—use containers or nets for catching. Wash hands after bug handling. Check for ticks after grass activities. Supervise closely to prevent bug eating (the temptation is real, especially with rolly-pollies).
Activity variations:
- Create a “bug hotel” using sticks, leaves, and natural materials where insects might like to hide
- Make bark rubbings or leaf prints of places where bugs were found
- Draw pictures of bugs in nature journal
- Sort bugs by categories: “flyers” vs. “crawlers,” colors, number of legs
- Set up multiple observation stations with different habitat types (under rocks, in grass, near water)
- For older kids: use field guide to learn real insect names and facts
- Night variation: go on a “moth hunt” near campground lights at dusk (always with adult supervision)
- Compare bugs found in different areas of campground
Budget tips: Use any clear plastic containers from home (clean yogurt containers, takeout containers). Skip expensive bug catchers—an old kitchen strainer works great. Print free bug identification charts before trip or use library books. Magnifying glasses from dollar stores work perfectly for toddlers.
Cleanup & sanity-saving tips: The most important part is releasing bugs back to nature—make it a ritual where toddler thanks the bug for letting them observe it. This teaches respect and also ensures you’re not left with bug containers to deal with. Rinse containers at campground spigot after releasing bugs. Some bugs toddlers can safely handle directly (rolly-pollies/pill bugs are perfect for this and beloved by toddlers—they’re gentle, slow-moving, and harmless). Keep wet wipes handy for post-bug-hunt hand cleaning. Pro tip: if your toddler becomes bug-obsessed (likely), this activity can happen multiple times per day with completely different finds each time—free entertainment that never gets old.
Simple Nature Crafts & Collages
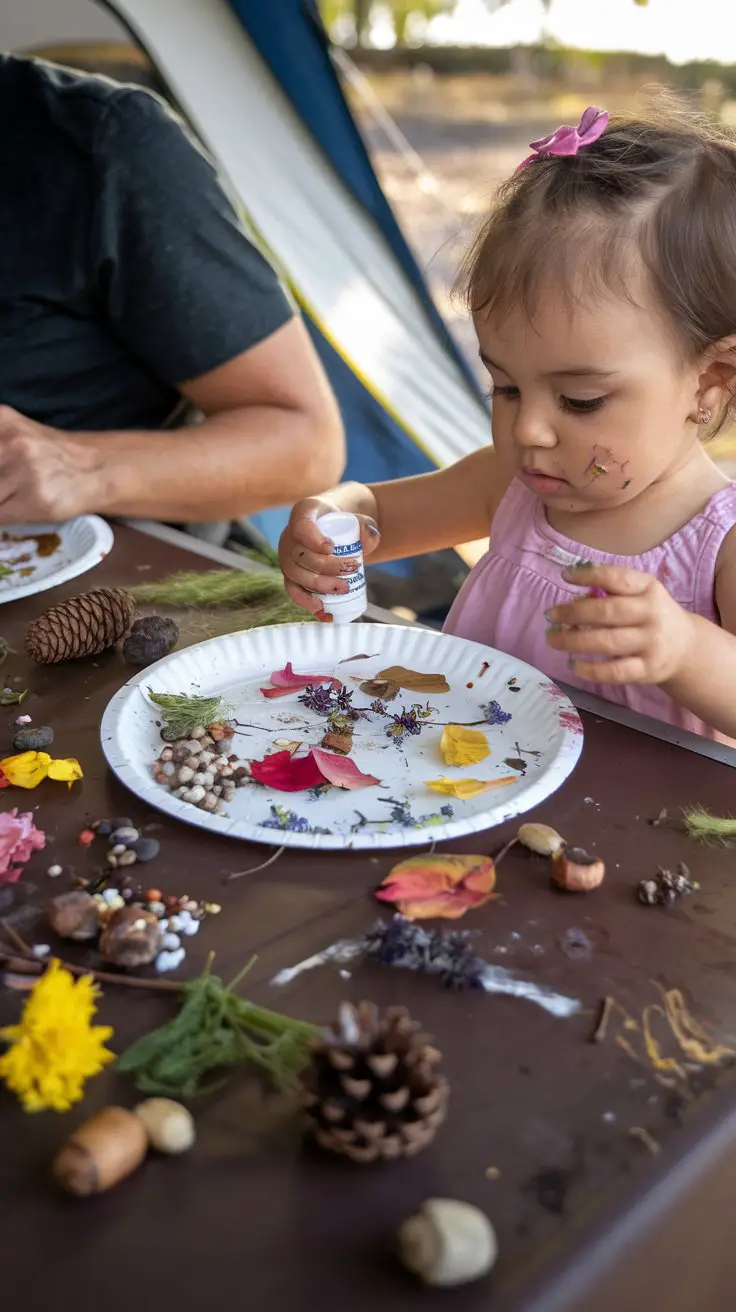
Nature provides the art supplies, your toddler provides the creativity, and you provide the glue. These simple crafts create tangible take-home souvenirs that grandparents will treasure way more than a generic gift shop keychain, plus they document your camping adventure in the sweetest way.
How to Set This Up
Materials needed:
- Paper plates, cardstock, or sturdy cardboard pieces as base
- White school glue or glue sticks (bring several—glue always disappears mysteriously on camping trips)
- Nature materials collected on walks: leaves, flower petals, small pebbles, grass, small twigs, acorns, bark pieces
- Optional: markers or crayons for drawing additions
- Optional: googly eyes to turn creations into creatures
- Newspaper or plastic tablecloth to protect table
- Wet wipes or damp cloth for sticky fingers
- Bag or box for transporting finished art home
Setup instructions:
- Take a nature collection walk specifically gathering craft materials (30 minutes of entertainment right there)
- Set up craft station at camping table with protective covering
- Arrange natural materials in sorted piles or in muffin tin compartments (toddlers love sorting by type)
- Give each child a base (paper plate works great) and glue
- Demonstrate simple gluing technique—small amount of glue, press item down, hold briefly
- Let them create freely without directing their art (resist the urge to “fix” their placements!)
- Set aside to dry completely (several hours or overnight)
Age appropriateness: 2 – 5 years (younger toddlers need more hand-over-hand help with glue)
Time investment: 20-30 minutes collecting materials, 10 minutes setup, 20-40 minutes creating, 5 minutes cleanup, several hours drying time
Mess level: Medium—glue on hands and table guaranteed, possibility of nature bits scattered around
Developmental benefits:
- Fine motor skills through glue bottle squeezing and precise placement
- Hand-eye coordination positioning items on glue spots
- Creative decision-making and artistic expression
- Texture exploration feeling different natural materials
- Pattern and design awareness
- Pride in creation (they made something beautiful from nature!)
Safety considerations: Supervise glue use (eating glue is a toddler rite of passage, but we still try to prevent it). Check all natural materials for thorns, sharp edges, or bugs. Avoid toxic plants (poison ivy leaves are pretty but problematic). Wash hands after handling nature materials and before eating.
Activity variations:
- Create nature “sun catchers” using clear contact paper instead of paper plates
- Make leaf rubbings by placing paper over leaves and rubbing with crayons
- Build “nature crowns” by gluing items to strips of cardstock formed into headbands
- Create nature “name plates” for your campsite with sticks forming letters
- Make fairy houses or bug houses (3D structures) instead of flat collages
- Press flowers between paper to preserve (then glue later at home)
- For older toddlers: create scenes (stick figure people made from actual sticks, grass hair, etc.)
- Make “camping memory collage” with items collected throughout trip
Budget tips: Paper plates from your camping supplies work as bases (use extras!). School glue is cheap and works better than expensive craft glue. All other materials are literally free from nature. This might be the most budget-friendly craft that still feels special.
Cleanup & sanity-saving tips: Let collages dry completely before attempting to transport—nothing sadder than watching carefully glued items fall off during packing. Store in flat box or large ziplock bag for travel home. Leftover nature materials can be scattered back into nature (part of cleanup game for toddlers). Glue bottles with caps that actually close are worth their weight in gold—test before trip! If glue gets on clothes, it usually washes out with water (benefits of using school glue instead of craft glue). Many families date these creations and save them as camping trip memories—five years later, you’ll treasure that wonky leaf arrangement way more than you expect.
If you’re camping with a group and want to add some friendly competition to your nature crafts, consider organizing them into creative team activities where families can showcase their artistic nature creations.
Tent “Camping” & Pretend Play
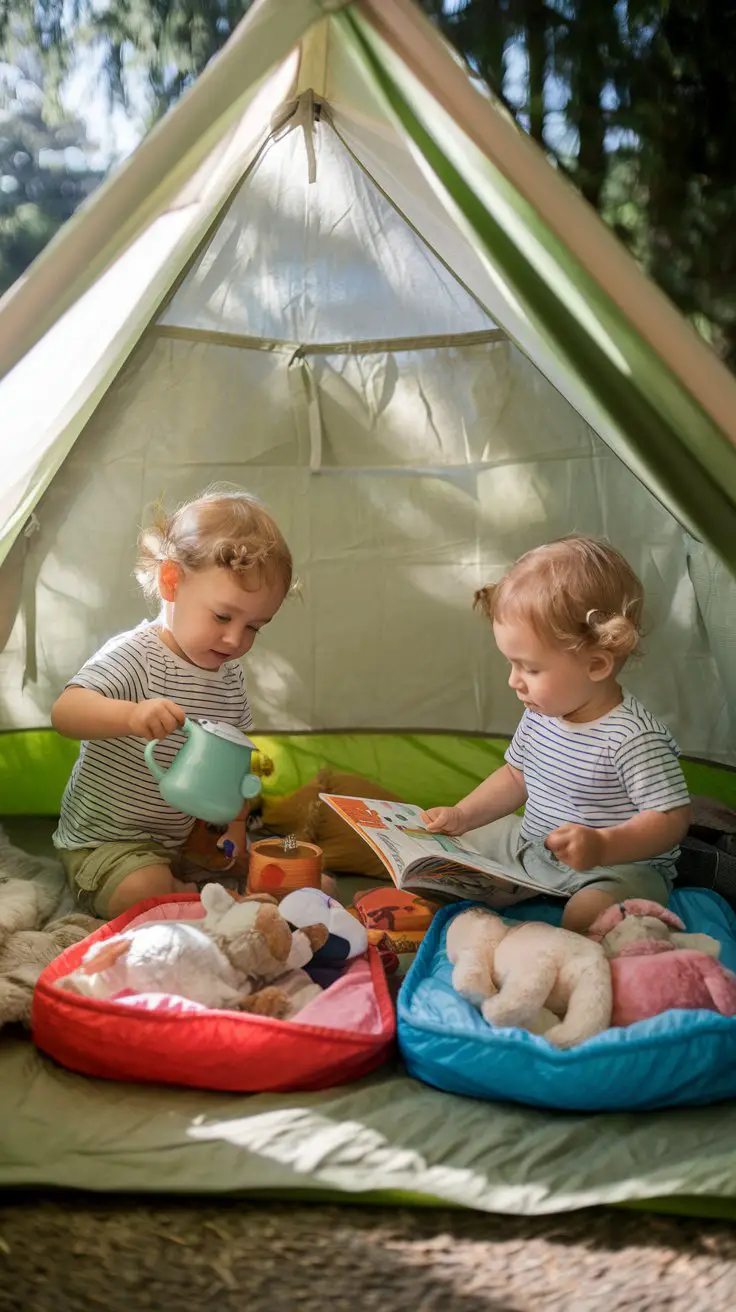
When you’re camping in a tent, why not let your toddler camp in the tent? Meta, right? But seriously, giving toddlers tent time for pretend play is brilliant—it’s enclosed (they can’t wander off), shaded (sun protection), and provides a completely new context for their imaginative play.
How to Set This Up
Materials needed:
- Your actual camping tent or a small pop-up play tent
- Sleeping bags or blankets for “camping setup”
- Camping gear repurposed as toys: plastic dishes, child-sized backpack, stuffed animals as “camping friends”
- Small flashlights (batteries removed if needed for safety)
- Books about camping or nature
- Snacks in camping dishes for “campfire meal”
- Optional: toy binoculars, toy compass, play camera
- Camping chairs positioned near tent door for parent supervision
Setup instructions:
- Designate tent time when tent isn’t needed for actual sleeping (mid-day works great)
- Set up “campsite” inside tent with sleeping bags arranged, stuffed animals positioned
- Provide child-safe camping gear they can manipulate without breaking important equipment
- Give simple pretend play prompts: “Can you make breakfast for the bears?” or “Time to pack backpack for a hike!”
- Sit nearby (tent door open for visibility) and let them lead their own play
- Intervene only for safety or if invited into their game
Age appropriateness: 2 – 5 years (peak pretend play age range)
Time investment: 10 minutes setup, 30-60+ minutes of independent play (glorious, glorious independent play!), 5 minutes cleanup
Mess level: Low—maybe sleeping bags get unzipped or items rearranged, but nothing actually messy
Developmental benefits:
- Imaginative play and storytelling creation
- Independence in self-directed play
- Social skills if playing with siblings or camping friends
- Language development through narrating their play
- Role modeling adult behaviors and camping routines
- Problem-solving in their pretend scenarios
Safety considerations: Ensure tent is staked properly so toddlers can’t accidentally collapse it. Check for tent stakes or sharp equipment inside. Keep tent door partially open for air circulation and supervision visibility. Remove or battery-disable any equipment that could cause harm. Establish rules about tent zippers (many toddlers can’t resist zipping themselves inside).
Activity variations:
- Set up stuffed animal “camping trip” where toddler is the parent camper
- Create camping-themed tea party or picnic inside tent
- Make it reading time—bring stack of books and create cozy reading nook
- Naptime in tent (game-changer for toddlers who fight naptime—new location = new interest)
- Shadow puppet play if tent gets dim enough
- Let them “pack” and “unpack” camping gear repeatedly (toddlers LOVE this)
- Sibling tent time where older child “teaches” younger one about camping
Budget tips: Literally zero additional cost—uses tent and gear you already brought. This is “free babysitting via creative repurposing.”
Cleanup & sanity-saving tips: The beauty of tent play is that cleanup mostly means putting camping gear back where it belongs anyway. Make it a game: “Can you help sleeping bag hop back to its spot?” Some parents leave tent set up slightly differently after play (sleeping bags rearranged, etc.) because kids love finding their setup “ready” next time. This activity is CLUTCH during the afternoon heat when it’s too hot for active play—tent provides shade and quiet activity zone. Also brilliant during light rain when you can’t do outdoor activities but everyone has cabin fever. Pro tip: tent time often leads to spontaneous naps, especially if you lie down “just to rest” beside them. <3
Star Gazing & Night Sky Exploration
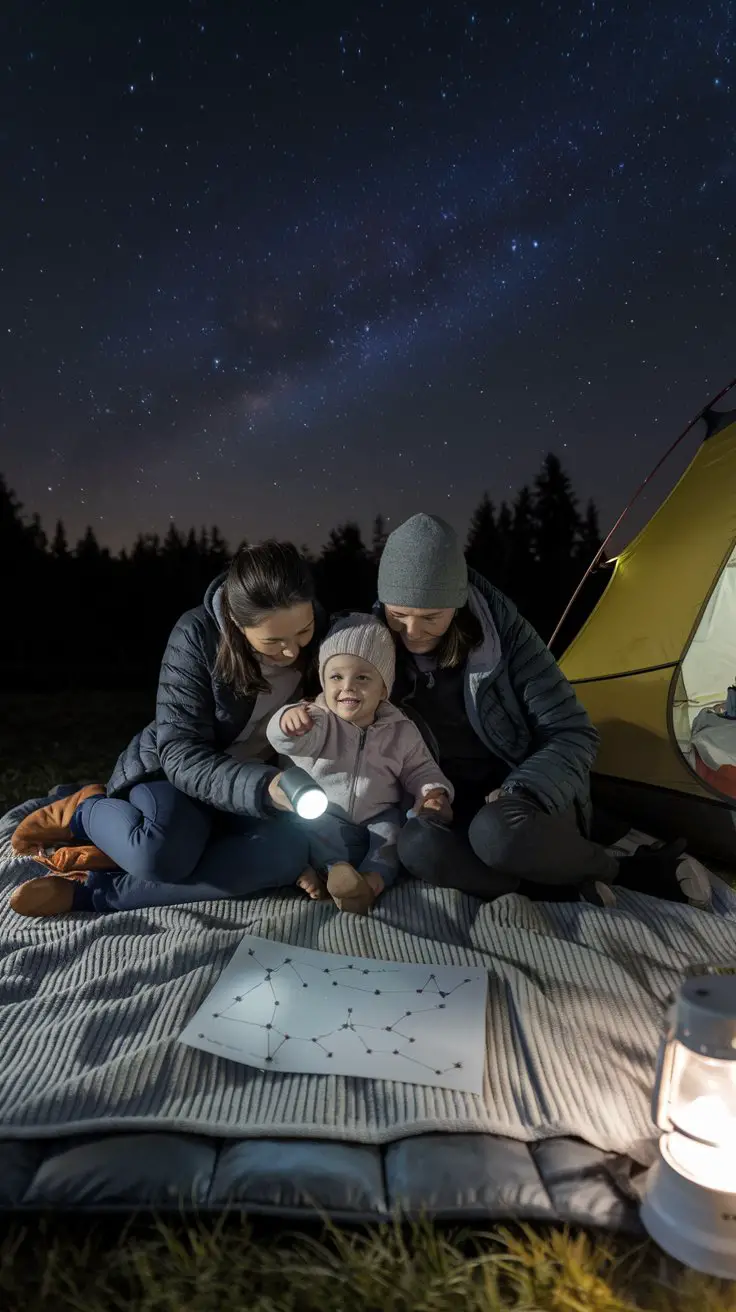
One of the absolute best parts of camping with toddlers is showing them a truly dark sky full of stars—something many kids growing up in cities never experience. The first time my friend’s toddler saw the Milky Way, she whispered “sky broke and sprinkled everywhere.” Yeah. That’s the magic you’re going for.
How to Set This Up
Materials needed:
- Large blanket or camping pad to lie on
- Sleeping bags or extra blankets for warmth
- Flashlight with red filter (preserves night vision) or regular flashlight for pointing
- Simple constellation guide (printed star chart or stargazing app)
- Warm layers for everyone (nights get cool fast)
- Optional: binoculars for moon/planet viewing
- Optional: glow sticks for toddler to hold (makes them feel part of the activity)
- Hot cocoa in thermos for cozy sipping (older toddlers)
Setup instructions:
- Wait until true darkness (at least 45-60 minutes after sunset) when stars are most visible
- Choose viewing spot away from campground lights if possible
- Spread blanket on ground in area clear of overhead branches
- Let eyes adjust to darkness for 10-15 minutes before serious stargazing (flashlights off!)
- Lie down together and simply observe—don’t rush to identify constellations
- Point out easy finds: moon (if visible), brightest stars, any planets
- Tell simple stories or make up your own constellation stories
- Keep session short for toddlers—15-20 minutes is often max before they get cold or restless
Age appropriateness: 2.5 – 5+ years (younger toddlers often fall asleep before dark enough!)
Time investment: 10 minutes setup, 15-30 minutes viewing, 5 minutes cleanup
Mess level: None—cleanest camping activity possible!
Developmental benefits:
- Science concepts about space, planets, stars
- Pattern recognition finding constellations
- Vocabulary building with astronomy terms
- Sense of wonder and connection to nature
- Patience and quiet observation skills
- Spatial awareness and understanding of scale (stars are far away!)
Safety considerations: Ensure viewing area is clear of trip hazards. Dress warmly to prevent chills. Keep toddlers on blanket to avoid wandering in dark. Use flashlights minimally and aim down, never up at sky or in anyone’s eyes. Be aware of campground quiet hours. If using stargazing app on phone, use night mode to protect night vision.
Activity variations:
- Look for shooting stars (make wishes!)
- Moon watching—observe moon phases, craters with binoculars
- Tell constellation stories from mythology (simplified for toddler understanding)
- Make up your own constellations from star patterns you see
- Count stars aloud (helps toddlers stay engaged)
- Look for satellites crossing the sky (look like moving stars)
- Use glow sticks to “draw” your own constellations in the air
- Sing “Twinkle Twinkle Little Star” while stargazing
Budget tips: Star charts can be printed free online or from library books. Many free stargazing apps available. Otherwise this activity costs nothing—the sky is free entertainment!
Cleanup & sanity-saving tips: This activity often transitions directly to bedtime—perfect timing! After stargazing, head straight to tent while kids are calm and sleepy. If they’re not ready for sleep, move to shadow puppets or quiet tent stories. The beauty of stargazing is zero cleanup—fold blanket, turn off flashlight, done. Some toddlers find the darkness unsettling at first; if yours seems anxious, keep session very short and stay close. Others are absolutely mesmerized and will remember the experience for years. IMO this is one of those rare parenting moments where everything aligns—exhausted kid, peaceful activity, nature’s beauty on display. Savor it (and maybe snap a photo even though it won’t capture the sky properly—you’ll want to remember this).
Conclusion
Camping with toddlers doesn’t have to feel like survival mode. When you embrace their natural curiosity, work with their short attention spans (not against them), and remember that the best activities are often the simplest ones, camping becomes genuinely fun for everyone.
These ten activities have one thing in common: they let toddlers do what they do best—explore, get messy, build, imagine, and experience the world through fresh eyes. You don’t need Pinterest-perfect execution or a trunk full of expensive supplies. You need sticks, water, a few basic materials, and the willingness to let go of rigid plans when your toddler decides that examining one particular pinecone is the only activity they need for the next hour.
The truth is, your toddler won’t remember whether you packed the “perfect” camping activities. They’ll remember that you let them collect twelve thousand sticks, that you made shadow puppets in the tent, that you lay under the stars together and tried to count them all. They’ll remember that camping meant freedom to explore, get dirty, stay up a little late, and have your full, phone-free attention.
So pack the basics, prepare these activities as backups for when energy is high and attention is short, and then trust that your toddler’s sense of adventure will guide much of your trip. Some activities will flop. Others will become beloved camping traditions you repeat for years. The chaos is part of the beauty. You’ve got this—and your little camper is going to love every messy, wonderful minute of it.

Greetings, I’m Alex – an expert in the art of naming teams, groups or brands, and businesses. With years of experience as a consultant for some of the most recognized companies out there, I want to pass on my knowledge and share tips that will help you craft an unforgettable name for your project through TeamGroupNames.Com!