
Remember the first time you watched Woody and Buzz become friends? That same magic of friendship, adventure, and heartwarming moments makes Toy Story the perfect theme for welcoming a new little one into the world.
I’ve helped plan three Toy Story baby showers now, and honestly, watching guests’ faces light up when they walk into a room transformed into Andy’s bedroom never gets old!
Whether you’re celebrating a mom-to-be who grew up with these beloved characters or you’re introducing the next generation to the gang, a Toy Story shower brings together nostalgia, fun, and that special Pixar magic.
And here’s the best part—this theme works beautifully for any gender, keeps guests of all ages entertained, and offers endless creative possibilities without breaking the bank.
Let me walk you through 15 ideas that’ll make your Toy Story baby shower absolutely unforgettable.
Trust me, these aren’t just cute—they’re actually doable, and your guests will be talking about this party for years to come.
Andy’s Room Backdrop and Photo Booth
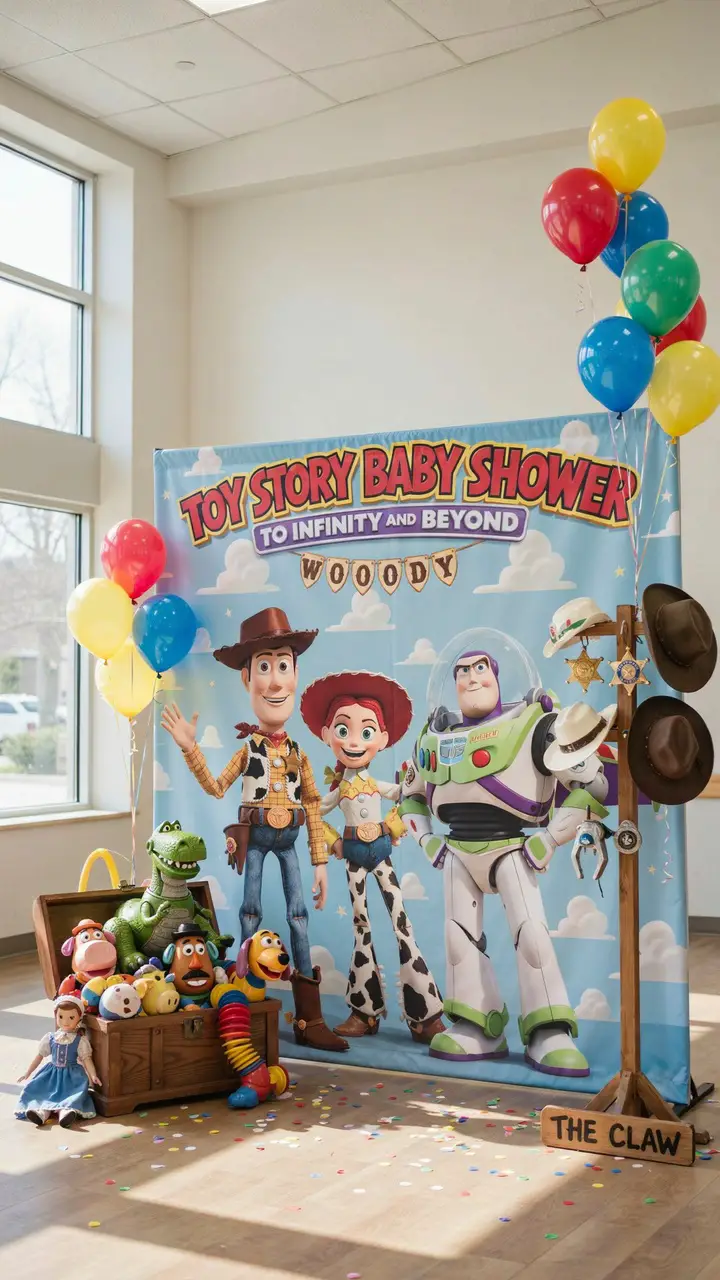
Transform your party space into Andy’s iconic bedroom with a cloud-wallpapered backdrop that instantly transports everyone into the Toy Story universe. I’ve seen guests literally gasp when they spot that familiar blue sky and white clouds—it’s pure nostalgia magic!
How to Do It
- Purchase or DIY your cloud backdrop: You can find pre-made vinyl backdrops online ($30-50) or create your own using blue bulletin board paper and white poster board clouds ($15-20)
- Print life-sized character cutouts: Use cardboard and printable templates from online (free to $10), or order professional standees ($40-80 each)
- Gather photo booth props: Create sheriff badges from gold cardstock, paint space helmets silver, and craft “The Claw” signs from foam board
- Set up a vintage toy chest: Fill an old wooden chest or cardboard box painted brown with plush Toy Story characters as backdrop decorations
- Add string lights: Wrap warm white fairy lights around the backdrop edges for that cozy Andy’s-bedroom glow
- Time needed: 2-3 hours for full setup
- Pro tip: Position your photo booth near natural light from a window—it photographs way better than artificial lighting alone!
For more creative celebration inspiration, check out these party names that capture the fun spirit of gathering together.
“To Infinity and Beyond” Dessert Table
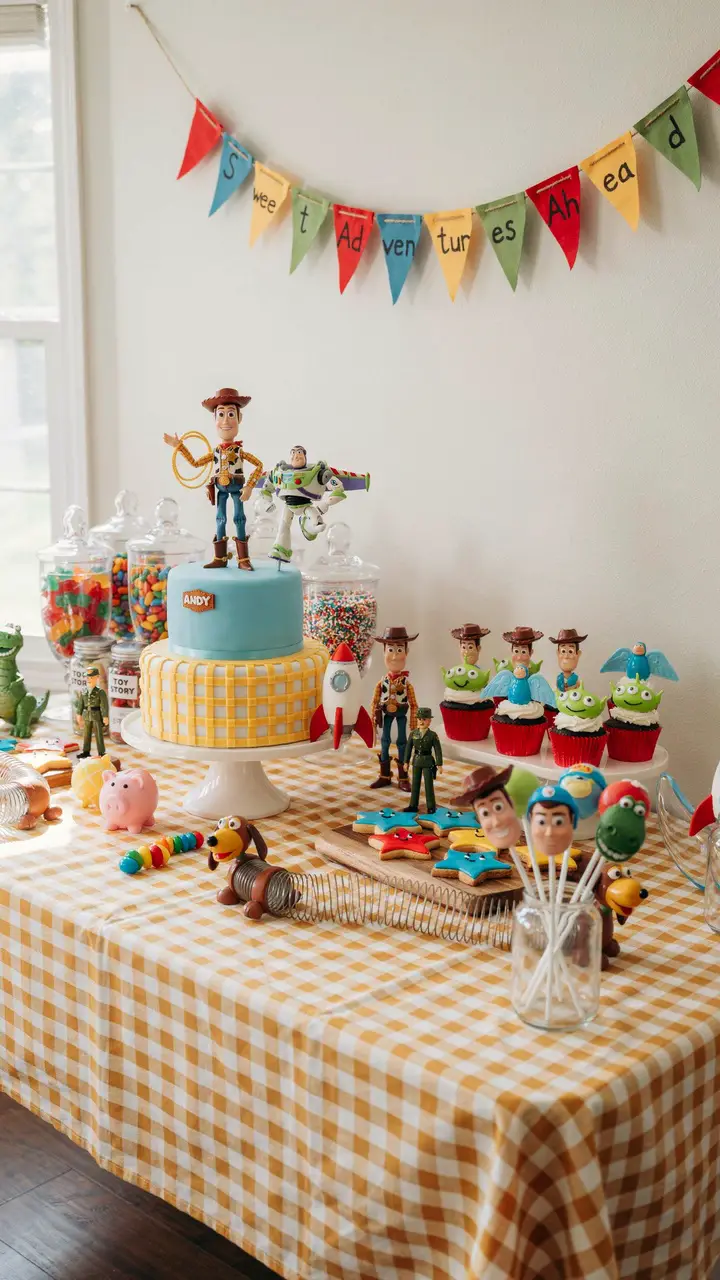
Your dessert table deserves to be the star of the show, and nothing says celebration quite like treats themed around our favorite space ranger and cowboy duo. I once saw a mom tear up when she spotted Buzz Lightyear cupcakes at her shower—these characters mean so much to people!
How to Do It
- Order or bake a themed cake: Budget $60-150 for a custom bakery cake, or save money by decorating a store-bought cake yourself with character figurines ($25-40)
- Create character cupcakes: Top vanilla or chocolate cupcakes with printed edible images or fondant decorations ($2-3 per cupcake)
- Make or order themed cookies: Star-shaped and character cookies decorated in primary colors add beautiful visual variety ($20-40 for two dozen)
- Set up a candy station: Fill clear glass jars with colorful candies—green for aliens, red for Jessie’s hat, blue for Buzz
- Use the signature tablecloth: Find yellow gingham fabric or plastic tablecloths to recreate Andy’s bedspread look ($10-20)
- Add height variation: Use cake stands, wooden crates, or stacked books to create different levels on your table
- Time estimate: 4-5 hours total if making items yourself, 1 hour for setup if ordering
- Budget-friendly alternative: Skip the custom cake and make a simple sheet cake, then top it with toy figurines you already own
Pizza Planet Game Station
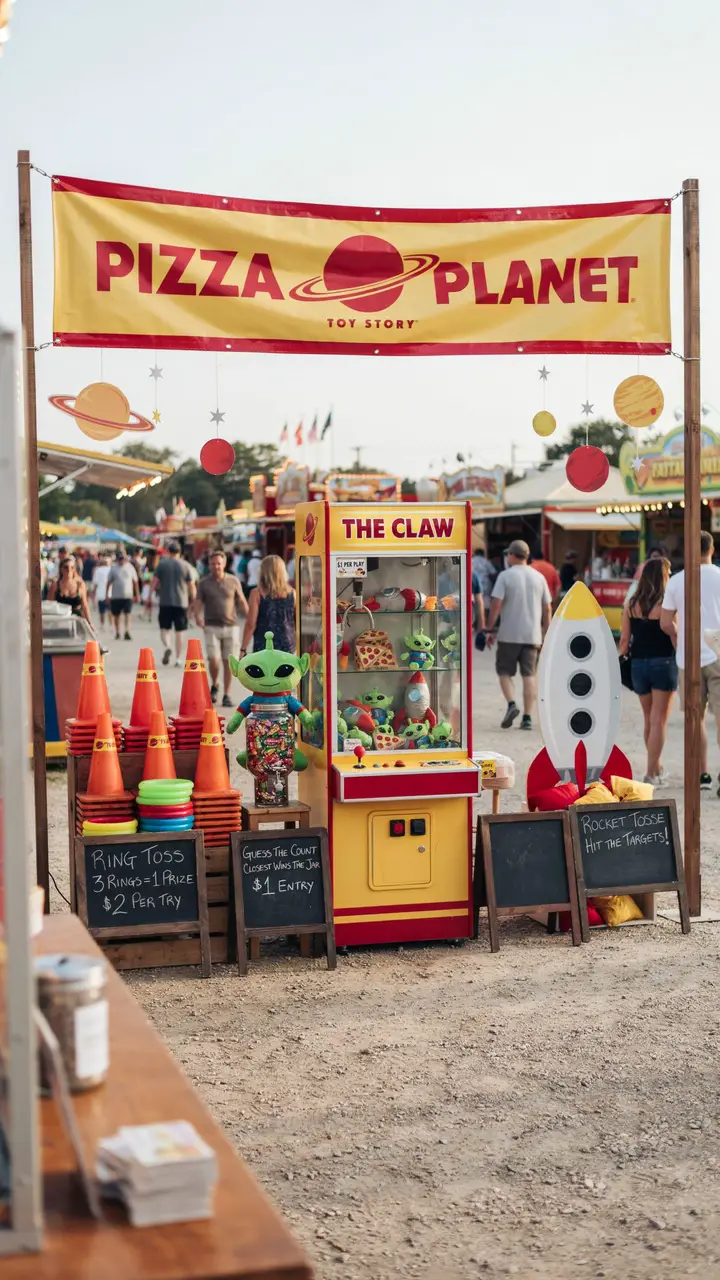
Remember how excited the toys got about Pizza Planet? Create that same energy with interactive game stations that’ll keep your guests entertained between gift-opening and eating. I’ve found that adults get surprisingly competitive with these games—it’s hilarious!
How to Do It
- Create “The Claw” game: Set up small prizes or party favors on a table under a handmade claw sign, let guests pick prizes blind
- Build a ring toss: Use traffic cones or painted bottles as targets, with glow-stick rings or rope rings for tossing
- Design a bean bag toss: Paint a large cardboard with Pizza Planet’s rocket and cut holes for tossing
- Set up guessing jars: Fill clear containers with jellybeans or candy, have guests estimate the count
- Make instruction cards: Write clear rules on small chalkboards or printed cards for each game station
- Designate a game host: Ask a friend to manage the stations and keep track of winners
- Materials needed: Traffic cones ($15), rings ($10), cardboard and paint ($20), small prizes ($30-50), candy ($20)
- Time to set up: 2 hours for game creation, 30 minutes for day-of setup
- Pro tip: Offer small prizes like Toy Story stickers or character keychains—guests love taking home something fun!
Your gaming friends might also enjoy these gaming usernames for their online adventures.
Sheriff Woody Welcome Entrance
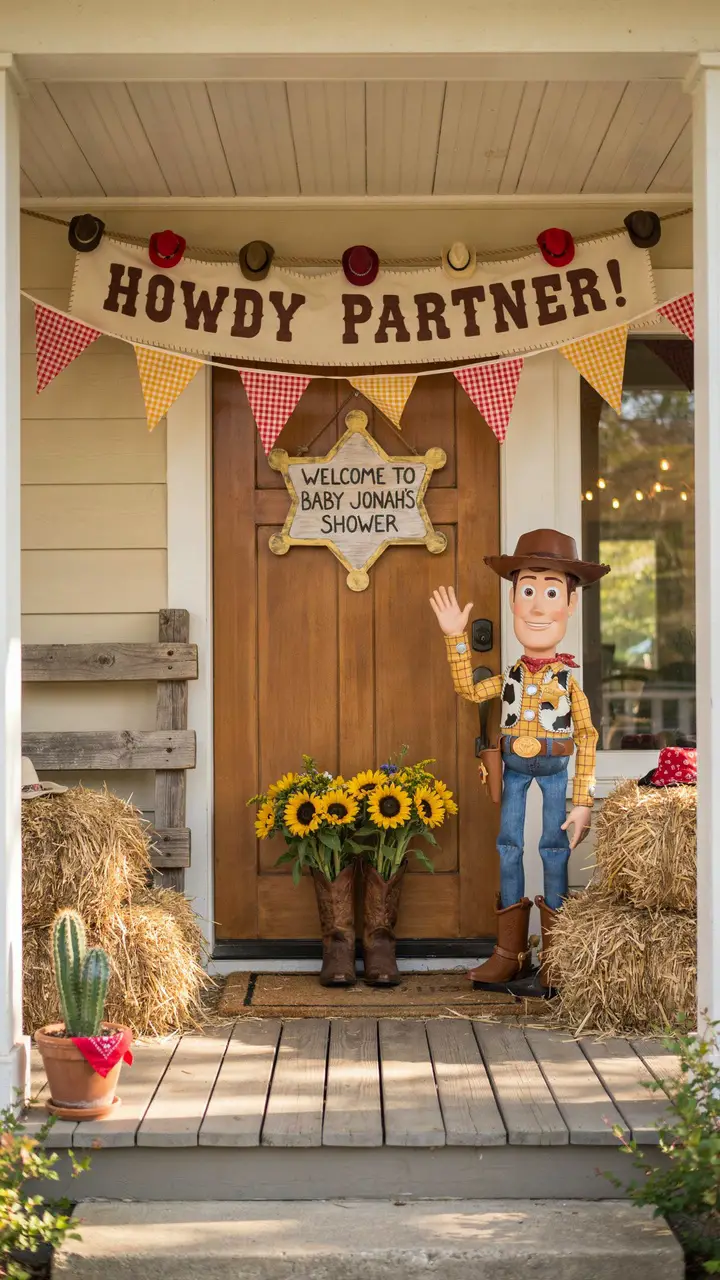
First impressions matter, and greeting your guests with a Woody-themed entrance sets the perfect tone before anyone even steps inside. I love watching guests pull out their phones to snap photos the moment they arrive!
How to Do It
- Print and mount a welcome banner: Design your own or order from Etsy ($15-30), hang it above the entrance
- Position a Woody standee: Place a life-sized cutout or create one from cardboard to greet guests ($30-50)
- Stack hay bales: Rent or purchase small hay bales from a farm supply store ($5-10 each), position them as entrance decorations
- Create a badge welcome sign: Cut a sheriff’s badge shape from plywood, paint gold, and letter your welcome message
- Fill boots with flowers: Use old cowboy boots or rain boots painted brown, fill with sunflowers or daisies ($20 for flowers)
- String rope garland: Weave natural rope between command hooks, add mini cowboy hats or bandanas
- Time required: 1.5-2 hours for entrance setup
- Alternative idea: If you’re short on space, focus on just the banner and Woody cutout—they make the biggest impact!
Buzz Lightyear Space Ranger Invitations
Your invitations set expectations for your entire event, so why not start the excitement with space ranger-worthy designs? When I mailed these out for my sister’s shower, people actually saved them as keepsakes!
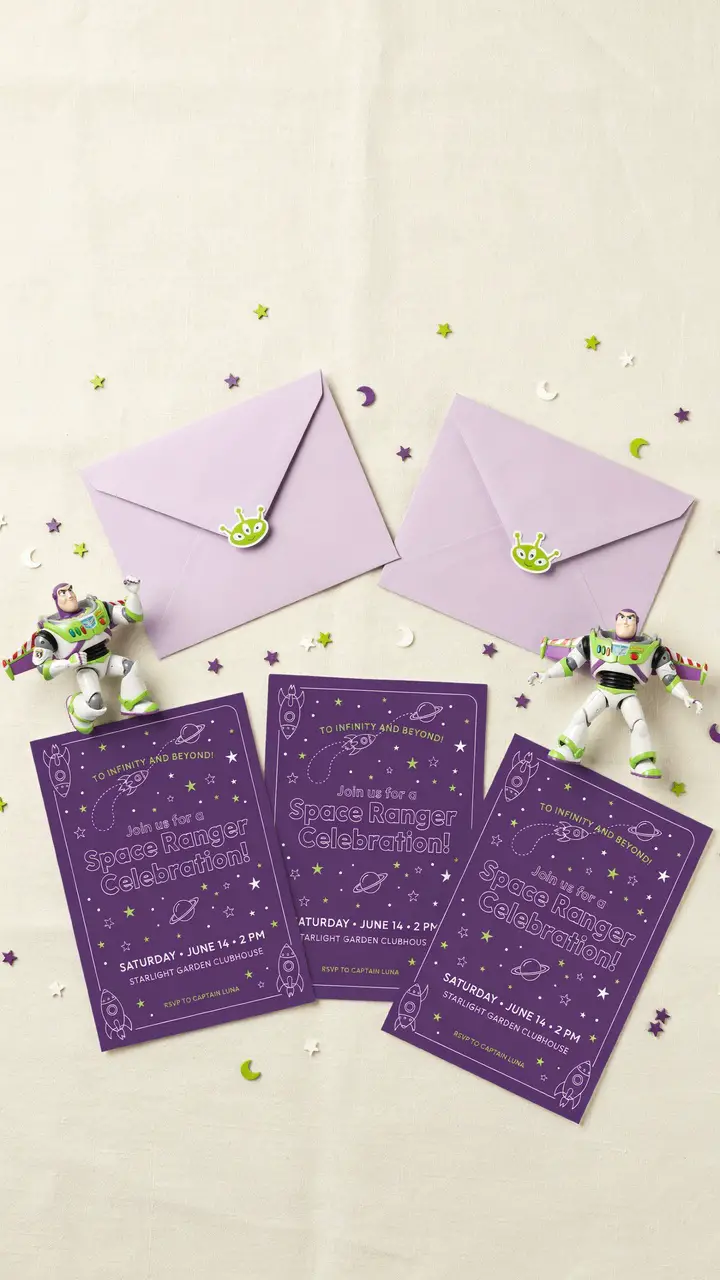
How to Do It
- Choose your format: Digital invitations (free-$15) save money and time, while printed invitations ($2-4 per card) feel more special
- Design key elements: Include space imagery, Buzz’s colors (purple, green, white), and ranger-themed wording
- Add essential details: Date, time, location, RSVP information, registry links, and any theme dress code
- Create matching envelopes: Use purple or white envelopes, seal with space-themed stickers
- Include a fun tagline: Try phrases like “To Infinity and Baby Beyond!” or “Space Rangers Unite for Baby [Name]”
- Order 6-8 weeks ahead: Give guests plenty of notice, especially for weekend events
- Print at home alternative: Use cardstock and your home printer to save $50-100 on printing costs
- Pro tip: Send digital save-the-dates early, then follow up with printed invitations for a special touch
For more group celebration ideas, explore these party playlist names to set the perfect mood.
Little Green Aliens Centerpieces
These adorable three-eyed creatures make perfect table centerpieces that are both budget-friendly and incredibly cute. Plus, guests always want to take them home as keepsakes!
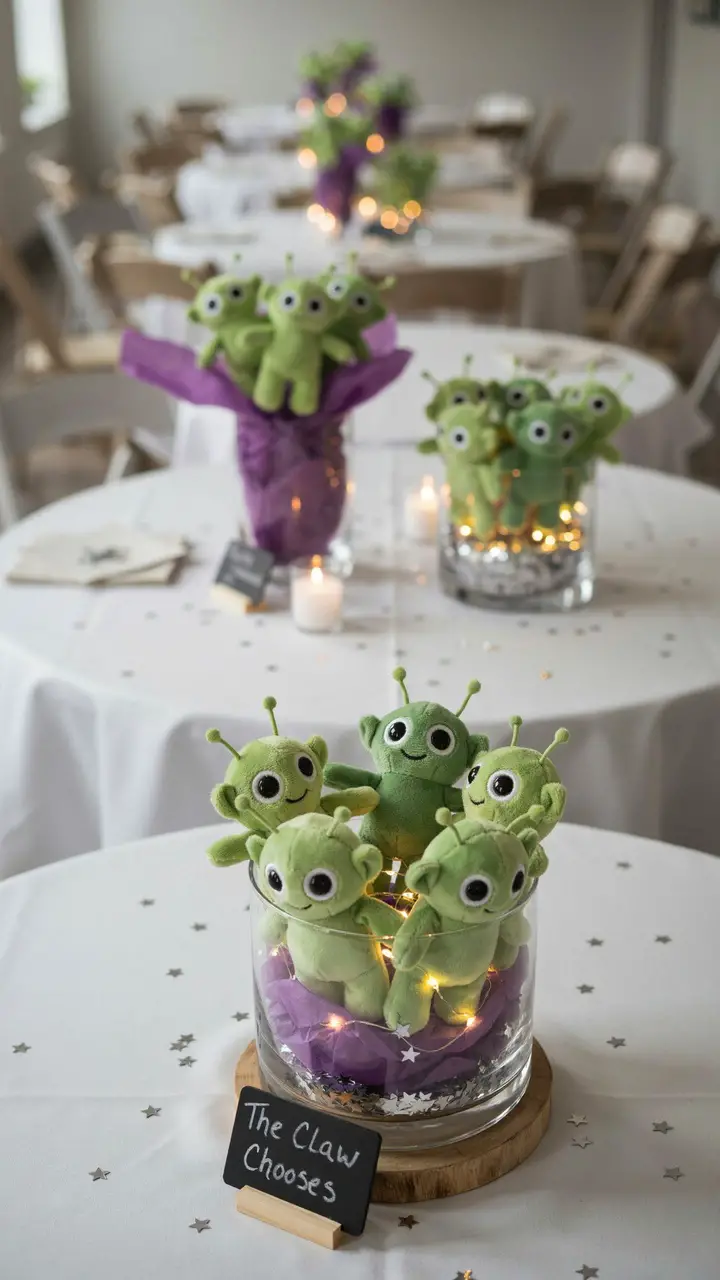
How to Do It
- Purchase plush aliens: Buy packs of small alien toys from dollar stores or online ($1-2 each, need 5-7 per centerpiece)
- Select your vases: Use clear glass cylinders, mason jars, or goldfish bowls from craft stores ($3-8 each)
- Add LED lights: Place battery-operated fairy lights in the bottom of each vase for a magical glow ($5 per strand)
- Layer with tissue: Crumple purple tissue paper and stuff around aliens to fill space and add color
- Sprinkle star confetti: Scatter metallic star confetti on table surfaces and inside vases ($5 per bag)
- Create name signs: Cut small chalkboards or cardstock, write table numbers or “The Claw” themed messages
- Use wooden rounds: Place each centerpiece on natural wood slices for rustic charm ($2-4 each)
- Number of centerpieces needed: One per table (typically 4-8 for most showers)
- Time to assemble: 15-20 minutes per centerpiece
- Money-saving tip: After the shower, give centerpieces to guests as prizes for game winners!
“You’ve Got a Friend in Me” Advice Cards Station
I absolutely love this idea because it creates a meaningful keepsake the parents will treasure forever. Watching guests thoughtfully write their advice always brings such sweet moments to the party.
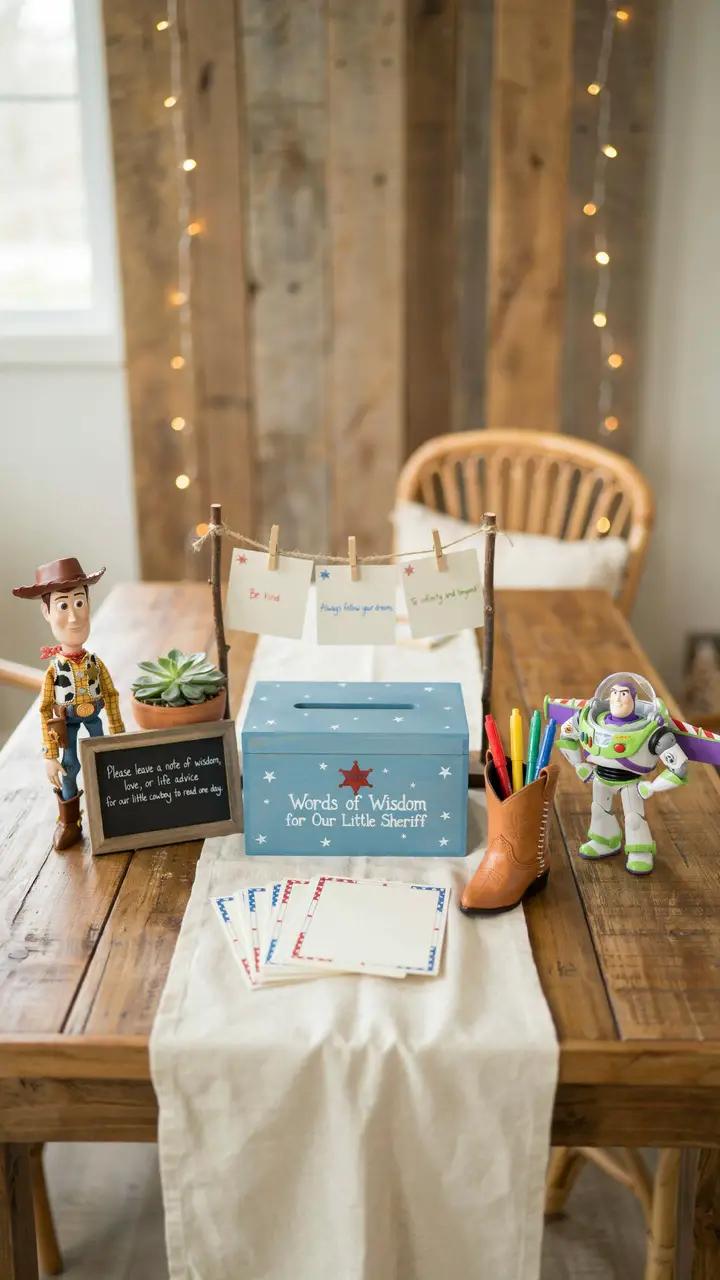
How to Do It
- Design or purchase cards: Create custom advice cards with character images and prompts ($15-25 for printed set), or use blank cardstock
- Include helpful prompts: Add questions like “Best parenting advice?” or “Favorite bedtime story?” to guide guests
- Provide quality pens: Stock the station with multiple pens in fun colors—guests hate searching for working pens!
- Create a collection box: Decorate a shoebox or wooden crate as the “mailbox” for completed cards
- Make instructions clear: Display a sign explaining what guests should write and where to place finished cards
- Add comfortable seating: Pull up a chair or stool so guests can sit while thoughtfully writing
- Offer examples: Display 1-2 sample cards with lighthearted advice to inspire guests
- Materials cost: $20-35 total for cards, box, pens, and decorations
- Setup time: 30 minutes
- Personal touch: Have the mom-to-be’s best friend write the first card to set a warm, genuine tone
Toy Story Character Food Labels
Small details make big impacts, and themed food labels transform ordinary party food into part of your story. Plus, they help guests with dietary restrictions identify what they can eat!
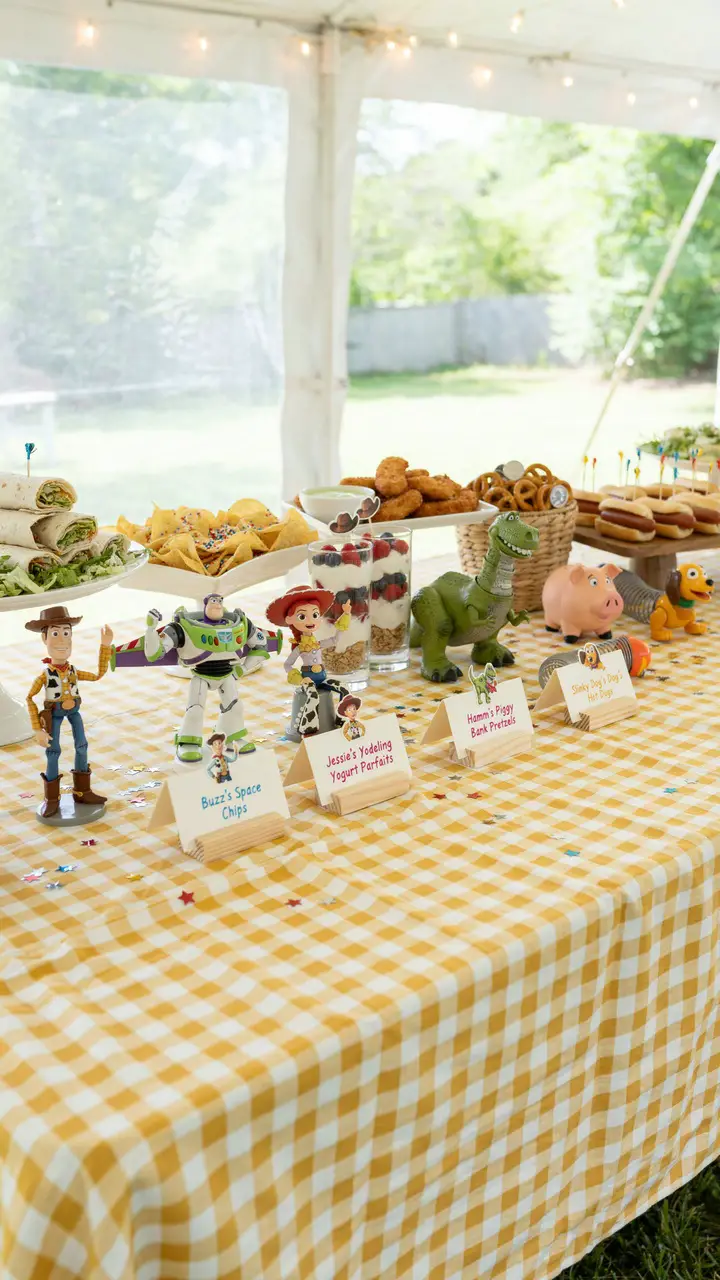
How to Do It
- Create a food list first: Write down all dishes you’re serving, then assign each one a Toy Story character or reference
- Design tent cards: Make 4×6 folded cards using cardstock, add character images and food names in playful fonts
- Print at home or order: Home printing costs about $10 for cardstock and ink, or order custom labels online ($20-40)
- Use creative connections: Match foods to characters logically—green items for aliens, western foods for Woody
- Include allergy information: Add small text noting “contains nuts,” “vegetarian,” “gluten-free” where applicable
- Make labels sturdy: Use heavy cardstock so labels stand up without flopping over
- Add mini figurines: Position small toy characters next to their corresponding food for extra charm
- Total supplies needed: Cardstock ($8), color printer or ordering service ($20), small figurines you already own
- Time to create: 1-2 hours for designing and printing, 15 minutes to set up
- Pro tip: Create a few extra blank labels for last-minute food additions or changes
Looking for more themed inspiration? Browse these disney usernames for other magical ideas.
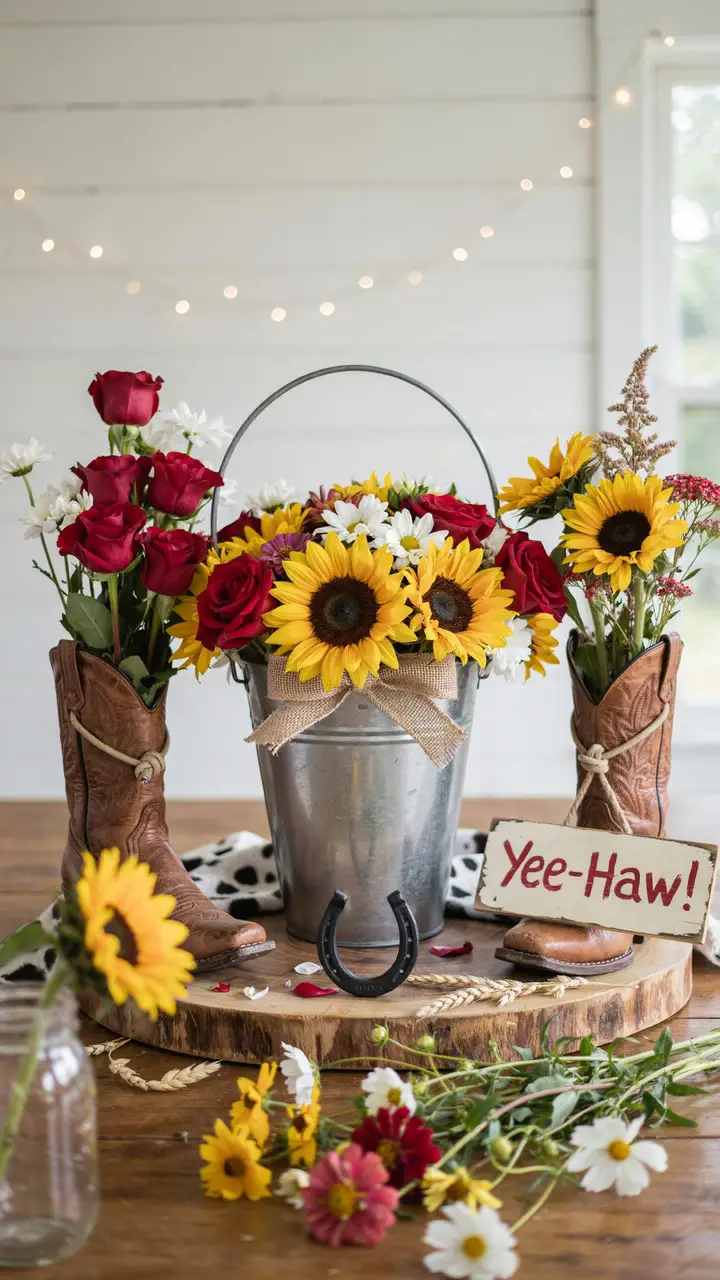
Cowgirl Jessie Floral Arrangements
Jessie’s vibrant personality deserves to shine through your floral choices! These arrangements bring that perfect pop of color and Western charm to your tables.
How to Do It
- Select Jessie’s signature colors: Focus on red, yellow, and white flowers to match her iconic outfit
- Choose flower varieties: Sunflowers, red roses, white daisies, and wildflowers work beautifully ($30-50 per arrangement)
- Find unique containers: Use galvanized buckets ($8-12 each), clean cowboy boots ($15-25 used), or mason jars wrapped in burlap
- Add Western touches: Tie burlap ribbon, small rope lassos, or bandana fabric around containers
- Create varying heights: Use different container sizes and stem lengths for visual interest
- Keep them fresh: Buy flowers 1-2 days before the event, keep in water until setup
- DIY to save money: Purchase flowers from grocery stores or farmer’s markets instead of florists (saves $100+)
- Number needed: 1 large arrangement per table, plus 1 statement arrangement for the gift or dessert table
- Assembly time: 45-60 minutes per arrangement
- Alternative idea: Mix real flowers with artificial stems to reduce cost and preparation time
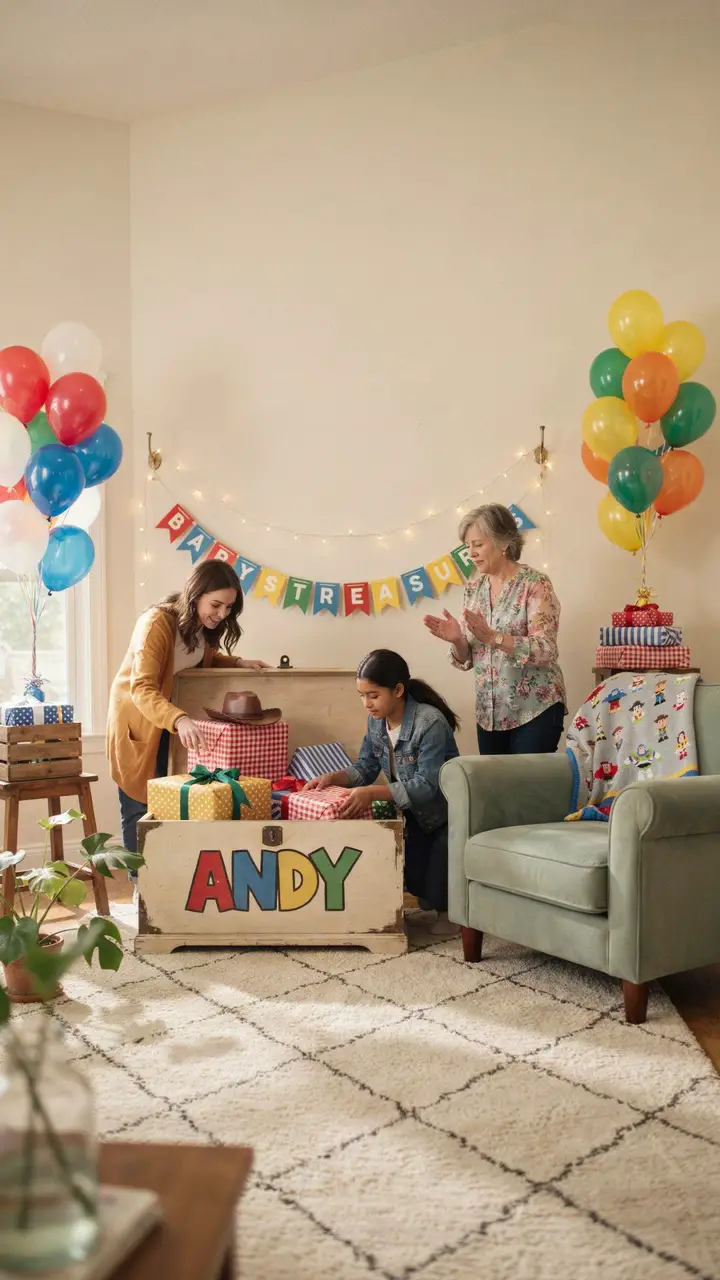
Toy Chest Gift Display Area
Transform the gift-opening area into something special that honors the toy box theme everyone loves from the movies. This creates such a fun focal point for one of the shower’s main events!
How to Do It
- Find or build a toy chest: Purchase an unfinished wooden chest ($40-80) to paint, or use a large cardboard box
- Paint Andy’s style letters: Use bright primary colors to spell baby’s name or “Andy” on the chest lid
- Position the chest strategically: Place it near the mom-to-be’s opening chair, easily visible to all guests
- Designate a gift table: Set up a separate table for gifts as guests arrive, then move them to the chest area for opening
- Create a cozy opening station: Provide a comfortable chair, small table for cards, and good lighting
- Add balloon decorations: Flank the area with balloon bouquets in red, blue, yellow, and green ($20-40)
- Provide gift opening supplies: Keep scissors, trash bags, and gift list notepad nearby
- Setup time: 1 hour for the complete area
- Photo op potential: This spot makes a perfect backdrop for photos of mom opening gifts
- Pro tip: Assign someone to collect cards and track who gave what gift—it makes thank-you notes so much easier!
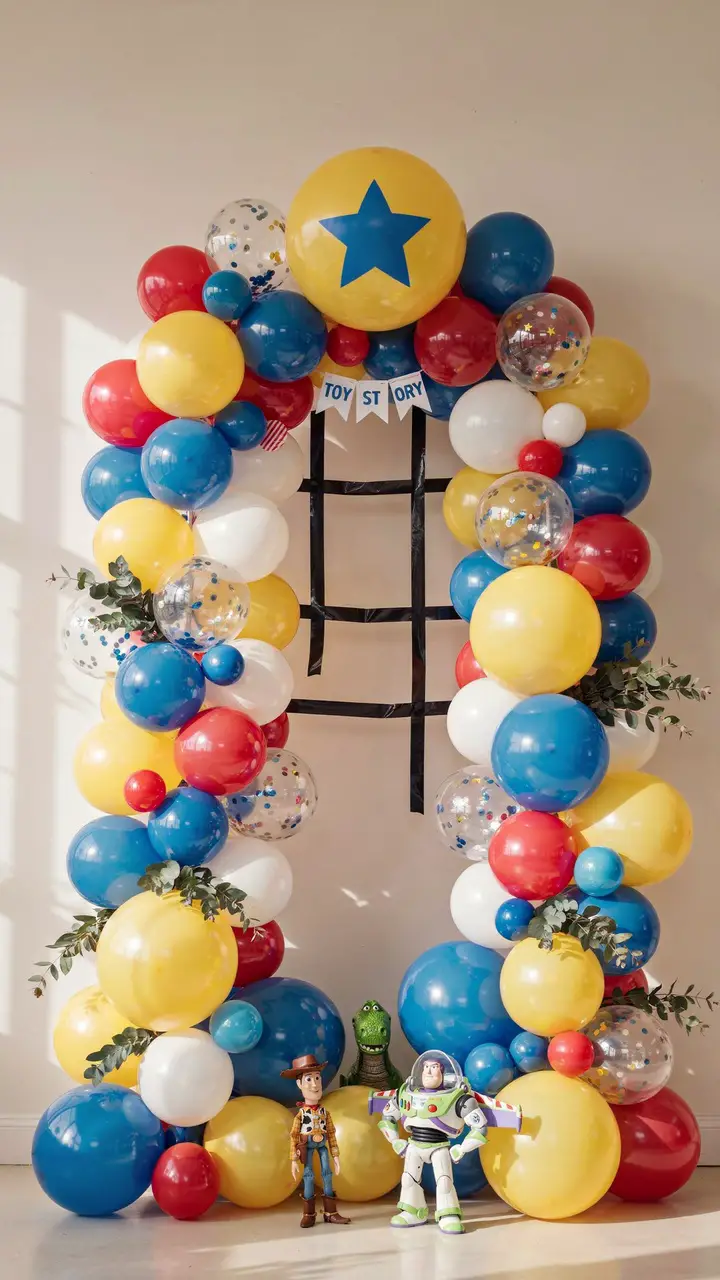
Pixar Ball Balloon Garland
That iconic yellow ball with the blue star appears in every Pixar movie, making it a perfect subtle nod for true fans. Plus, it adds an amazing pop of color to your space!
How to Do It
- Purchase balloon supplies: Order balloon garland kits online ($40-60) or buy balloons individually in yellow, blue, red, white
- Calculate quantity needed: Plan for 80-100 balloons for a 10-foot garland, adjust for your space
- Use balloon garland tape: This clear plastic strip with holes makes assembly infinitely easier ($8-12)
- Inflate strategically: Create varied sizes—some fully inflated, some smaller for dimension
- Follow the Pixar pattern: Concentrate yellow and blue to recreate the ball’s distinctive look
- Add greenery: Tuck eucalyptus or artificial greenery between balloons for elegance ($15-20)
- Hang securely: Use command hooks, fishing line, or garland hooks—never damage venue walls!
- Assembly time: 2-3 hours for a large garland (invite friends to help—it goes faster!)
- Budget option: Skip the garland kit and buy individual balloons from dollar stores (saves $30+)
- Pro tip: Assemble your garland the evening before and hang the morning of the shower—balloons last 24+ hours
For team activities at your celebration, consider these team names for competition to add friendly rivalry.
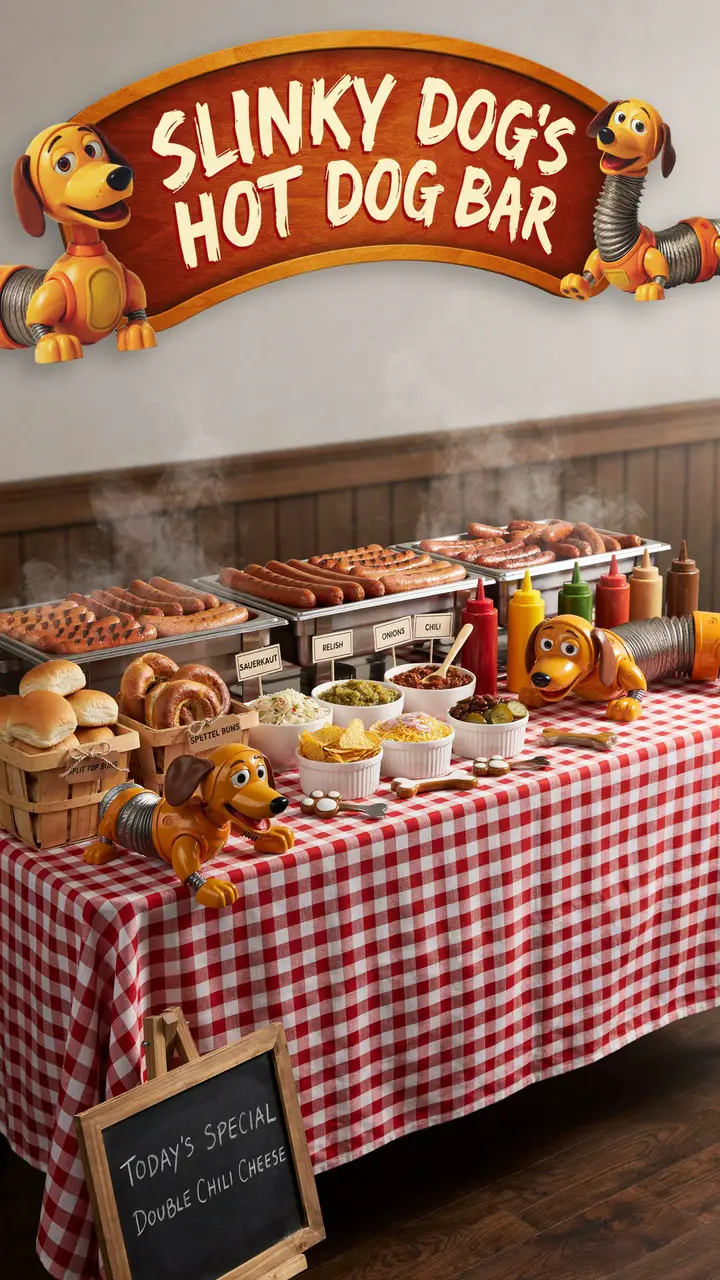
Slinky Dog Hot Dog Bar
Food puns are the best, and a hot dog bar themed after Slinky Dog always gets guests laughing while creating their perfect meal. This interactive food station keeps everyone engaged!
How to Do It
- Cook hot dogs in advance: Use a slow cooker to keep them warm throughout the party (feeds 20-25 people with 3-4 packs)
- Offer variety: Include regular hot dogs, bratwurst, and veggie dogs for different preferences
- Set up topping station: Provide bowls of sauerkraut, relish, diced onions, shredded cheese, chili, bacon bits
- Include condiments: Set out ketchup, mustard (multiple types!), mayo, and barbecue sauce
- Provide bun options: Regular hot dog buns, pretzel buns, and gluten-free buns
- Add side dishes: Chips, coleslaw, potato salad, and pickle spears complete the meal
- Create clear labels: Mark each topping and identify any allergens clearly
- Use fun serving ware: Display toppings in colorful bowls with wooden spoons
- Total food cost: $60-100 for 25 people depending on quality and options
- Setup time: 30 minutes for full buffet arrangement
- Serving tip: Keep hot dogs in a slow cooker on “warm” setting—they stay perfect for hours!
Rex’s Dino-Mite Baby Predictions Game
Baby prediction games are shower classics, and adding Rex’s nervous personality makes this version extra entertaining. Watching guests debate due dates and baby weights never gets old!
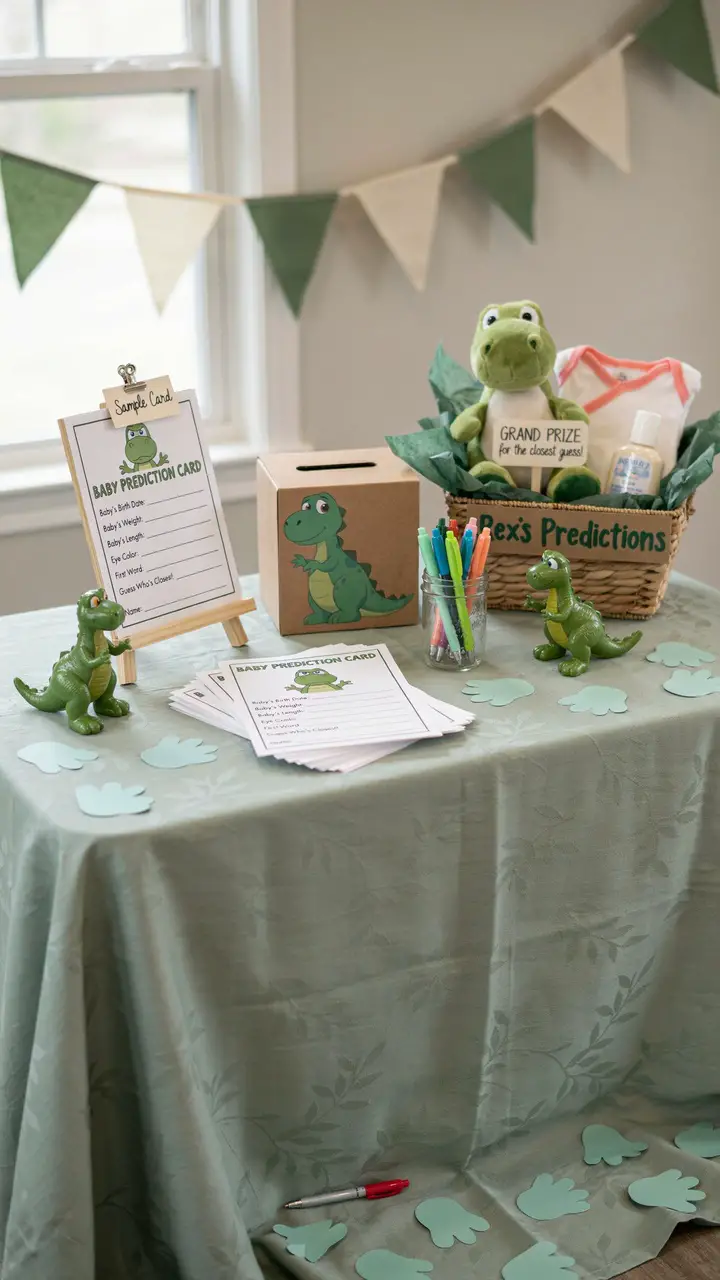
How to Do It
- Design prediction cards: Create cards with Rex’s image and spaces for 8-10 predictions (date, time, weight, length, eye color, hair amount)
- Print on cardstock: Use quality paper so cards feel substantial, not flimsy ($10-15 for 30 cards)
- Include fun categories: Add predictions like “first word,” “looks more like mom or dad,” “future career”
- Provide plenty of pens: Stock 5-6 working pens in fun colors—guests will use them all!
- Create collection system: Decorate a box or envelope for guests to submit completed cards
- Display instructions clearly: Write a sign explaining the game and where to place finished cards
- Follow up after baby arrives: Mom-to-be should check cards after birth to see who predicted correctly
- Offer a prize: Let guests know the closest predictor wins a prize (tell them what it is for extra motivation!)
- Materials needed: Cardstock, printer ink, pens, collection box, decorations ($20-30 total)
- Preparation time: 1 hour for design and printing, 15 minutes for setup
Star Command Drink Station
Every space ranger needs proper refreshments! Create a drink station that’s both functional and perfectly themed to keep guests hydrated and happy.
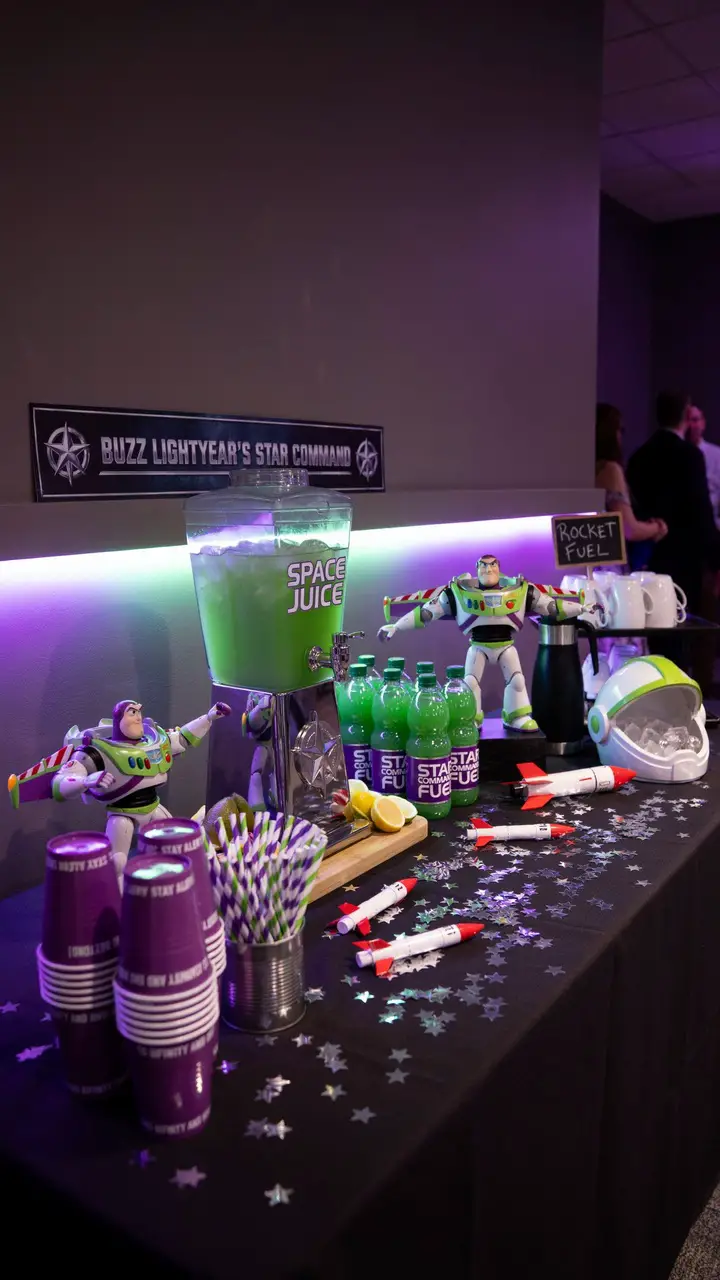
How to Do It
- Choose your beverages: Offer green punch, lemonade, iced tea, coffee, and water for variety
- Create themed labels: Design drink tags like “Star Command Fuel,” “Rocket Refresher,” “Galaxy Juice”
- Use character colors: Make green lime punch, purple grape juice, or blue Hawaiian punch
- Provide fun cups: Order purple or green cups, add Buzz Lightyear stickers ($15-25 for 50 cups)
- Add garnish options: Set out lime wheels, lemon slices, mint leaves, or fun stirrers
- Include special straws: Paper straws in metallic colors or star patterns add nice detail ($8-12)
- Keep drinks cold: Use large dispensers with ice, or keep bottles in decorative coolers
- Create coffee station: Set up separate hot beverages with themed sign for coffee-loving guests
- Add lighting effects: String purple or blue LED lights around the station for atmosphere
- Total cost: $40-60 for all beverages and supplies (non-alcoholic options)
- Setup time: 30-40 minutes
- Pro tip: Freeze some punch ahead in ice cube trays—keeps drinks cold without diluting them!
For more festive gathering ideas, check out these group names for friends to celebrate your crew.
Toy Story Trivia Baby Bingo
Combine two classic shower games into one by creating Toy Story-themed baby bingo cards. I’ve seen this keep guests entertained for the entire gift-opening session!
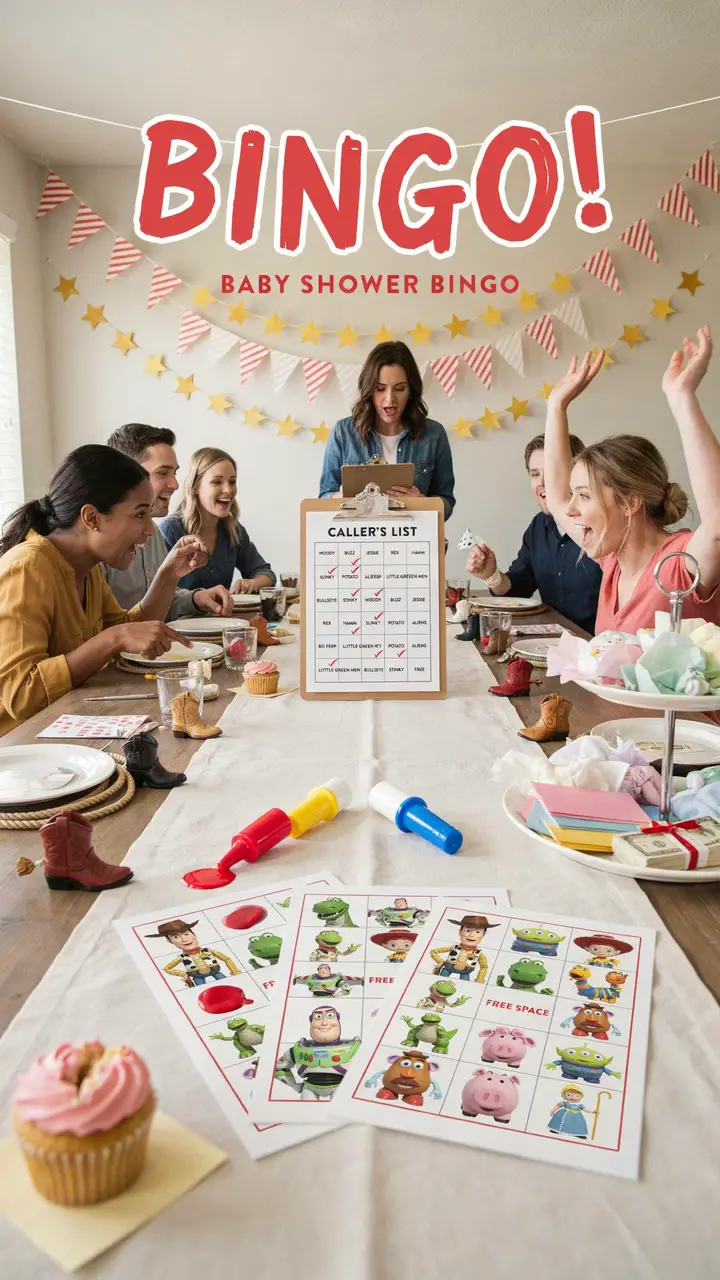
How to Do It
- Design unique cards: Create 30-40 different bingo cards with randomized character placements (find templates online or make in Word)
- Use character images: Replace bingo numbers with Toy Story character faces for visual appeal
- Print on cardstock: Ensures cards don’t tear during play ($15-20 for supplies)
- Provide markers: Give guests daubers, chips, or colorful markers to mark their cards
- Create caller cards: Make a master list of all characters for the gift opener to call out
- Explain the rules: Guests mark squares when mom-to-be receives gifts related to characters
- Alternative play method: Mark squares when you spot items that match character themes (diapers = aliens who think everything’s “ooooh”)
- Offer multiple prizes: Award winners for first bingo, four corners, blackout ($30-50 for small prizes)
- Preparation time: 2 hours for design and printing
- Pro tip: Laminate cards with clear contact paper so you can reuse them at multiple showers!
Infinity and Beyond Party Favors
Send guests home with thoughtful favors that remind them of this special celebration. The best favors are actually useful, not just dust collectors!
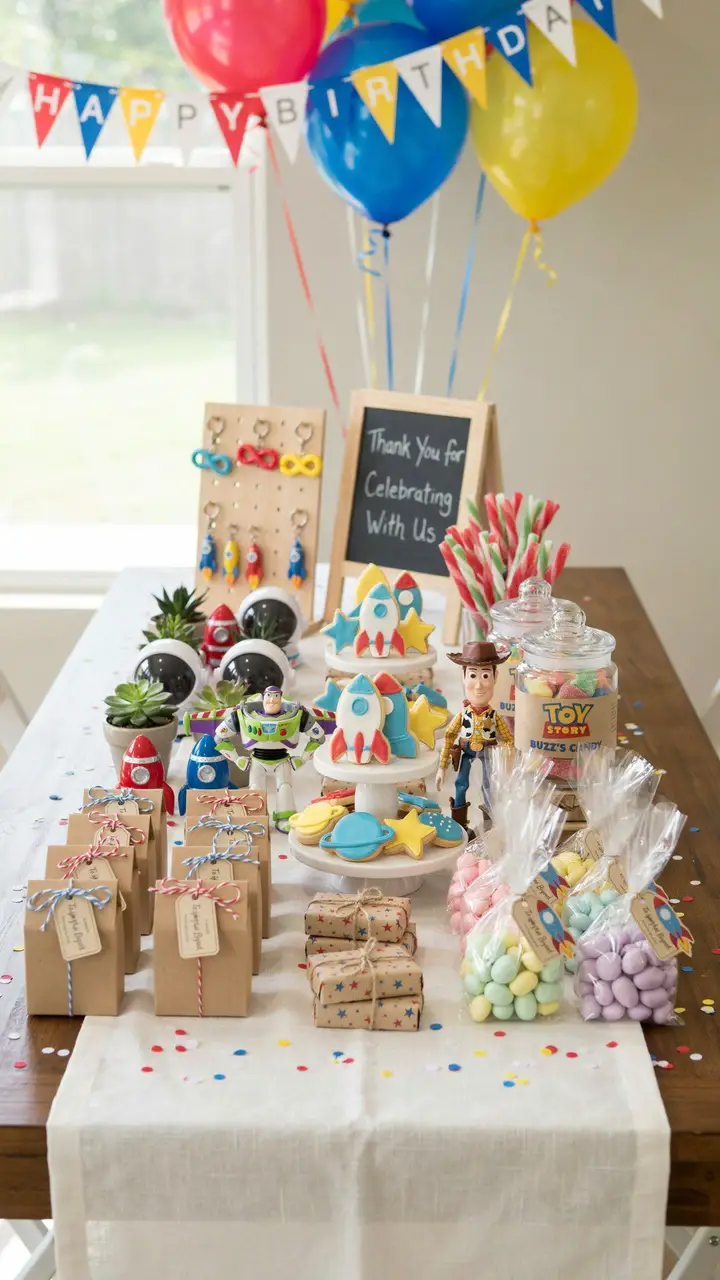
How to Do It
- Choose practical favors: Select items guests will actually use or enjoy, not just throw away
- Cookie option: Order or bake decorated sugar cookies in star, rocket, or character shapes ($2-3 each)
- Succulent plants: Buy tiny succulents and plant in painted pots with space or character designs ($3-5 each)
- Candy jars: Fill small glass jars with colorful candies, add custom Toy Story labels ($2-4 each)
- Toy figurines: Package small character toys with thank-you tags ($3-5 each)
- Create custom tags: Design “Thanks for joining our adventure” tags with baby’s name and shower date
- Use themed packaging: Wrap favors in boxes or bags featuring Toy Story colors and patterns
- Calculate quantity: Order 5-10 extra favors in case of unexpected guests
- Total budget: $60-150 depending on guest count and favor type
- Assembly time: 2-3 hours to prepare all favors
- Money-saving idea: Make homemade treats like cookies or candy mixes and package them beautifully—guests love homemade!
Planning a Toy Story baby shower means creating an experience filled with nostalgia, friendship, and excitement for the adventure ahead. These 15 ideas give you everything you need to throw a celebration that honors these beloved characters while focusing on what really matters—welcoming a precious new life into the world.
Remember, the best baby showers aren’t about perfection or spending a fortune. They’re about bringing people together to support someone you love during one of life’s most beautiful transitions. Whether you go all-out with every detail or choose just a few favorite ideas from this list, your thoughtfulness and effort will shine through.
So grab those toy figurines, print those invitations, and get ready to create memories that’ll last to infinity and beyond. Your little space ranger or cowgirl is almost here, and this celebration will be the perfect way to say, “You’ve got a friend in me!” <3

Greetings, I’m Alex – an expert in the art of naming teams, groups or brands, and businesses. With years of experience as a consultant for some of the most recognized companies out there, I want to pass on my knowledge and share tips that will help you craft an unforgettable name for your project through TeamGroupNames.Com!