
You know that moment when you’re hosting a playdate or managing a small group of toddlers and suddenly realize you need to keep multiple tiny humans entertained at once? Yeah, me too.
Whether you’re a parent organizing a playgroup, a caregiver managing multiple little ones, or just brave enough to invite over your toddler’s friends, group activities can either be your best friend or your biggest challenge.
Here’s the thing about toddler group activities—they need to be simple enough that everyone can participate, engaging enough to hold their attention (for at least a few minutes!), and flexible enough to accommodate different developmental stages.
I’ve learned through plenty of trial and error that the best group activities embrace the chaos, encourage social interaction without forcing it, and have minimal rules because, let’s be honest, toddlers and rules aren’t exactly best friends.
Let me share ten group activities that have actually worked for me and countless other parents I know. These aren’t Pinterest-perfect setups—they’re real, doable ideas that consider the beautiful messiness of multiple toddlers in one space.
Parachute Play: The Ultimate Crowd-Pleaser
There’s something magical about watching a group of toddlers giggling uncontrollably while running under a billowing parachute. This activity has saved me more times than I can count at playgroups, and every single child gets equally excited about it.

How to Set This Up
- Materials needed: One play parachute (6-12 feet diameter), 5-10 lightweight balls or small stuffed animals, open floor space (living room, basement, or backyard)
- Age range: 18 months to 5 years (with adult assistance for younger toddlers)
- Setup time: 2 minutes to clear space and lay out parachute
- Play duration: 10-20 minutes before energy shifts
- Mess level: Low—just need space to move around
Step-by-step instructions:
- Clear a safe space free from furniture edges and breakable items
- Lay the parachute flat on the ground and have adults or older kids hold handles
- Start with simple up-and-down movements while everyone holds on
- Add balls on top and watch toddlers delight in making them bounce
- Try “mushroom” (everyone lifts high then steps underneath before it falls)
- Play “cat and mouse” with one child running under while others lift and lower
Developmental benefits: Gross motor coordination, following group directions, turn-taking, spatial awareness, cooperative play
Safety notes: Always have enough adults to maintain parachute control; watch for toddlers who might trip on fabric edges; keep movements slow enough for youngest participants
Activity variations: Use scarves instead of balls for slower-paced fun; add music and pause when you stop for a musical parachute game; try color calling (“everyone wearing blue, run underneath!”)
Budget tip: No parachute? Use a large flat bedsheet—it works surprisingly well and costs nothing
Parent sanity-saver: This burns energy FAST, making it perfect before snack time or naptime
Looking for more group fun? Check out these creative team names for kids to give your playgroup some identity!
Bubble Station Bonanza
I’ve never met a toddler who doesn’t stop everything for bubbles. Setting up multiple bubble stations around your space gives every child something to do while naturally encouraging them to move between activities and interact with different friends.

How to Set This Up
- Materials needed: Large bucket or basin, bubble solution (commercial or homemade—1 cup water, 2 tablespoons dish soap, 1 tablespoon glycerin), variety of bubble wands (commercial, DIY from pipe cleaners, or kitchen utensils like slotted spoons), optional bubble machine, towels for inevitable spills
- Age range: 12 months to 5 years (younger ones watch and pop, older ones blow)
- Setup time: 5 minutes to prepare solution and arrange stations
- Play duration: 15-30 minutes of solid engagement
- Mess level: Medium—bubbles create slippery surfaces and solution drips
Step-by-step instructions:
- Fill shallow basins or buckets with bubble solution at different stations
- Provide various wand sizes—large wands make easier bubbles for beginners
- Set up one “popping zone” with continuous bubbles from a machine
- Create a “blowing station” with smaller wands for toddlers ready to blow
- Have towels ready for wet hands and inevitable spills
- Encourage but don’t force sharing—having multiple wands prevents conflicts
Developmental benefits: Hand-eye coordination, breath control, cause-and-effect understanding, gross motor skills (chasing and reaching), social interaction through parallel play
Safety considerations: Supervise closely around bubble solution—it’s soapy and can sting eyes; avoid on slippery surfaces if indoors; choose non-toxic bubble solutions for youngest toddlers who might taste everything
Activity variations: Add food coloring to solution for colored bubbles (test on surface first!); freeze bubble solution slightly for sturdier bubbles; create giant bubbles using hula hoops in kiddie pools for older toddlers
Cost-saving alternative: Homemade solution costs pennies; pipe cleaners bent into shapes make free wands; skip the bubble machine and blow bubbles yourself
Cleanup strategy: Rinse any bubble solution immediately from surfaces; have a designated “dry off” towel area before kids go back inside
Want to organize your little bubble enthusiasts? Try some group names for 4 friends for your regular playdate crew!
Musical Movement Circle
This one’s a lifesaver because it combines music (toddlers love music!), movement (toddlers need movement!), and simple instructions (because complicated rules don’t work). The best part? Even the shyest toddler can participate at their own comfort level.

How to Set This Up
- Materials needed: Music source (phone, speaker, or simple instrument you can play), simple rhythm instruments (maracas, tambourines, bells, drums, or homemade shakers), clear floor space for a circle, optional: scarves or ribbons for waving
- Age range: 12 months to 4 years (babies can sit in laps and participate)
- Setup time: 3 minutes to gather instruments and form circle
- Play duration: 10-15 minutes (shorter sessions work better)
- Mess level: Low—just instruments being dropped or tossed occasionally
Step-by-step instructions:
- Gather everyone in a loose circle on the floor (don’t worry if it’s chaotic!)
- Start with familiar songs toddlers recognize (Wheels on the Bus, If You’re Happy and You Know It)
- Pass out instruments but expect immediate chaos—that’s normal
- Do simple actions everyone can copy: clapping, stomping, jumping, spinning
- Alternate between fast and slow songs to help with energy management
- Include a “freeze dance” element where everyone stops when music pauses
- Let kids lead occasionally—they’ll surprise you with their creativity
Developmental benefits: Rhythm and music awareness, gross motor coordination, following directions in a group setting, self-expression, auditory processing, taking turns
Safety notes: Ensure instruments don’t have small removable parts for youngest toddlers; create enough space so jumping/spinning kids don’t collide; watch for children who might throw instruments when excited
Activity variations: Use scarves for a gentler version with flowing movements; try animal walks (stomp like elephants, hop like bunnies); add a “copycat” element where one child leads movements; incorporate simple instruments like pots and wooden spoons
DIY instrument ideas: Plastic bottles filled with rice or beans (secure lid with tape!); paper plates stapled together with bells inside; wooden spoons for drumsticks on overturned pots
Managing different ages: Older toddlers can lead actions while younger ones watch and participate at their level; don’t force participation—some kids prefer observing first
Check out these music trivia team names if your little musicians need some group inspiration!
Collaborative Art Wall
Here’s something I learned the hard way—trying to make toddlers create individual art projects in a group setting often ends in tears (theirs and yours). But give them one giant shared canvas? Magic happens. They naturally work alongside each other, get inspired by what others are doing, and there’s zero pressure for a “finished” product.

How to Set This Up
- Materials needed: Large roll of craft paper or taped-together construction paper (4×6 feet section), painter’s tape, washable paints in squeeze bottles or small cups, variety of tools (sponges, foam brushes, large crayons, dot markers, stickers), paint smocks or old t-shirts, drop cloth or newspaper for floor protection, wet wipes and towels nearby
- Age range: 18 months to 5 years (with varying levels of independence)
- Setup time: 10 minutes to tape paper and set out supplies
- Play duration: 15-30 minutes depending on group interest
- Mess level: High—embrace it, plan for it, protect accordingly
Step-by-step instructions:
- Tape a large sheet of paper low on the wall (knee to shoulder height for toddlers)
- Protect the floor underneath with a drop cloth or old shower curtain
- Set out 3-4 paint colors in small amounts (start small—you can add more!)
- Provide different tools at various stations along the paper
- Put smocks on everyone (even if they claim they’ll be careful—they won’t)
- Step back and let creative chaos unfold
- Resist the urge to direct their art—this is about process, not product
- Take photos during the creation for parents to see
Developmental benefits: Fine motor skills, color recognition, creative expression, cooperation without forced sharing, sensory exploration, cause-and-effect learning, confidence building
Safety considerations: Use only non-toxic, washable materials; tape paper securely so it won’t fall if tugged; supervise paint consumption (some toddlers test if it’s edible); ensure adequate ventilation
Activity variations: Add texture with bubble wrap printing, sponge shapes, or stamping with kitchen items; try a seasonal theme with fall leaves to stamp, or winter snowflakes to glue; make it sensory by adding sand to paint or using shaving cream instead
Managing the chaos: Limit paint colors to 3-4 to prevent brown mud mixture; have a designated “washing station” nearby; accept that some children will paint for 30 seconds then wander—that’s okay!
Photo opportunity: Take a group picture of all the kids in front of their masterpiece before taking it down
Cleanup strategy: Wet wipe hands immediately before paint dries; have a sink or basin with soapy water ready; roll up artwork while still wet if keeping it
Coordinating creative chaos with your crew? These small group names might help organize your artistic squad!
Sensory Bin Stations
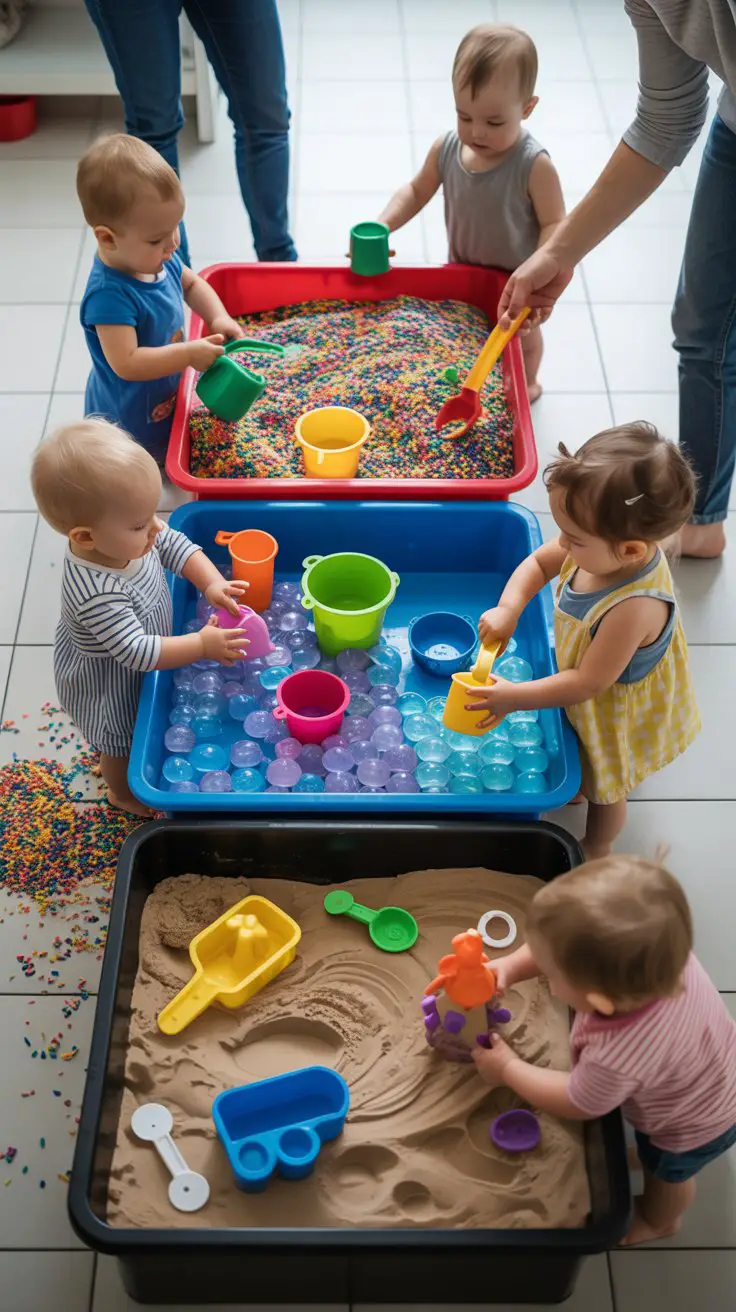
Multiple sensory bins set up around a space is honestly genius for group play. Each child can engage at their own pace, bins naturally limit how many kids are at one station (preventing overwhelming crowding), and the focused, tactile play often has a calming effect even on energetic toddlers.
How to Set This Up
- Materials needed: 3-4 large plastic bins or shallow storage containers, sensory fillers (rice, pasta, water beads, kinetic sand, dried beans, shredded paper), scooping tools (cups, spoons, small shovels, tongs), small toys relevant to each bin (vehicles for rice, sea creatures for water beads, construction figures for sand), large mat or tablecloth for containment, wet wipes for inevitable hand cleaning
- Age range: 18 months to 4 years (with close supervision for youngest)
- Setup time: 15 minutes to fill bins and arrange stations
- Play duration: 20-40 minutes of focused play
- Mess level: Medium to high—but containable with proper setup
Step-by-step instructions:
- Set up bins at a low table or directly on a protected floor area
- Fill each bin with a different sensory material (4-6 inches deep)
- Add 2-3 scooping tools and 3-4 small toys to each bin
- Space bins far enough apart that children aren’t on top of each other
- Establish a simple rule: “One bin at a time, then move to the next”
- Allow free exploration—resist directing their play
- Have a “washing station” with wet wipes or a basin nearby for hand cleaning between bins
- Expect mixing of materials between bins—that’s part of the learning
Developmental benefits: Fine motor skills, sensory exploration, hand-eye coordination, concentration, problem-solving, mathematical concepts (pouring, measuring, comparing), independent play
Safety considerations: Supervise youngest toddlers closely around small items; choose age-appropriate fillers (avoid choking hazards); monitor for children who mouth materials; ensure water beads are stored safely when not in use
Bin combination ideas:
- Beach theme: kinetic sand + shells + small buckets
- Rainbow rice + measuring cups + small animals
- Dried pasta + tongs + sorting bowls
- Water beads + sea creatures + scoops
- Shredded paper + plastic eggs + pom poms
Managing different ages: Younger toddlers enjoy simple scooping and dumping; older toddlers might create scenarios or sort items; adjust tools to developmental level
Budget-friendly options: Use rice, pasta, or dried beans instead of expensive water beads or kinetic sand; repurpose kitchen tools as scoops; use toys you already have
Cleanup plan: Use a handheld vacuum for rice/pasta; contain water beads immediately (they’re slippery!); store kinetic sand in airtight container; accept that some sensory material will escape—it’s inevitable
Parent sanity-saver: Set up bins outdoors when possible for easier cleanup; lay bins in a large cardboard box to contain mess; keep this activity for when you have energy to deal with cleanup
For more sensory fun ideas, explore these science team names that celebrate learning through exploration!
Obstacle Course Adventure
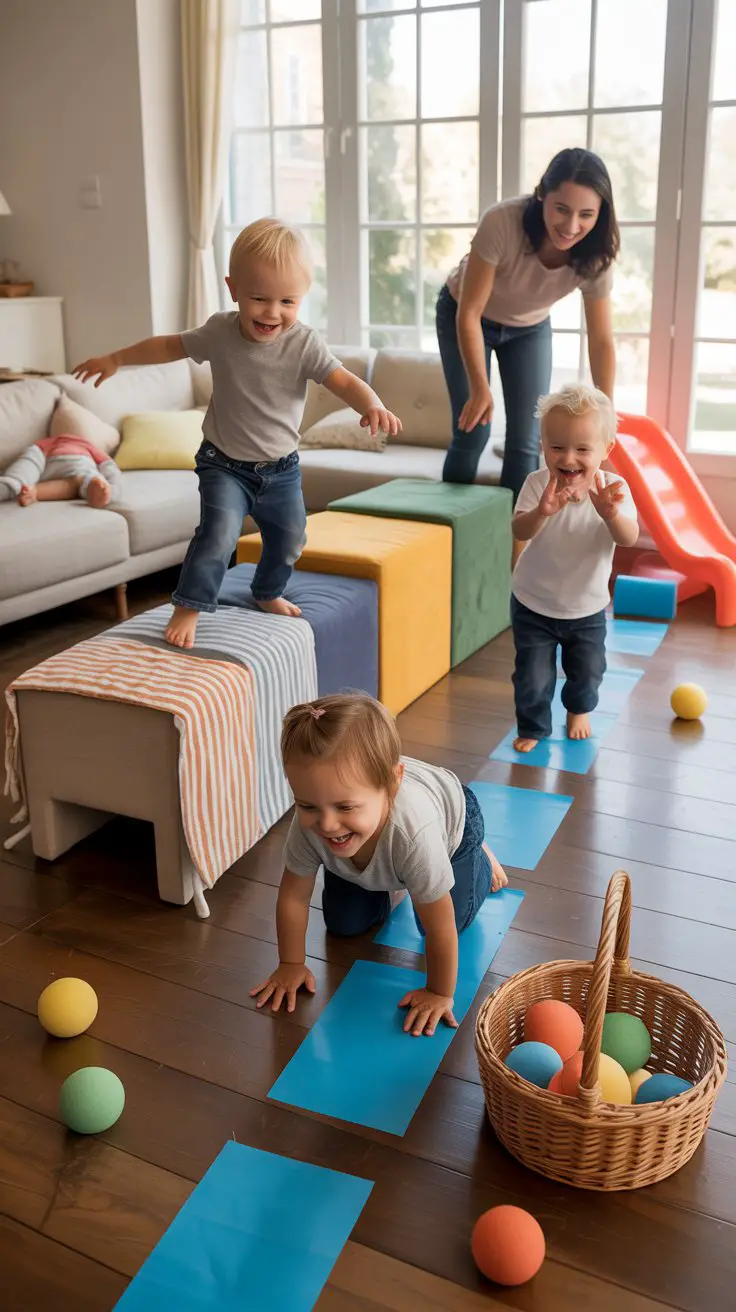
Toddlers have energy—so much energy. An indoor or outdoor obstacle course lets them burn it productively while working on coordination and building confidence. The best part? Each child can complete it at their own pace without competition stress.
How to Set This Up
- Materials needed: Couch cushions or foam mats, painter’s tape (for lines on floor), tunnels (pop-up or DIY from blankets over chairs), small step stool or sturdy box for climbing, basket and soft balls for throwing, optional small slide or ramp, jump rope laid in a line for “tightrope”, hula hoop or pool noodle for other challenges
- Age range: 18 months to 5 years (adjust difficulty per age)
- Setup time: 10-15 minutes to arrange stations safely
- Play duration: 20-30 minutes before interest wanes
- Mess level: Low mess, medium chaos level
Step-by-step instructions:
- Clear a safe space with enough room for movement
- Set up 5-7 stations in a clear path (start to finish)
- Make each station achievable but slightly challenging
- Demonstrate each obstacle once but don’t over-explain
- Let children go at their own pace—some will speed through, others will take time
- Encourage waiting if someone is at a station, building patience skills
- Celebrate every completion—high fives all around!
- Mix up the course order if interest wanes
Developmental benefits: Gross motor skills, balance and coordination, spatial awareness, following sequences, patience and turn-taking, problem-solving, building confidence through achievement
Safety notes: Ensure all obstacles are stable and won’t tip; pad any hard edges; supervise climbing stations closely; check that tunnels are well-ventilated; clear trip hazards from the path
Obstacle station ideas:
- Walk across cushions without touching the floor
- Crawl through tunnel or under blanket
- Balance on tape line or rope laid on floor
- Toss balls into basket (adjust distance by age)
- Jump over pool noodle on the ground
- Climb up and slide down small slide
- Bear walk or crab walk across designated area
- Weave between cones or stuffed animals
Adjusting for different ages: Younger toddlers need simpler, wider paths; older toddlers can handle narrow balance beams or higher jumps; allow younger ones to skip challenging stations
Activity variations: Add a theme (jungle adventure, space mission, rescue course); time it for older kids who enjoy challenges; create relay teams for older toddlers; change up stations weekly to maintain interest
Indoor vs. outdoor: Indoor works great with soft obstacles; outdoor allows for more running, jumping, and messier challenges like mud puddle jumping
Managing energy levels: Place calmer stations (ball tossing, careful balancing) between active ones (tunnel crawling, jumping); end with a cooling down station
Organizing competitive fun? Check out these team names for competition for some spirited inspiration!
Story Time Theater
Reading to a group of toddlers can either be delightful or complete chaos. The trick? Make it interactive, keep it short, and embrace the fact that not everyone will sit still the whole time—and that’s perfectly okay.

How to Set This Up
- Materials needed: 2-3 picture books with engaging illustrations and simple, repetitive text, comfortable seating area (carpet, cushions, or mat), optional props related to stories (stuffed animals, hats, simple costumes), backup books for when attention shifts
- Age range: 12 months to 5 years (attention span varies widely)
- Setup time: 5 minutes to arrange seating and select books
- Play duration: 10-20 minutes total (multiple short books work better than one long one)
- Mess level: Low—might just be scattered books and cushions
Step-by-step instructions:
- Create a defined story area with comfortable seating in a semi-circle
- Choose books with repetitive phrases toddlers can chant along with
- Sit where all children can see the pictures (hold book facing them)
- Start with the shortest, most engaging book to hook attention
- Use animated voices, sound effects, and gestures
- Pause to let children point at pictures or repeat phrases
- Allow standing, moving, or wandering—forcing sitting rarely works
- Have props children can hold during relevant parts of the story
- Keep each book to 5-7 minutes max
- End before you lose everyone’s attention
Developmental benefits: Language development, listening skills, imagination, attention span building, story comprehension, vocabulary expansion, social participation
Best book choices for groups:
- Repetitive text: “Brown Bear, Brown Bear,” “Dear Zoo”
- Sound effects: “We’re Going on a Bear Hunt,” “Chicka Chicka Boom Boom”
- Interactive elements: “Don’t Push the Button,” “Press Here”
- Participation: “If You’re Happy and You Know It” books
- Rhyming stories: Dr. Seuss classics, Julia Donaldson books
Managing wiggly toddlers: Accept that not everyone will sit perfectly still; create gentle boundaries (stay in the reading area) without being rigid; offer fidget-friendly items like small stuffed animals to hold; take wiggle breaks between books
Activity variations: Add simple props (puppet shows during reading); let children act out parts of the story afterward; create a “story basket” with items from the book to explore after reading; make sound effects a group activity
For mixed ages: Choose books with layered content; let older toddlers help turn pages or hold props; don’t worry if youngest ones wander—they’re still listening!
Parent tip: Position yourself where you can see all children while they focus on the book; this helps with behavior management without being hovering
Love stories? Discover book club names for your little literary crew!
Water Play Station
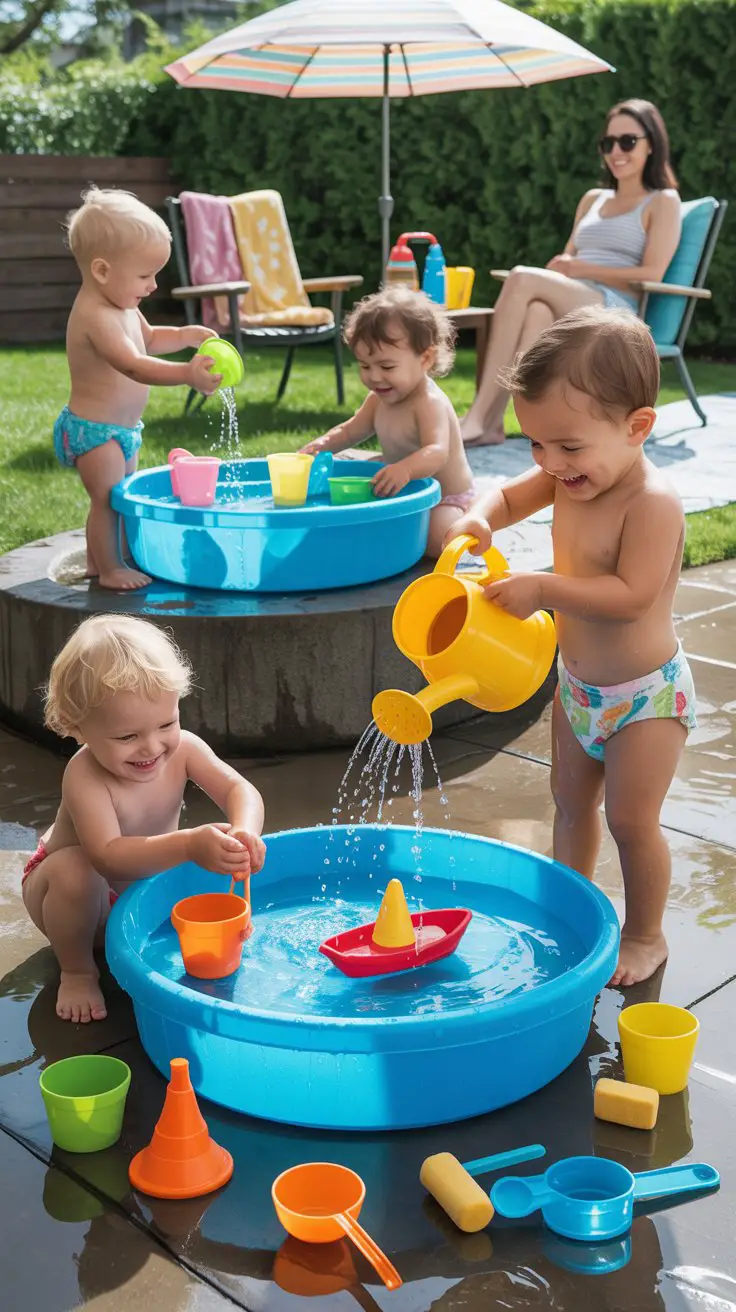
When temperatures allow, water play is absolutely unbeatable for keeping a group of toddlers happily occupied. There’s something universally soothing yet engaging about water, and the setup can be as simple or elaborate as you want.
How to Set This Up
- Materials needed: Large plastic bins, water tables, or inflatable pools, water (preferably warm for comfort), variety of water toys (cups, funnels, scoops, squeeze bottles, boats, watering cans, sponges, basting tools), swim diapers or bathing suits, towels for each child, sunscreen, plastic aprons if indoors, drop cloth if setting up inside
- Age range: 12 months to 5 years (constant supervision for all ages)
- Setup time: 10 minutes to fill containers and set out toys
- Play duration: 30-45 minutes of solid engagement
- Mess level: High—plan for everyone to get soaked
Step-by-step instructions:
- Fill water tables or bins to 3-4 inches deep (enough to play, not enough to be dangerous)
- Set up multiple stations if you have several children
- Provide various pouring, scooping, and squirting tools
- Add a few drops of dish soap for bubble fun (optional)
- Include items that sink and float for experimentation
- Place towels in an accessible spot for when children want to dry off
- Let children explore freely—there’s no “right way” to water play
- Supervise constantly but resist over-directing their play
- Have spare clothes ready because everyone WILL get wet
Developmental benefits: Sensory exploration, hand-eye coordination, mathematical concepts (full/empty, volume, measuring), cause-and-effect understanding, fine motor skills, imaginative play, social cooperation
Safety considerations: Never leave children unattended around water—even shallow amounts; empty bins immediately after play; ensure water temperature is comfortable; watch for slippery surfaces; supervise mouth contact with water toys
Activity variations: Add ice cubes on hot days; include food coloring for rainbow water (can stain, test first); try “car wash” with sponges and toy vehicles; create a “washing station” for baby dolls; freeze toys in ice blocks to melt
Indoor adaptation: Use smaller bins on protected floors; add aprons; keep water levels very shallow; use warm water for comfort; have mops ready for inevitable spills
Managing different ages: Younger toddlers focus on simple pouring and splashing; older ones enjoy more complex scenarios like “cooking” or “washing”; provide tools appropriate to each skill level
Budget-friendly setup: Use plastic storage bins instead of expensive water tables; repurpose kitchen items as water toys; skip fancy toys—water itself is entertaining
Cleanup plan: Empty water onto grass or plants (bonus garden watering!); dry bins before storing to prevent mildew; wash water toys with soap and let them dry completely
Ending the activity: Give a 5-minute warning; help children transition by letting them help pour out water; have a designated changing area ready with towels
Planning water fun? Get inspired by beach themed team names for your splash squad!
Building Block Challenge
Give toddlers blocks and step back—you’ll be amazed at what happens. Group block play naturally encourages cooperation, problem-solving, and creativity without forcing structured activities. The best part? Children can engage at totally different levels and still play alongside each other successfully.

How to Set This Up
- Materials needed: Large collection of blocks (50-100+ pieces in various sizes and materials—wooden, foam, cardboard, mega blocks), large clear floor space, optional: small vehicles, toy animals, or figures to incorporate, storage bins for organization, soft mat or carpet (blocks are loud on hard floors!)
- Age range: 12 months to 5 years (with blocks sized appropriately for age)
- Setup time: 5 minutes to dump out blocks and clear space
- Play duration: 20-40 minutes depending on group engagement
- Mess level: Medium—blocks everywhere, but easy cleanup
Step-by-step instructions:
- Create a designated building zone on carpet or mat
- Pour out a generous pile of blocks in the center
- Let children gravitate naturally to the blocks—no forced directions
- Observe what they create without immediately “helping”
- Encourage but don’t force sharing—parallel play is valid
- Celebrate both building and knocking down (it’s all learning!)
- Provide additional materials if interest wanes (toy animals, vehicles)
- Take photos of creations before inevitable destruction
- Make cleanup part of the game (who can collect the most red blocks?)
Developmental benefits: Spatial reasoning, problem-solving, fine and gross motor skills, mathematical concepts (size, balance, patterns), creativity, cooperation when building together, cause-and-effect understanding, patience and persistence
Safety considerations: Ensure blocks don’t have sharp edges; supervise throwing to prevent injuries; watch for younger toddlers putting small pieces in mouths; create enough space so falling towers don’t hit other children
Block type recommendations:
- 12-24 months: Large foam blocks, cardboard blocks (safe to throw)
- 2-3 years: Wooden unit blocks, large plastic blocks, cardboard brick blocks
- 3-5 years: All of the above plus smaller connector blocks, themed block sets
Managing different play styles: Some children stack, others line up, some knock down immediately—all are valid; provide enough blocks that children don’t have to share every piece; expect and accept the child who only wants to knock things down
Activity variations: Add a theme (build a zoo for animals, garage for cars, castle for figures); try building challenges for older toddlers (“can you build something taller than you?”); use blocks of all one color for a different visual challenge
Storage solution: Use clear bins to see what’s inside; sort by type or size for easy access; rotate block types weekly to maintain interest
Cleanup game: “Can you find all the red blocks?”; race to see who can stack the most; sing a cleanup song; make block pickup part of the building process
Parent sanity-saver: Accept that blocks will be everywhere—it’s temporary; use a contained area like a play mat to limit spread; invest in quality blocks that last through multiple children
Looking for group building fun? Check out engineering team names for your little architects!
Snack Time Social
Never underestimate the power of food to bring toddlers together. A well-planned group snack time isn’t just about eating—it’s a social activity that teaches sharing, patience, manners, and conversation skills in the most natural way possible.

How to Set This Up
- Materials needed: Low table and chairs (or picnic blanket for floor seating), small plates or divided containers for each child, sippy cups or small open cups, variety of finger foods (fruits, crackers, cheese, veggies), wet wipes and napkins, small pitcher for child-led water pouring (optional), allergy-aware snack choices
- Age range: 12 months to 5 years (adjust food textures for youngest)
- Setup time: 10 minutes to prepare and arrange food
- Activity duration: 15-25 minutes (eating plus social time)
- Mess level: Medium—plan for dropped food and spills
Step-by-step instructions:
- Set up seating so all children can see each other
- Place a small portion of food on each plate (you can always add more)
- Provide individual cups of water to minimize sharing concerns
- Sit with the children and model conversation
- Encourage simple mealtime manners (please, thank you, staying seated)
- Allow children to serve themselves from communal bowls if age-appropriate
- Talk about the foods—colors, textures, tastes
- Make it social but not forced—some children eat quietly, and that’s fine
- Clean hands and faces when finished (make it part of the routine)
Developmental benefits: Social skills, conversation practice, fine motor skills (self-feeding), exposure to variety of foods, learning patience and taking turns, manners development, independence
Safety considerations: Be aware of all food allergies in the group; avoid choking hazards (grapes cut in quarters, not whole); supervise eating closely; ensure all foods are age-appropriate textures; have water readily available
Toddler-approved snack ideas:
- Fruits: Sliced bananas, quartered berries, melon cubes, mandarin segments
- Veggies: Cucumber sticks, bell pepper strips, cherry tomatoes halved, steamed carrot coins
- Proteins: Cheese cubes, hummus with crackers, hard-boiled egg quarters
- Grains: Whole grain crackers, mini rice cakes, pita triangles, dry cereal
Managing picky eaters: Offer variety but no pressure to eat everything; model eating without forcing; celebrate trying new things without making it a big deal; remember toddlers’ appetites vary wildly
Activity variations: Try a “rainbow snack” with foods of different colors; create simple patterns with foods on plates; let older toddlers help prepare snacks; make it themed (teddy bear picnic, beach party snacks)
Allergy accommodations: Always ask parents about dietary restrictions; label any allergen-containing foods; consider offering common allergen-free options; keep foods separated on plates
Conversation starters for toddlers: “What color is your strawberry?”; “Is your cracker crunchy or soft?”; “Who else likes cheese?”; keep it simple and concrete
Cleanup strategy: Have wet wipes immediately ready; let children help wipe their own hands and faces; shake out outdoor blankets; accept that some food will end up on the floor
Post-snack transition: Build in handwashing time; have the next activity ready to prevent chaos; use a song to signal snack time is ending
Want snack time inspiration? Browse lunch group names for your regular eating crew!
Dance Party Freeze
When energy is high and attention is scattered, nothing resets a group of toddlers like a good dance party. Adding the “freeze” element turns it from pure chaos into a structured-ish game that even the youngest can understand and enjoy.

How to Set This Up
- Materials needed: Music source (phone, tablet, or speaker), age-appropriate music playlist (mix of fast and slow songs), clear, safe dancing space (move furniture and clear trip hazards), optional: scarves, ribbon wands, or musical instruments for added fun, soft lighting or disco ball for extra excitement
- Age range: 18 months to 5 years (even younger babies enjoy being held and bounced to music)
- Setup time: 5 minutes to clear space and queue music
- Play duration: 10-20 minutes (perfect energy burner)
- Mess level: Low—just moved furniture and scattered props
Step-by-step instructions:
- Create a safe, open space free from sharp corners and breakable items
- Start music at moderate volume (toddlers can be sensitive to loud sounds)
- Model different dancing movements—jumping, spinning, wiggling, marching
- Dance for 30-60 seconds then pause music and shout “FREEZE!”
- Everyone must freeze in whatever position they’re in
- Make silly frozen faces to add humor
- Hold freeze for 5-10 seconds (longer for older kids)
- Start music again and repeat
- Celebrate enthusiastic freezers and creative dancers equally
- Mix up dance styles—fast songs, slow songs, animal movements
Developmental benefits: Gross motor coordination, rhythm awareness, listening skills, impulse control (stopping when music stops), creative expression, following directions, energy release, spatial awareness
Safety notes: Ensure adequate space between dancers to prevent collisions; watch for toddlers who might fall while freezing; keep volume at safe levels; supervise spinning to prevent dizziness-related falls
Music suggestions:
- Action songs: “Shake Your Sillies Out,” “Head Shoulders Knees and Toes”
- Freeze-friendly: Any music with clear stops or pause points
- Energy burners: Fast-paced kids’ music, kid-friendly pop songs
- Calming: Slower songs to bring energy down at the end
Dance movement ideas:
- Animal walks (hop like bunnies, stomp like elephants, slither like snakes)
- Scarves for waving and twirling
- Ribbon wands for flowing movements
- Jumping, spinning, wiggling specific body parts
- Dance like robots, dance like ballerinas, dance like silly monsters
Managing different energy levels: Some children are natural dancers, others are observers—both are fine; allow “dancing in place” for less mobile toddlers; let energetic kids really express themselves; provide sitting spots for children who need breaks
Activity variations: Add a “mirror dance” where children copy your moves; try “slow motion freeze” for older toddlers; incorporate specific freeze poses (“freeze like a star, freeze like a tree”); make it musical statues with elimination for older kids who understand
Wind-down strategy: End with 2-3 slower songs to gradually reduce energy before transitioning to quieter activities; include stretching or “melting to the ground” movements; finish with a “sleeping” freeze where everyone lies down
Space-saving option: If space is limited, do seated dancing in a circle or have children take turns in the dance space
Looking for music fun? Explore dance team names for your little performers!
Closing Thoughts: Making Group Activities Work for Your Crew
Here’s what I’ve learned after countless playdates, playgroup sessions, and toddler gatherings: the “perfect” group activity doesn’t exist. Some days parachute play is a massive hit. Other days, the same exact setup gets 90 seconds of interest before everyone scatters to explore your kitchen cabinets instead.
The real magic happens when you release the pressure of Pinterest-perfect execution and embrace what group play with toddlers actually is—a beautiful, chaotic, unpredictable opportunity for little humans to learn how to exist alongside each other. Some children will dive into every activity with enthusiasm. Others will observe from the sidelines, and that’s completely valid developmental behavior. Your job isn’t to force participation or create Instagram-worthy moments—it’s to provide safe, engaging opportunities and then step back.
Remember that group activities for toddlers serve multiple purposes beyond simple entertainment. They’re learning to wait their turn (even if just for 30 seconds). They’re discovering that their friends might approach the same activity completely differently. They’re building social confidence in low-pressure environments. They’re developing the foundational skills for cooperation, communication, and community that will serve them for life.
A few final thoughts from the parenting trenches: Always have a backup plan because toddlers are delightfully unpredictable. Keep sessions short—20 to 30 minutes is often the sweet spot before chaos ensues. Build in transition time between activities because abrupt changes trigger meltdowns. And most importantly, give yourself grace when things don’t go as planned.
Your willingness to gather children together, facilitate play, and create these experiences is what matters. Not whether they followed the obstacle course in the right order. Not whether the collaborative art wall stayed neat and organized. Not whether everyone danced during freeze dance. You’re building community, supporting development, and creating joyful childhood memories—even when it feels like barely controlled chaos.
Trust your instincts, know your specific group of children, and adjust these ideas to match your reality. Some groups thrive on high-energy activities. Others need calmer, more focused play. There’s no single right way to do toddler group activities—there’s only the way that works for your unique collection of little personalities.
Now go forth and embrace the beautiful mess of toddler group play. You’ve absolutely got this! <3

Greetings, I’m Alex – an expert in the art of naming teams, groups or brands, and businesses. With years of experience as a consultant for some of the most recognized companies out there, I want to pass on my knowledge and share tips that will help you craft an unforgettable name for your project through TeamGroupNames.Com!