You know that moment when your toddler discovers they can bang two wooden spoons together? Yeah, that’s both the beginning of a beautiful musical journey and the start of your neighbor’s complaints.
But here’s the thing—music isn’t just noise (though it definitely feels that way sometimes). It’s actually one of the most powerful tools we have for supporting our kids’ development, from language skills to emotional expression to basic math concepts.
I’ve spent countless afternoons turning my living room into a makeshift concert hall, complete with pot-lid cymbals and a hairbrush microphone. Some activities lasted exactly 47 seconds.
Others became daily requests that I’m still doing months later. What I’ve learned is that music activities don’t need to be complicated or require fancy instruments. Your kitchen has more musical potential than most toy stores, and your enthusiasm matters way more than your actual singing ability (thank goodness, because mine is questionable at best).
These ten activities work for different ages, energy levels, and attention spans. Some are perfect for burning energy on rainy afternoons. Others are calming enough for that tricky pre-bedtime window.
A few require basically zero prep, while others give you a solid 15-minute setup project while your little one naps. Mix and match based on what your family needs today—not what some perfect Pinterest parent is doing.
For those exploring other engaging activities, check out these creative team names for kids to make group activities even more fun.
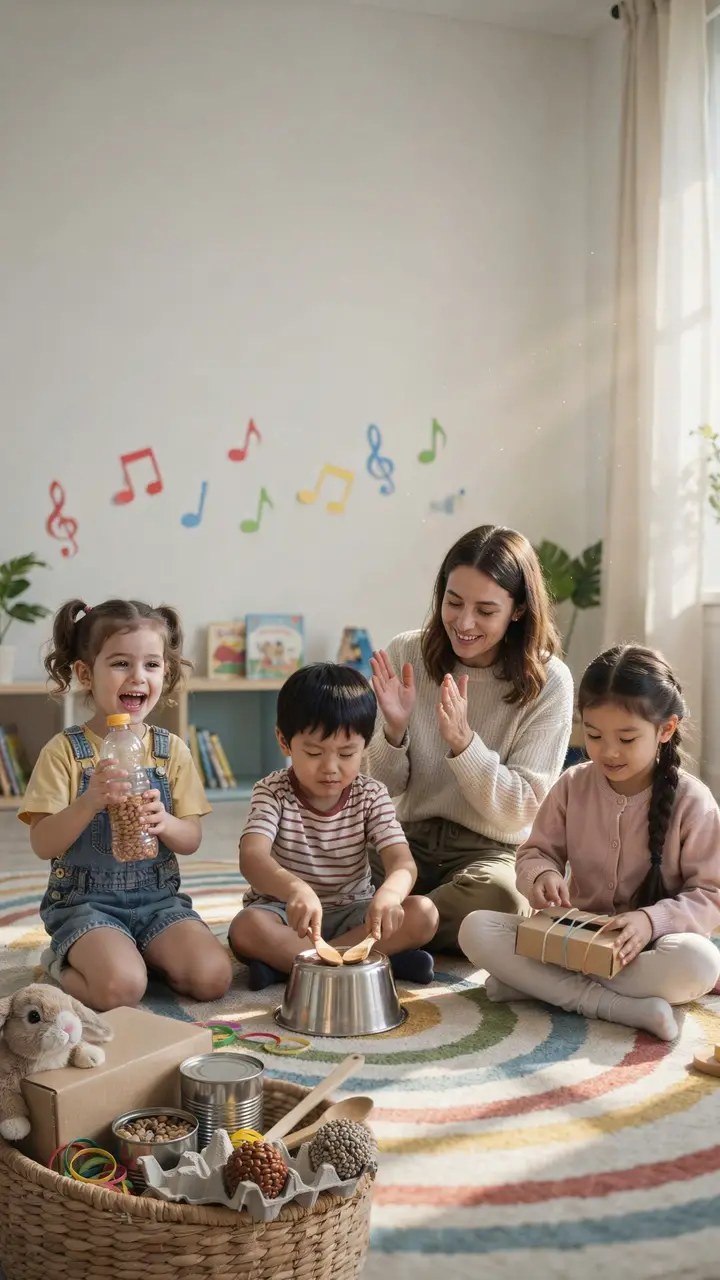
Homemade Instrument Orchestra
There’s something absolutely magical about watching kids realize they can create music from everyday objects. Plus, this activity teaches resourcefulness and creative thinking—skills they’ll use way beyond toddlerhood.
How to Set This Up
Materials needed:
- Empty plastic bottles or containers with lids (at least 3-4 different sizes)
- Dried beans, rice, or small pasta for shakers
- Metal pots, pans, and lids in various sizes
- Wooden spoons, spatulas, and whisks
- Empty tissue boxes or small cardboard boxes
- Rubber bands of different thicknesses
- Paper towel tubes
- Wax paper and rubber bands (for kazoo-style instruments)
- Large basket or bin for storage
Step-by-step setup:
- Fill plastic bottles about one-third full with dried beans or rice, securing lids tightly (add hot glue around edges for extra security with younger kids)
- Stretch rubber bands around tissue boxes at different tensions to create string instruments
- Cover one end of paper towel tubes with wax paper secured with rubber bands for humming instruments
- Arrange pots and pans as drums with wooden spoons as drumsticks
- Set up a designated “stage area” with a small rug or blanket
- Store all instruments in an accessible basket
Age appropriateness: 18 months-6 years (with modifications)
- 18-24 months: Focus on shakers and simple banging with close supervision
- 2-3 years: Add in rhythm sticks and basic drums
- 3-5 years: Include string and wind instruments, introduce taking turns
- 5+ years: Encourage creating specific rhythms and following patterns
Time commitment:
- Setup: 15-20 minutes
- Play duration: 15-45 minutes depending on age and interest
- Cleanup: 5-10 minutes
Mess level: Low to medium (watch for broken rubber bands or spilled beans)
Developmental benefits:
- Fine motor skills through grasping, shaking, and controlled movements
- Cause and effect understanding (I shake this, sound happens)
- Rhythm and pattern recognition
- Creative expression and musical exploration
- Turn-taking and cooperation during group play
- Listening skills and sound differentiation
Safety considerations:
- Supervise closely with small items like beans or rice
- Hot glue bottle lids shut for children under 3
- Check rubber bands regularly for wear and replace as needed
- Ensure no sharp edges on metal containers
- Keep noise level reasonable to protect developing ears
Activity variations:
- Create a “marching band” and parade around the house
- Record your orchestra and play it back (kids love hearing themselves)
- Assign each family member an instrument and create simple songs together
- Introduce loud/soft, fast/slow concepts
- Make seasonal instruments (jingle bell shakers for winter, ocean drums for summer)
Cost-saving tips: Everything listed uses household items—this activity costs basically nothing! Save containers and packaging materials specifically for music-making.
Cleanup strategy: Make cleanup part of the performance—”Now let’s play the cleanup song!” Store instruments in labeled baskets and make putting them away a matching game for younger kids.
Parent sanity-saver: Set specific “concert times” rather than allowing constant access. My rule: instruments come out for 30-minute sessions twice daily. This preserves both your hearing and your child’s interest.
Looking for more group activity ideas? These camp team names work perfectly for music-themed play dates.
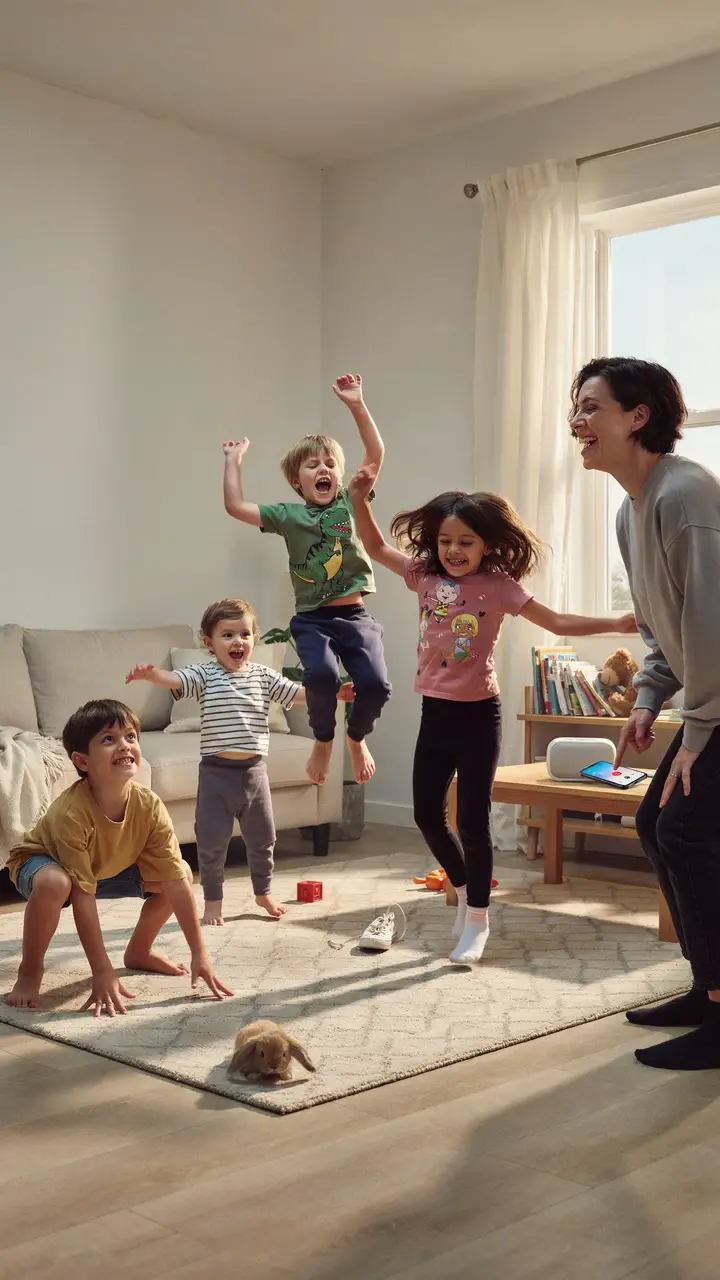
Freeze Dance Party
Freeze dance is the perfect combination of burning energy and practicing self-control—two things toddlers desperately need to work on. Plus, it requires absolutely zero preparation beyond a device that plays music.
How to Set This Up
Materials needed:
- Music player (phone, tablet, speaker, or old-fashioned radio)
- Playlist of upbeat, kid-friendly songs with varying tempos
- Open floor space (move furniture if needed)
- Optional: scarves, ribbons, or light instruments to dance with
Step-by-step setup:
- Clear a safe dancing space—push furniture back and remove any tripping hazards
- Create a playlist mixing fast and slow songs (varying tempo keeps kids engaged)
- Explain the rules simply: “When music plays, we dance! When it stops, we freeze like statues!”
- Demonstrate freezing in silly poses yourself
- Start with shorter songs (2-3 minutes) for younger children
Age appropriateness: 18 months-8 years
- 18-24 months: May not fully understand “freezing” but will enjoy dancing and stopping
- 2-3 years: Starting to grasp the concept, loves the silliness
- 3-5 years: Fully engaged, adds creative frozen poses
- 5+ years: Can follow more complex rules (freeze in specific poses, freeze as certain animals)
Time commitment:
- Setup: 2-3 minutes
- Play duration: 10-30 minutes (until energy is sufficiently burned)
- Cleanup: 1 minute
Mess level: None! (Though you might need to rearrange furniture after)
Developmental benefits:
- Gross motor skills through varied dance movements
- Impulse control and body awareness (stopping movement on command)
- Listening skills and quick response time
- Body control and balance when holding freeze positions
- Rhythm awareness and musicality
- Emotional regulation through physical activity
Safety considerations:
- Ensure adequate space between dancers to prevent collisions
- Watch for overexcitement leading to unsafe movements
- Keep dancing area away from sharp furniture corners
- Monitor energy levels—stop before exhaustion leads to meltdowns
- Stay nearby for younger toddlers who might lose balance
Activity variations:
- Freeze in specific poses: “Freeze like a tree! Like a superhero! Like a sleeping cat!”
- Animal dance: assign different animals for different songs
- Slow-motion freeze: instead of instant freezing, slow down gradually
- Partner freeze: dancers must freeze while touching their partner
- Color freeze: call out colors and kids freeze while touching something that color
- Musical emotions: dance happy, sad, silly, or angry to different songs
Parent participation tip: Dance WITH them, especially with younger kids. Your enthusiasm is contagious, and they love seeing grown-ups be silly. Plus, you’ll get your own workout in.
Cleanup strategy: Use the last song as “cleanup dance”—kids dance while putting away any props used and pushing furniture back.
Energy management: Schedule freeze dance strategically—before quiet time when you need them worn out, or mid-afternoon when everyone’s getting restless. Avoid right before bedtime unless you want a second wind you’ll regret.
For families organizing larger group activities, these dance team names add extra fun to movement activities.
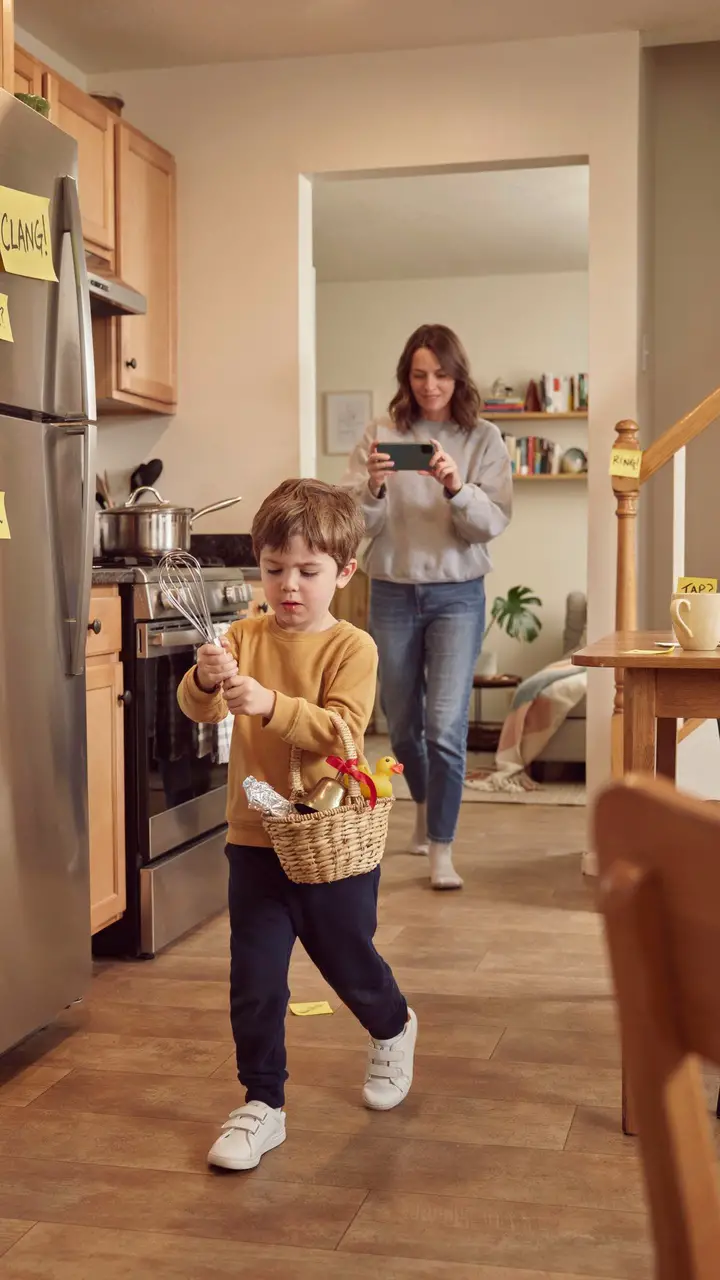
Sound Scavenger Hunt
This activity combines music exploration with a treasure hunt—basically catnip for curious toddlers. It gets them moving, thinking, and listening in ways that feel like pure play.
How to Set This Up
Materials needed:
- Small basket or bag for collecting items
- Sticky notes or small pieces of paper (optional, for sound clues)
- List of sounds to find (written for older kids, picture-based for pre-readers)
- Common household objects that make various sounds
Step-by-step setup:
- Walk through your home identifying items that make interesting sounds (before your child starts)
- Create a simple list: “Something that rings,” “Something that crinkles,” “Something that rattles”
- For pre-readers, draw simple pictures or take photos of the actual items
- Optional: place sticky notes with drawn symbols near findable items as hints
- Set boundaries for the hunt (which rooms are okay to explore)
- Start with 5-7 items for younger kids, up to 15 for older children
Age appropriateness: 2-7 years
- 2-3 years: Adult-guided hunt with 3-5 obvious items, focus on exploring sounds together
- 3-4 years: Semi-independent with picture clues, 5-8 items
- 4-5 years: Mostly independent with simple word clues, 8-12 items
- 5+ years: Fully independent with descriptive clues, can hide items for others to find
Time commitment:
- Setup: 10-15 minutes
- Play duration: 15-30 minutes
- Cleanup: 5 minutes
Mess level: Low (just returning items to their places)
Developmental benefits:
- Listening discrimination and sound identification
- Problem-solving through clue interpretation
- Category understanding (things that ring vs. things that shake)
- Spatial awareness navigating through home
- Following directions and task completion
- Vocabulary building for sound-related words (jingle, clatter, rustle, chime)
- Memory skills remembering where items belong
Safety considerations:
- Pre-screen all findable items to ensure they’re safe for your child’s age
- Establish off-limits areas (parent’s bedroom, areas with breakables)
- Supervise younger children to prevent climbing or unsafe reaching
- Avoid items with sharp edges or small parts for children under 3
- Set ground rules about gentle handling of discovered items
Activity variations:
- Volume hunt: Find something loud, something quiet, something medium
- Pitch hunt: High sounds vs. low sounds
- Material hunt: Find wooden sounds, metal sounds, plastic sounds
- Hide and seek version: Parent hides noisy items that kids must find by following sounds
- Recording hunt: Record each discovered sound and play them back as a guessing game
- Outdoor version: Take the hunt outside for nature sounds (leaves crunching, sticks snapping, rocks clinking)
- Instrument creation: Find items that could become instruments
Example hunt list:
- Something that jingles (bells, keys, coins in a jar)
- Something that crinkles (tissue paper, chip bag, aluminum foil)
- Something that rattles (container of beans, baby rattle, pill bottle with buttons)
- Something that rings (triangle, bicycle bell, wind chime)
- Something that taps (wooden blocks, pencils, plastic containers)
- Something that whooshes (paper being waved, scarf through air)
- Something that squeaks (dog toy, rubber duck, marker cap)
Parent involvement: For younger kids, hunt together and celebrate each discovery enthusiastically. For older kids, let them hunt independently while you prepare the next activity or enjoy five minutes of peace with your coffee.
Extension activity: Once items are collected, create a “sound story” using them in sequence, or organize them from quietest to loudest.
Storage tip: Keep a dedicated “sound hunt basket” ready with common items so you can set this up quickly on days when you need an immediate activity.
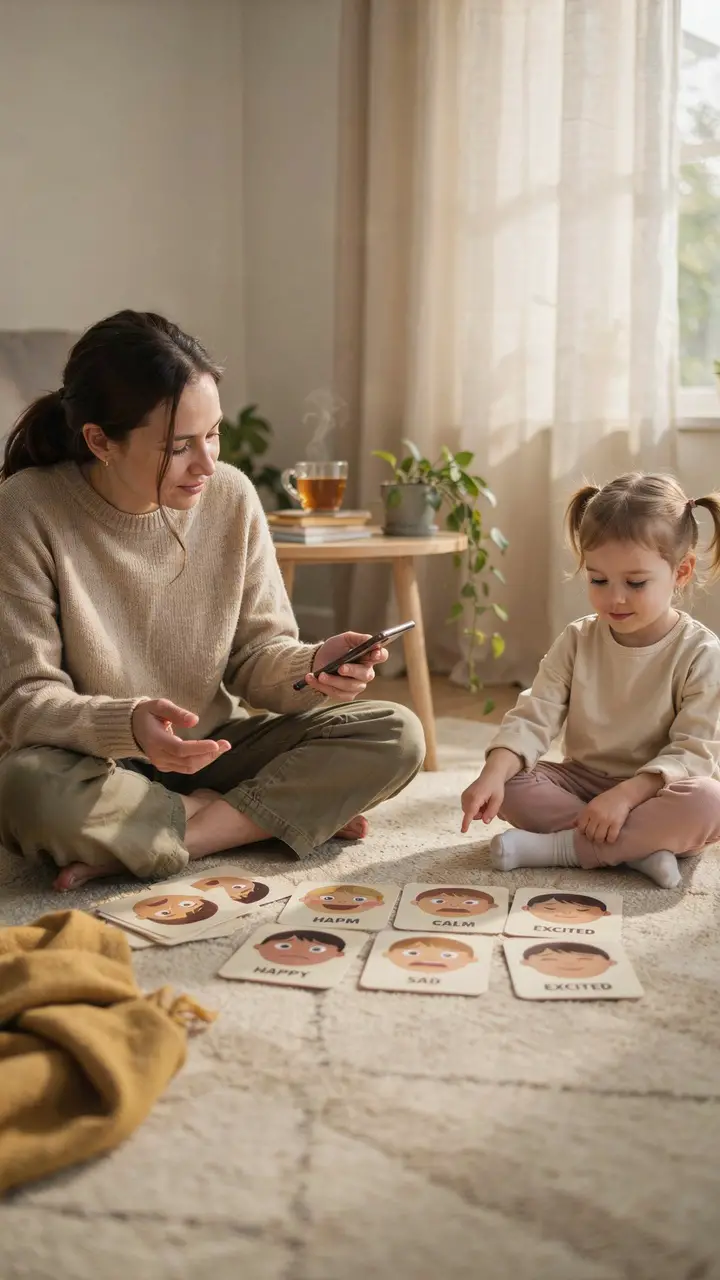
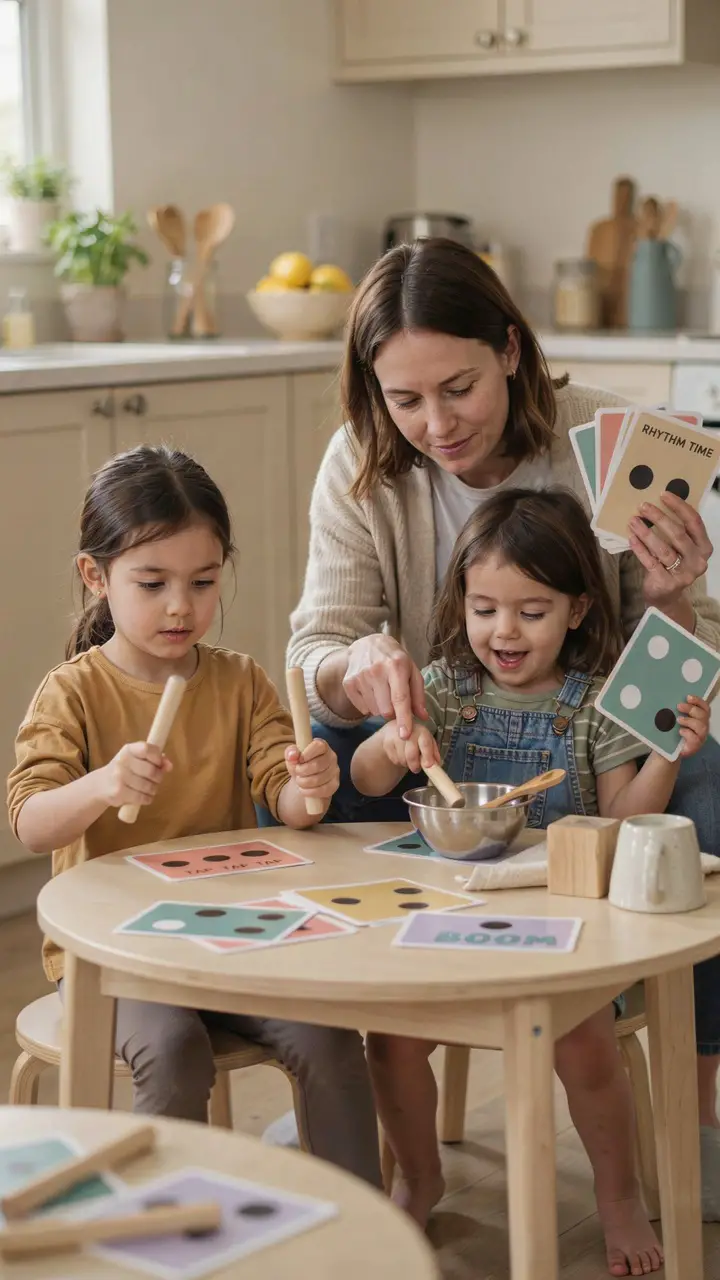
Musical Emotions Game
Teaching emotional literacy through music is sneaky brilliant—kids learn to identify and express feelings while thinking they’re just playing. This one’s especially helpful during those preschool years when big emotions can feel overwhelming.
How to Set This Up
Materials needed:
- Emotion face cards (purchased or homemade with drawn/printed faces)
- Music player with carefully selected songs
- Playlist organized by emotional tone:
- Happy songs (upbeat, major key)
- Sad songs (slow, minor key)
- Excited/energetic songs (fast tempo, lots of instruments)
- Calm songs (gentle, simple melodies)
- Silly songs (unexpected sounds, playful rhythms)
- Optional: emotion chart poster for reference
- Optional: mirror for kids to practice making emotion faces
Step-by-step setup:
- Create or gather 4-6 basic emotion face cards (start with happy, sad, excited, calm)
- Curate a playlist with 2-3 songs clearly representing each emotion
- Arrange cards face-up where child can easily see and reach them
- Demonstrate the game first: play a happy song and model selecting the happy card
- Explain that different music makes us feel different ways
Age appropriateness: 2-6 years
- 2-3 years: Focus on 2-3 basic emotions (happy and sad), adult-guided
- 3-4 years: Expand to 4 emotions, beginning to identify independently
- 4-5 years: 5-6 emotions, can explain why they chose each card
- 5+ years: More nuanced emotions (peaceful, frustrated, surprised), can suggest songs that match feelings
Time commitment:
- Setup: 10 minutes (first time creating cards and playlist)
- Play duration: 10-20 minutes
- Cleanup: 2 minutes
Mess level: None
Developmental benefits:
- Emotional intelligence and feeling identification
- Listening skills and musical interpretation
- Self-awareness connecting music to internal feelings
- Vocabulary development for emotion words
- Empathy building through recognizing emotions in music
- Decision-making and opinion expression
- Focus and concentration during listening periods
Safety considerations:
- Choose age-appropriate songs without scary or intense content
- Watch for genuine emotional responses—some songs might trigger unexpected feelings
- Keep volume at safe levels
- Stop if child becomes distressed by certain songs
- Create emotionally safe space for all feeling expressions
Activity variations:
- Movement version: Dance the emotion you hear in the music
- Drawing version: Draw pictures while listening and see what emotions emerge
- Story version: Play a song and together create a story about a character feeling that emotion
- Family version: Each family member takes turns being DJ and others guess the emotion
- Instrument version: Play homemade instruments matching the emotional tone (gentle shaking for calm, loud drumming for excited)
- Photo version: Take silly photos mimicking the emotion they identify
Sample playlist suggestions:
- Happy: “Happy” by Pharrell Williams, “Can’t Stop the Feeling” by Justin Timberlake, “Walking on Sunshine” by Katrina and the Waves
- Sad: “Somewhere Over the Rainbow” (slow version), simple piano pieces, “The Swan” by Saint-Saëns
- Excited: “Celebration” by Kool & the Gang, William Tell Overture, carnival music
- Calm: “Clair de Lune” by Debussy, gentle lullabies, ocean sounds with soft music
- Silly: “Baby Shark” (love it or hate it), “The Chicken Dance,” novelty songs with funny sounds
Parent conversation starters:
- “How does this music make your body feel?”
- “What do you think is happening in this song?”
- “When do you feel this way?”
- “What makes you feel happy/sad/excited?”
Extended learning: Connect this to real-life situations: “Remember when we played that calm music? Let’s use those calm feelings now when you’re feeling frustrated.”
Real-talk moment: This activity is genuinely useful for helping kids process their own emotions. I’ve used it countless times when my little one is struggling to name what they’re feeling. It’s become our bridge to bigger emotional conversations.
For kids developing social-emotional skills in group settings, explore these small group names for music-based activities.
DIY Rhythm Sticks and Pattern Play
Rhythm sticks are ridiculously simple but somehow endlessly engaging. This activity sneaks in early math concepts (patterning!) while kids think they’re just making cool sounds.
How to Set This Up
Materials needed:
- Wooden dowels or thick craft sticks (2 per child, 1/2 inch diameter, 12 inches long work well)
- Sandpaper for smoothing rough edges
- Optional: paint or washi tape for decorating
- Pattern cards (homemade or printed)
- Different surfaces for tapping (metal, wood, plastic, cardboard)
- Timer or music for paced activities
Step-by-step setup:
- Purchase or cut wooden dowels to appropriate length
- Sand all edges thoroughly until completely smooth
- Allow kids to decorate with paint, stickers, or washi tape (let dry completely)
- Create simple pattern cards:
- Start with 2-3 beat patterns (tap-tap-rest, tap-rest-tap)
- Use visual symbols (dots, colors, pictures)
- Increase complexity gradually
- Gather various tappable surfaces and arrange within reach
- Designate a rhythm stick zone to contain the activity
Age appropriateness: 18 months-6 years
- 18-24 months: Free exploration, tapping together, simple cause-and-effect
- 2-3 years: Basic imitation (copy parent’s rhythm), two-beat patterns
- 3-4 years: Following simple pattern cards, creating own simple rhythms
- 4-5 years: Complex patterns (4-6 beats), can tap different surfaces on cue
- 5+ years: Creating and recording own patterns, teaching patterns to others
Time commitment:
- Initial stick creation: 30-45 minutes (plus drying time if decorating)
- Play duration: 10-30 minutes
- Cleanup: 3 minutes
Mess level: Low (can be loud though!)
Developmental benefits:
- Pattern recognition and replication (pre-math skills)
- Rhythm and timing awareness
- Following multi-step directions
- Hand-eye coordination and bilateral coordination (using both hands together)
- Listening and imitation skills
- Working memory (remembering pattern sequences)
- Creative expression through rhythm creation
- Cause-and-effect understanding (different surfaces = different sounds)
Safety considerations:
- Supervise closely with children under 3 to prevent hitting others or themselves
- Ensure dowels are completely smooth with no splinters
- Set clear rules: “Sticks tap sticks, tables, and drums—not people, pets, or walls”
- Watch for signs of overstimulation or roughness
- Store out of reach when not in supervised use
Activity variations:
- Copy cat rhythm: Parent taps a pattern, child echoes it back
- Nature rhythm: Tap patterns on outdoor items (rocks, trees, fences)
- Song rhythm: Tap along to familiar songs following the beat
- Conversation rhythm: “Talk” to each other using only rhythm sticks
- Fast and slow: Explore tempo changes with the same pattern
- Loud and soft: Practice dynamic control (important for impulse control!)
- Follow the leader: Take turns being the rhythm leader
- Pattern dance: Create patterns that include movement between taps
- Recording game: Record rhythms and play back for guessing
Pattern progression:
- Level 1: Two taps (tap-tap)
- Level 2: Two taps with rest (tap-tap-rest or tap-rest-tap)
- Level 3: Three varied beats (tap-tap-rest-tap)
- Level 4: Incorporate different volumes (loud-soft-loud)
- Level 5: Different surfaces (wood-metal-table)
- Level 6: Extended sequences (6-8 beat patterns)
Pattern card creation tips:
- Use large, clear symbols that kids can easily see from sitting position
- Color-code for different actions (blue dots = tap together, red dots = tap table)
- Laminate cards for durability (or use page protectors)
- Store in a small photo album or envelope for easy organization
- Start with just 4-5 cards, add more as child masters existing ones
Parent involvement: This works great as both independent and together-time activity. Younger kids need you engaged and demonstrating. Older kids can work through pattern cards independently while you’re nearby.
Sound management: Set time limits and rhythm stick “hours” to preserve household sanity. My rule: 20-minute sessions, twice daily max. Trust me on this.
Connection to music: Play songs and have kids tap along to the beat. This builds foundational skills for future music reading and playing actual instruments.
For families creating structured group music activities, check out these music trivia team names for added fun.
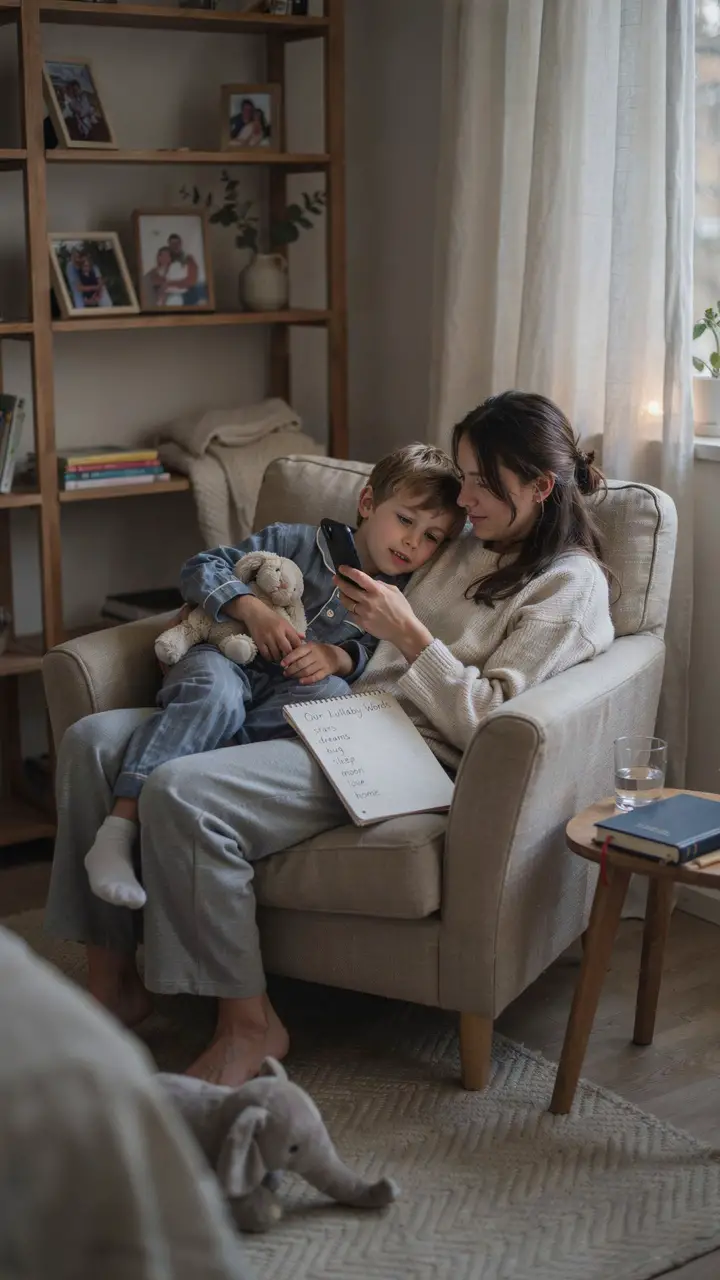
Lullaby Creation and Recording
This activity might just become your new favorite bedtime routine. Kids love hearing themselves sing, and there’s something incredibly special about creating songs together. Plus, these recordings become precious keepsakes.
How to Set This Up
Materials needed:
- Recording device (phone, tablet, or simple voice recorder)
- Quiet space with minimal background noise
- Optional: soft lighting (lamp, nightlight, string lights)
- Paper and crayons for brainstorming song ideas
- Familiar simple melodies to use as starting points (Twinkle Twinkle, Row Row Row Your Boat)
- Optional: soft background instrumental music
Step-by-step setup:
- Choose a calm time, ideally part of your bedtime routine
- Set up comfortable seating where you can snuggle together
- Minimize environmental noise (turn off TV, close windows if needed)
- Test your recording device and show child how it works
- Brainstorm together: “What makes you feel sleepy and safe?”
- Write down or draw their ideas
- Choose a familiar, simple melody everyone knows
- Fit their words into the melody (doesn’t have to rhyme!)
Age appropriateness: 2-8 years
- 2-3 years: Very simple repetitive phrases, parent does most of the singing
- 3-4 years: Can contribute more words and sing along with parent
- 4-5 years: Beginning to carry simple melodies independently
- 5+ years: Can create more complex lyrics and sing solo or in harmony
Time commitment:
- Setup: 5 minutes
- Creation and recording: 15-25 minutes
- Listening back: 5-10 minutes
- Repeat listening: Priceless
Mess level: None
Developmental benefits:
- Creative expression and personal storytelling
- Language development and vocabulary use
- Melody recognition and pitch matching
- Memory formation (songs are powerful memory anchors)
- Emotional regulation through calming musical activities
- Self-confidence hearing their own voice celebrated
- Family bonding through shared creative process
- Bedtime routine enhancement with personalized ritual
Safety considerations:
- Keep volume quiet and calming
- Ensure recording device is secure if child wants to hold it
- This is not the time for silly, energetic songs—keep it genuinely calming
- Watch for tiredness cues and end before full meltdown
Activity variations:
- Family chorus: Record everyone singing together
- Solo showcase: Each family member gets a verse
- Pet lullabies: Create songs about family pets
- Special person songs: Make personalized lullabies for each child
- Holiday versions: Adapt for different seasons or celebrations
- Story lullabies: Turn favorite bedtime stories into songs
- Instrumental version: Hum instead of using words
- Lullaby collection: Record multiple versions over time
Sample lullaby creation:
Base melody: Twinkle Twinkle Little Star
Child’s ideas: “Mommy, hugs, my dog, moon, soft blanket”
Created lullaby:
“Mommy holds me, holds me tight (repeat)
While we look up at the night (repeat)
My soft blanket, hugs so warm
Keeps me safe from any harm
Mommy holds me, holds me tight
Goodnight, sleep tight, all through the night”
Recording tips:
- Do a few practice run-throughs before officially recording
- Keep recordings—mistakes and giggles included (they’re the best parts)
- Don’t worry about perfect pitch or professional quality
- Capture the yawns and the sleepy parts too
- Record the creation process conversation—you’ll treasure it later
Playback strategies:
- Play recordings during actual bedtime routine for familiar comfort
- Listen in the car during evening rides home
- Share with grandparents and family (they’ll absolutely love this)
- Create a “lullaby album” on your device with all recordings
- Play quietly during naps or quiet time
Parent confession: I started doing this when my kiddo was going through major bedtime struggles. Now our made-up lullabies are THE most requested songs. They’ve even replaced some traditional favorites. Hearing your own voice singing about your own experiences is incredibly powerful for little ones.
Emotional benefits: Beyond development, this activity creates a sense of security and ownership. It tells your child, “You are so special that we made a song just for you.” That message is worth every slightly off-key note.
Keepsake idea: Save these recordings permanently. Transfer to a secure backup. I promise you’ll want to cry-listen to them when your kid is a teenager.
For families exploring music in faith-based settings, these church group names might inspire creative connections.
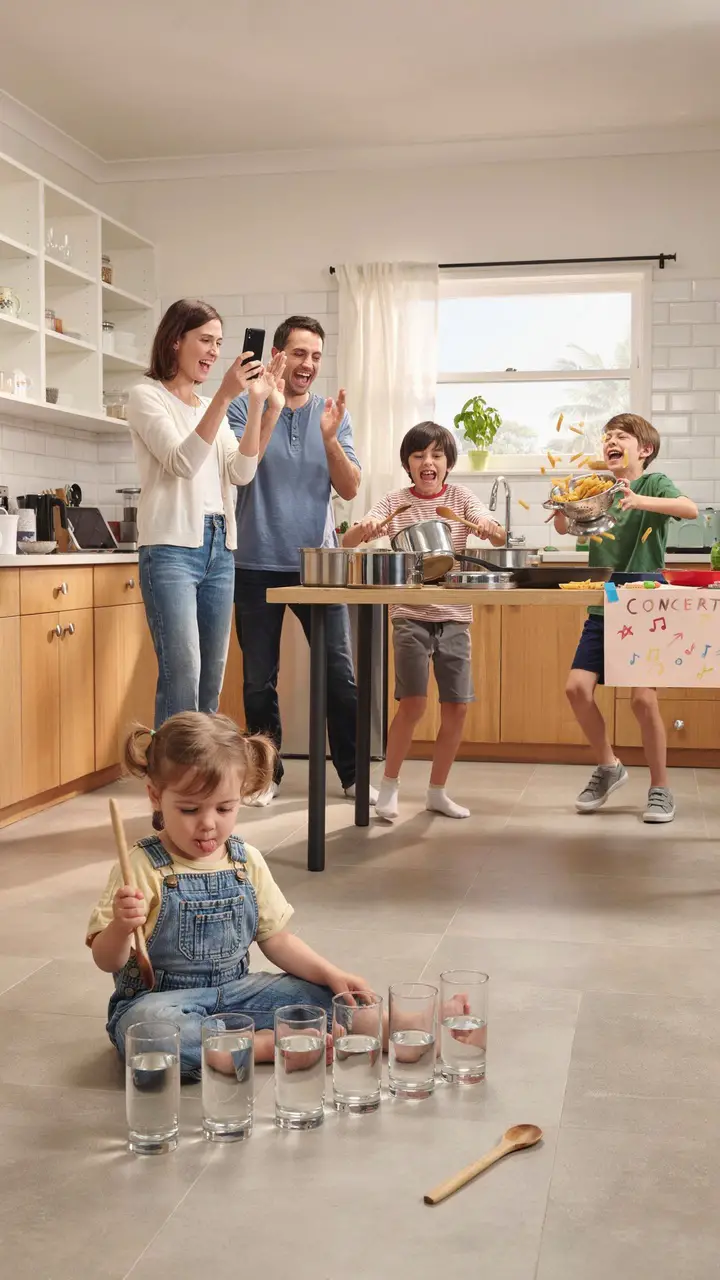
Kitchen Band Concert
Your kitchen is basically a music store that you also use for feeding people. This activity embraces the beautiful chaos of kitchen percussion while teaching organization, sequencing, and teamwork.
How to Set This Up
Materials needed:
- Pots and pans (various sizes for different tones)
- Wooden spoons, spatulas, whisks (drumsticks and shakers)
- Metal colander filled with dried beans or pasta (shaker)
- Water glasses (different amounts of water = different pitches)
- Tupperware containers with lids
- Cheese grater and spoon (scraper)
- Mixing bowls (drums)
- Muffin tins (multi-tone drums)
- Cookie sheets (gongs)
- Safe space cleared on the floor and counter
Step-by-step setup:
- Remove all actual cooking items, sharp objects, and breakables
- Set up different “stations” for each type of instrument
- Arrange glass water xylophone on safe, stable surface (adult supervision required)
- Create drum station with pots and pans arranged by size
- Set up shaker station with filled containers
- Designate a conductor spot
- Optional: create simple “sheet music” with symbols representing different instruments
Age appropriateness: 2-8 years
- 2-3 years: Free exploration with close supervision, focus on one or two stations
- 3-4 years: Can rotate through stations, beginning to follow simple conductor cues
- 4-5 years: Takes turns, follows pattern sequences, participates in group performances
- 5+ years: Can read simple symbol music, creates own compositions, conducts others
Time commitment:
- Setup: 15-20 minutes
- Performance/play: 20-45 minutes
- Cleanup: 10-15 minutes (make this part of the show!)
Mess level: Medium (loud but not messy unless water glasses get knocked over)
Developmental benefits:
- Rhythm and timing through coordinated playing
- Turn-taking and cooperation in group performance
- Listening skills for conductor cues
- Understanding pitch (higher vs. lower notes)
- Volume control (playing softly vs. loudly on command)
- Sequencing when following musical patterns
- Fine motor control with different utensil types
- Creative expression through instrument selection and playing style
Safety considerations:
- Closely supervise water glass station—one knocked glass ends the concert
- Ensure stable surfaces for all heavy items
- Watch for overwhelming noise levels (protect those developing ears)
- Keep glass items away from children under 4
- Monitor for throwing utensils or aggressive playing
- Set clear “concert behavior” rules before beginning
Activity variations:
- Family orchestra: Assign each family member specific instruments
- Musical games: Play kitchen band versions of freeze dance or musical chairs
- Recording concert: Film the performance and watch it together
- Ticket booth: Create tickets and programs for a formal show
- Different genres: Play classical kitchen band, jazz kitchen band, rock kitchen band
- Following recipes: Create “recipes” for songs with specific instrument sequences
- Guest conductor: Let each child take turns conducting the band
- Sound experiments: Test what happens when you tap different items together
Sample concert program:
- Opening Number: “All Together Now” (everyone plays simultaneously for 30 seconds)
- Glass Solo:Water xylophone feature
- Pot Drum Performance: Rhythmic pot drumming
- Shaker Dance: All shakers together
- Quiet Interlude: Gentle tapping only
- Grand Finale: Everyone loud and celebratory for 1 minute
- Bow and Applause
Conductor cue ideas:
- Arms up high = play loud
- Arms down low = play softly
- Pointing = that station plays solo
- Hands together = everyone plays
- Hands apart = everyone stops
- Waving = play faster
- Slow motion = play slower
Parent participation: You absolutely have to join this one. Be the conductor, be a band member, be the enthusiastic audience—but you must participate. Kids need to see adults being silly with kitchen items.
Real talk about noise: Yes, this is LOUD. Choose a time when you can handle the volume (not at 7am on Saturday when you’re still recovering from Friday). Consider warning neighbors if you’re in an apartment. Set time limits. Your sanity matters.
Cleanup concert: The very best part of this activity is making cleanup part of the show. “And now, the magnificent cleanup symphony!” Each item gets “played” one final time before returning to its home. Somehow this makes cleanup way more appealing.
Photo/video opportunity: This makes for the BEST family videos. Kids will watch these over and over. Grandparents will cry. You’ll treasure them forever.
For kids enjoying ensemble activities, these band names bring extra creativity to group music sessions.
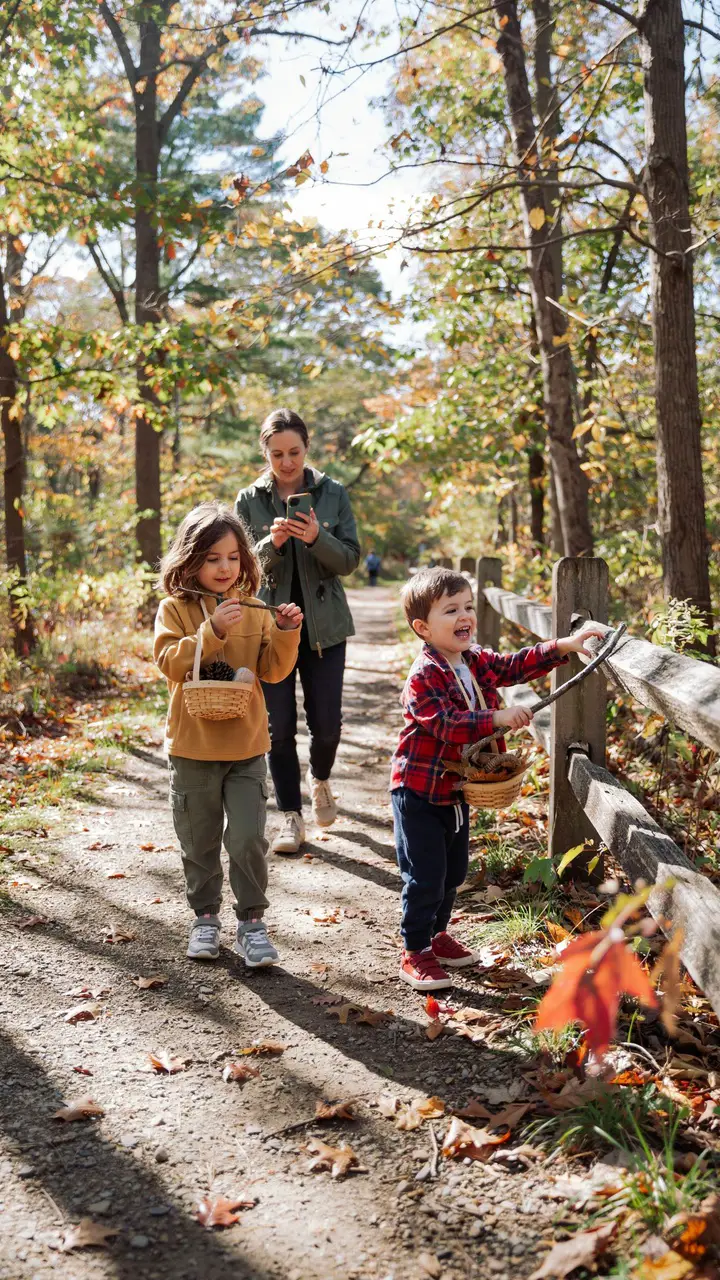
Nature Sound Walk and Composition
Taking music outdoors completely changes the experience. This activity combines movement, nature exploration, and creative sound composition—perfect for kids who need to burn energy while learning.
How to Set This Up
Materials needed:
- Small basket or bag for each child
- Recording device (phone or tablet)
- Nature area (backyard, park, trail, neighborhood)
- Appropriate outdoor clothing and shoes
- Optional: printed “sound treasure hunt” list
- Optional: field guide for identifying birds or insects by sound
- Water bottles
- Sunscreen and bug spray as needed
Step-by-step setup:
- Choose an accessible outdoor location appropriate for your child’s age and mobility
- Create a simple list of sounds to find (or let discovery be organic)
- Pack baskets with safe collection containers
- Explain the mission: we’re sound detectives finding nature’s music
- Demonstrate listening carefully and identifying sounds
- Set collection rules (take only what’s already fallen, leave living things alone)
- Plan for 30-45 minute outdoor time
Age appropriateness: 2-10 years
- 2-3 years: Very short walk, adult carries basket, focus on obvious sounds (birds, crunching leaves)
- 3-4 years: Can carry own small basket, stops frequently to explore
- 4-6 years: More purposeful collecting, can identify multiple sounds
- 6+ years: Longer walks, records own sounds, creates detailed compositions
Time commitment:
- Prep: 10 minutes
- Outdoor exploration: 30-60 minutes
- Composition time: 15-30 minutes
- Total: 1-2 hours
Mess level: Low to medium (nature dirt, possible muddy shoes)
Developmental benefits:
- Sensory awareness and auditory discrimination
- Observation skills and attention to environment
- Pattern recognition in natural sounds
- Classification skills (animal sounds vs. weather sounds vs. human-made sounds)
- Physical activity and gross motor development
- Vocabulary expansion for sound descriptors
- Creative thinking in composition creation
- Environmental awareness and nature connection
- Memory skills remembering sounds and their sources
Safety considerations:
- Stay on marked trails appropriate for children
- Watch for poisonous plants (poison ivy, poison oak)
- Check for ticks after the walk
- Ensure children understand which items are safe to touch and collect
- Stay within sight and hearing of children at all times
- Bring first aid supplies for minor scrapes
- Check weather forecast and dress appropriately
- Avoid areas with steep drop-offs or water hazards for younger children
Sounds to discover:
- Bird sounds: Different species, different calls
- Insect sounds: Crickets, bees, cicadas
- Wind sounds: Through different types of trees and leaves
- Water sounds: Stream, pond, rain, puddles
- Walking sounds: On different surfaces (gravel, leaves, grass, wooden bridge)
- Weather sounds: Rain, thunder (from safe distance), wind
- Animal sounds: Squirrels chattering, dogs barking, frogs
- Natural percussion: Stick on tree trunk, rock on rock, pinecone dropping
- Human-made sounds: Distant traffic, airplanes, bells, construction
Collection ideas:
- Sticks of different thicknesses (make different sounds when tapped)
- Seed pods that rattle
- Smooth stones that click together
- Crunchy dried leaves
- Hollow items that make interesting tones when tapped
- Pinecones that can be shaken or rubbed together
- Grass to blow through for whistling sounds
Composition activity after the walk:
- Spread out collected items
- Test the sound each item makes
- Organize by type of sound (rattles, taps, crunches, etc.)
- Create a simple nature symphony:
- Opening: soft rain stick (dried leaves in container)
- Birdsong: whistle or recorded birds
- Wind: swishing grass or leaves
- Thunder: shaking branch or large leaf
- Ending: gentle stone clicking
- Record the performance
- Listen back together and discuss
Extension activities:
- Create nature sound library by recording and labeling different sounds
- Draw pictures of sound sources
- Write or dictate stories featuring the sounds discovered
- Compare sounds from different seasons or locations
- Create sound maps showing where different sounds were found
- Make sound-matching game with recorded sounds
Parent involvement: Walk WITH your child, matching their pace. Point out sounds they might miss. Model genuine curiosity and wonder. Your enthusiasm for nature sounds directly impacts their engagement.
Weather considerations: Different weather creates different soundscapes. Rain walks (with proper gear) offer completely different sonic experiences than sunny days. Wind makes trees sing. Snow muffles everything mysteriously.
Sensory processing note: For children with auditory sensitivities, start in quieter natural spaces (neighborhood backyard instead of busy park). Let them control volume by choosing how close to approach sound sources. This activity can actually help desensitization in a gentle, child-led way.
Connection to science: This activity naturally leads to discussions about animal habitats, weather patterns, plant life cycles—so much learning happening through musical exploration.
Gratitude element: End the walk with everyone sharing their favorite sound discovered. This creates appreciation for nature’s music and mindfulness about the environment.
For families incorporating outdoor activities into team building, explore these outdoor adventure team names.
Karaoke Time
Never underestimate the power of letting kids be the star of their own show. Karaoke combines performance, confidence-building, and pure joy—plus it’s hilarious and creates the best family memories.

How to Set This Up
Materials needed:
- Device for playing songs with lyrics (tablet, laptop, TV with streaming)
- YouTube (with karaoke versions of kids’ songs) or karaoke apps
- Microphone (toy microphone, hairbrush, wooden spoon, or actual USB mic)
- Optional: Bluetooth speaker for better sound quality
- Stage area (designated spot, small platform, or step stool)
- Decorations (streamers, lights, homemade posters)
- Dress-up clothes and accessories
- Seating for audience
- Optional: song list poster for choosing next performance
Step-by-step setup:
- Clear safe performance space with good visibility
- Set up device at child’s eye level for reading lyrics
- Test audio equipment and adjust volume
- Create “stage” with special markers (tape outline, rug, platform)
- Add concert atmosphere with simple decorations
- Prepare playlist of child’s favorite songs (start with very familiar ones)
- Arrange audience seating
- Optional: create tickets, programs, or backstage pass badges
Age appropriateness: 3-10 years
- 3-4 years: Can’t read lyrics yet, focus on familiar songs they know by heart
- 4-5 years: Beginning to follow simple written lyrics if present
- 5-7 years: Fully engaged, reads lyrics, takes performance seriously
- 7+ years: May want more pop songs, choreography, costume changes
Time commitment:
- Setup: 15-20 minutes
- Performance time: 20-60 minutes (attention span dependent)
- Cleanup: 5-10 minutes
Mess level: Low (unless costume changes involve dumping out entire dress-up bin)
Developmental benefits:
- Confidence building through performance
- Public speaking skills and stage presence
- Literacy development following written lyrics
- Memory skills learning and remembering songs
- Emotional expression through musical performance
- Rhythm and melody reproduction
- Turn-taking when siblings share the stage
- Self-regulation managing performance anxiety or excitement
- Creative expression through song interpretation and movement
Safety considerations:
- Secure microphone cords or use wireless to prevent tripping
- Keep stage low and stable
- No standing on chairs or unstable furniture
- Monitor volume levels to protect hearing
- Watch for overexcitement leading to wild behavior
- Set boundaries about respectful audience behavior
Activity variations:
- Duet performances: Parent-child or sibling duets
- Lip sync battle: Act out songs without actually singing
- Dance performance: Add choreography to favorite songs
- Costume concert: Quick costume changes between songs
- Genre night: All Disney songs, all silly songs, all action songs
- Family talent show: Everyone performs different acts
- Judges panel: Set up stuffed animals as judges (keep it always positive!)
- Recording session: Professionally record performance for sharing with family
- Music video creation: Film performances with simple effects
Song suggestions by age:
Ages 3-4:
- “Let It Go” (Frozen)
- “Baby Shark”
- “The Wheels on the Bus”
- “Old MacDonald”
- “Twinkle Twinkle Little Star”
Ages 5-7:
- “How Far I’ll Go” (Moana)
- “You’re Welcome” (Moana)
- “Hakuna Matata” (Lion King)
- “Part of Your World” (Little Mermaid)
- “Count on Me” (Bruno Mars)
Ages 7+:
- “Shake It Off” (Taylor Swift)
- “Happy” (Pharrell)
- “Fight Song” (Rachel Platten)
- “Roar” (Katy Perry)
- “Can’t Stop the Feeling” (Justin Timberlake)
Parent participation: Early performances need you as supportive co-star or enthusiastic audience. Your reaction sets the tone—if you’re genuinely enthusiastic (not mockingly laughing), they’ll feel safe to perform. As they gain confidence, you can transition to audience member and videographer.
Audience etiquette: Teach respectful audience behavior—no talking during performance, clap at the end, say at least one specific positive thing. This applies to parents and siblings. Even if the performance is objectively not great, find something genuine to praise (“I loved your energy!” “Your hand movements were so fun to watch!”).
Managing shyness: Some kids love performing; others freeze. For shy kids:
- Start with you singing together
- Let them perform for stuffed animals first
- Don’t force stage time
- Celebrate small brave moments
- Never make them feel bad for not wanting to perform
Confidence building: Karaoke is incredibly powerful for building confidence. Regularly let kids perform for family members (in person or via video call). They’ll gradually become comfortable being the center of attention in positive ways.
Real talk: Some performances will be absolutely chaotic. Kids will forget lyrics, dissolve into giggles, fight over the microphone, or lose interest after one song. That’s completely normal. The goal is fun and building positive associations with music and performance—not perfection.
Recording and sharing: Always ask permission before recording and sharing. Some kids love seeing themselves; others are embarrassed. Respect their comfort levels. Keep recordings for family enjoyment and future teenage embarrassment.
For families organizing talent shows or performances, these singers group names add structure to performance activities.
Musical Storytelling
This activity transforms favorite books into musical experiences, deepening comprehension and making stories come alive in completely new ways. It’s especially magical for reluctant readers or kids who process information better through multiple senses.
How to Set This Up
Materials needed:
- Favorite picture books (start with ones you know well)
- Variety of instruments and sound-makers:
- Rain stick or shaker (for rain, wind, movement)
- Bells (for magic, happiness, twinkling)
- Drum (for footsteps, thunder, knocking)
- Xylophone or chimes (for transformation, melody)
- Maracas (for excitement, shaking)
- Triangle (for magical moments, stars)
- Wooden blocks (for walking, building)
- Sticky notes for marking musical moments
- Comfortable reading spot
Step-by-step setup:
- Choose a familiar story that naturally includes sounds or actions
- Read through once together without instruments
- Identify moments for musical enhancement
- Mark pages with sticky notes indicating which instrument to use
- Assign instruments to specific story elements:
- Character themes (certain instrument for each character)
- Action sounds (footsteps, door opening, eating)
- Emotion sounds (happy = bells, sad = slow drum)
- Scene setting (rain stick for rain scenes)
- Practice once slowly
- Perform the story with full sound effects
Age appropriateness: 2-8 years
- 2-3 years: Simple books, one instrument, parent leads entirely
- 3-4 years: Can remember 2-3 sound cues, beginning to anticipate
- 4-6 years: Handles multiple instruments, reads visual cues from sticky notes
- 6+ years: Can read some words, helps plan instrument choices, creates more complex soundscapes
Time commitment:
- First-time setup: 20 minutes
- Story performance: 10-20 minutes depending on book length
- Repeat performances: 10 minutes
Mess level: Low
Developmental benefits:
- Reading comprehension through multi-sensory engagement
- Story sequencing and narrative understanding
- Cause and effect (this story moment = this sound)
- Prediction skills anticipating what sound comes next
- Memory remembering instrument assignments
- Listening skills for story cues
- Fine motor skills operating different instruments
- Timing and rhythm matching sounds to story pace
- Creative interpretation deciding what sounds fit different moments
- Love of reading through enhanced engagement
Safety considerations:
- Choose child-safe instruments without small parts for younger kids
- Keep reading area free of clutter to prevent tripping
- Monitor volume to keep activity calming, not overwhelming
- Watch for frustration if timing is difficult—keep it flexible and fun
Book suggestions and sound ideas:
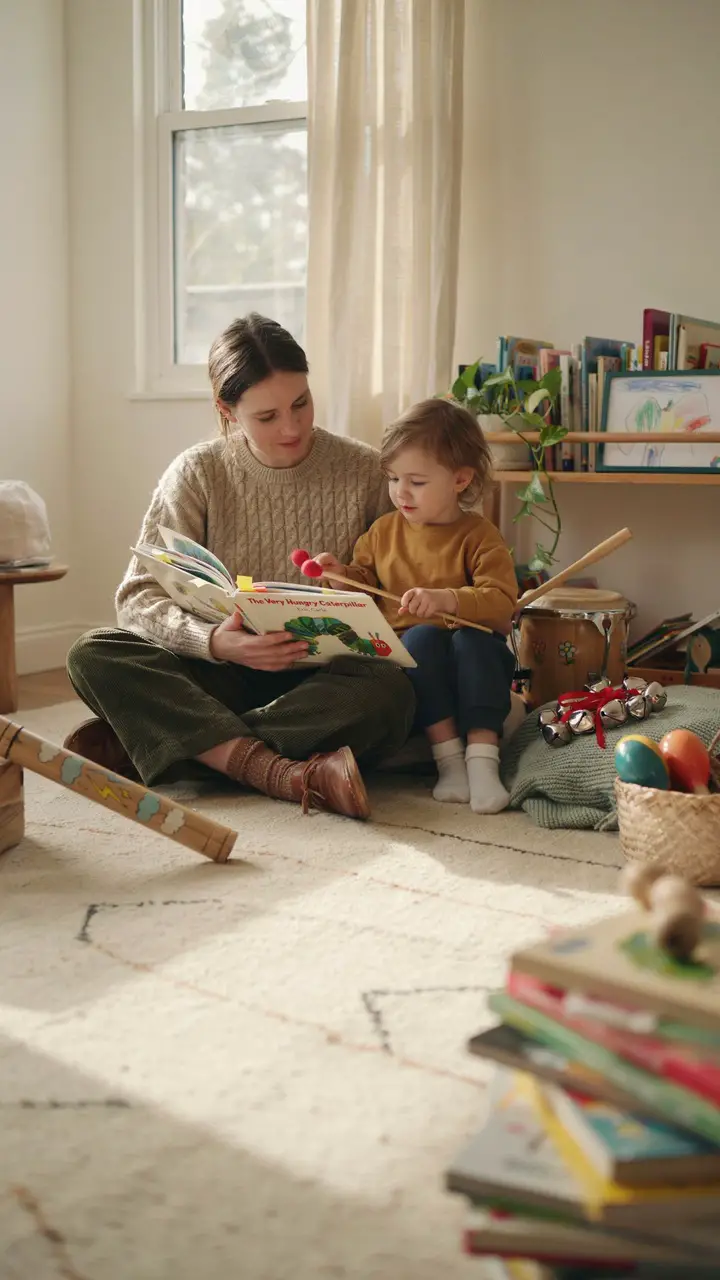
“The Very Hungry Caterpillar” by Eric Carle:
- Munching sounds: wood blocks tapping
- Days of the week: triangle dings
- Stomach ache: drum rolls
- Butterfly transformation: xylophone ascending scale
“Where the Wild Things Are” by Maurice Sendak:
- Sailing: rain stick
- Wild rumpus: all instruments together loudly
- Max’s boat: gentle drum rhythm
- Moon: soft chimes
“We’re Going on a Bear Hunt” by Michael Rosen:
- Swishy grass: shakers
- Splashing river: rain stick
- Squelchy mud: squeezing sounds
- Snowstorm: fast shaking
- Bear: deep drum
“The Snowy Day” by Ezra Jack Keats:
- Walking in snow: soft crunching rhythm
- Making snowballs: quick gathering sounds
- Snowball in pocket: slow melting sounds (descending xylophone)
“Brown Bear, Brown Bear, What Do You See?” by Bill Martin Jr.:
- Different animal theme: assign each animal its own instrument
- Page turns: soft bell
- Pattern emphasis: rhythmic instrument patterns
Activity variations:
- Create sound score: Write symbols showing which instruments play when
- Different emotions: Perform same story with happy sounds, then sad sounds
- Recording: Make an audio book version with your sound effects
- Reverse activity: Play sounds and let child guess which story they’re from
- Story creation: Make up original stories specifically designed for instrument accompaniment
- Family performance: Each family member gets instruments for different characters
Parent involvement: This requires engaged participation. You’re the narrator and guide, especially for younger children. Older kids may want to take over the narration role themselves. Either way, this is together time.
Building complexity: Start with simple, repetitive books. As children master those, move to more complex narratives with subtle sound opportunities. Eventually, they’ll be creating elaborate sound designs for chapter books.
Connection to literacy: This activity makes abstract reading concepts concrete. Story structure becomes tangible when sounds mark the beginning, middle, and end. Comprehension deepens when children must identify the right moment for sound effects. For struggling readers, this multisensory approach creates alternative entry points into stories.
Inclusive adaptation: This works beautifully for children with different learning styles:
- Auditory learners: Obviously ideal
- Kinesthetic learners: Physical instrument playing enhances engagement
- Visual learners: Add picture cards showing which instrument for which moment
Library extension: Take this approach to library story time by bringing small, quiet instruments. Ask the librarian first—many welcome interactive reading. It transforms passive listening into active participation.
Creating traditions: Musical storytelling can become a cherished bedtime ritual. Some families have “musical Monday” where dinner time stories include sound effects. These traditions create lasting memories and positive associations with reading.
For families exploring dramatic arts with music, these drama club names inspire creative group activities.
Conclusion
Music activities for kids don’t require perfect pitch, expensive instruments, or formal training. They require nothing more than curiosity, everyday objects, and your willingness to embrace a little noise and chaos. Whether you’re shaking homemade rhythm instruments, conducting a kitchen band concert, creating lullabies together, or transforming stories into musical experiences, you’re building something far more valuable than musical skills—you’re creating joyful memories and strengthening your connection with your child.
The most important instrument in any of these activities isn’t the drum or the xylophone or even the recording device. It’s your presence and enthusiasm. Kids don’t need perfection; they need permission to explore, experiment, and express themselves through sound. They need adults who clap along even when the rhythm is completely off, who sing harmony even when the melody is pure chaos, who celebrate the attempt rather than critique the execution.
So go ahead—let them bang on pots, create ridiculous songs, march through the house with their homemade parade, and record those sleepy lullabies. The mess cleans up. The noise eventually stops. But the confidence they build, the neural connections they form, and the happiness they experience? Those last forever. You’re doing amazing work raising these little musicians, one joyful (and yes, sometimes very loud) activity at a time. <3

Greetings, I’m Alex – an expert in the art of naming teams, groups or brands, and businesses. With years of experience as a consultant for some of the most recognized companies out there, I want to pass on my knowledge and share tips that will help you craft an unforgettable name for your project through TeamGroupNames.Com!